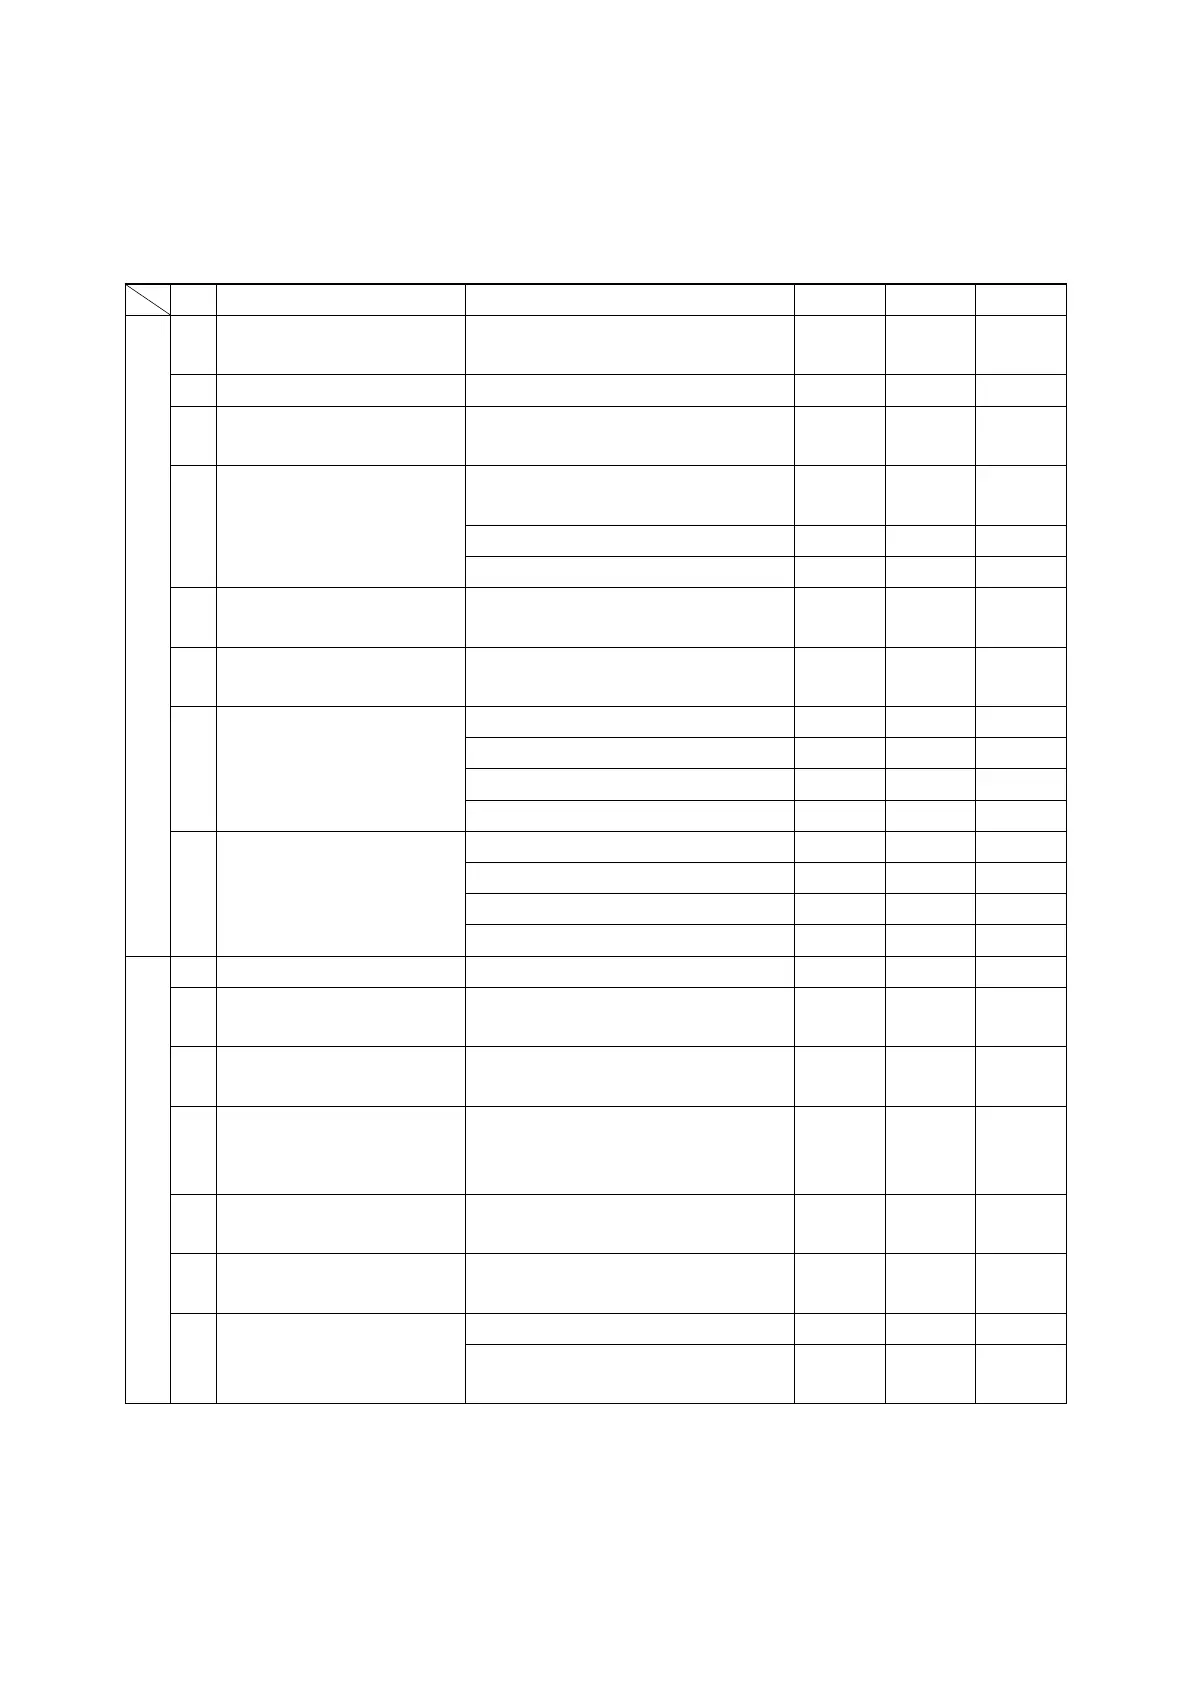
3-8
3.4 Periodic Inspection
Always to operate the unit normally, conduct periodic inspections of each part in addition to pre-operation
ones and make adjustments or repairs where necessary. The following table shows an example of the
inspection plan.
No. Inspection item Inspection content 2nd year 4th year 8th year
General structure
1
Inspection for physical
damage
✓✓✓
2 Loose mounting bolts ✓✓✓
3
Condition of panels, hinge
and lock
✓✓✓
4 Control box inspection
1) Cover packing inspection and
replacement
✓✓✓
2) Loose cable gland ✓✓✓
3) Internal cleaning ✓✓✓
5
Sealing condition of holes
through casing frame
Air leakage and clearance ✓✓✓
6
Packing inspection and
replacement
Ventilator cover packing ✓✓✓
7 Painted area recondition
1) Compressor ✓✓✓
2) Receiver ✓✓✓
3) Solenoid valve (coil cap) ✓✓✓
4) Unit ✓✓
8 Repainting
1) Compressor ✓
2) Receiver ✓
3) Condenser fan motor ✓
4) Condenser fan ✓
Refrigerant system
1 Refrigerant leakage ✓✓✓
2 Compressor
Water entering to compressor
terminal
✓✓✓
3
Inspection and replacement
of sight glass
✓
4
Condition of fasteners on
the refrigerant pipes and
gauge pipes
✓✓✓
5
Condition of thermal
insulation of refrigerant pipe
✓✓✓
6
Evaporator coil cleaning
(by water)
✓✓✓
7 Condenser coil cleaning
1) Water-cleaning ✓✓✓
2) Steam-cleaning (after pumping
down the refrigerant)
✓✓✓
 Loading...