Mechanical Installation
6
Multi-Section Displays
In typical multi-section installations, the lowest
display section is installed rst, but be sure to verify
with the mounting drawing.
1� Use eyebolts to lift the lowest display section
into position on the wall.
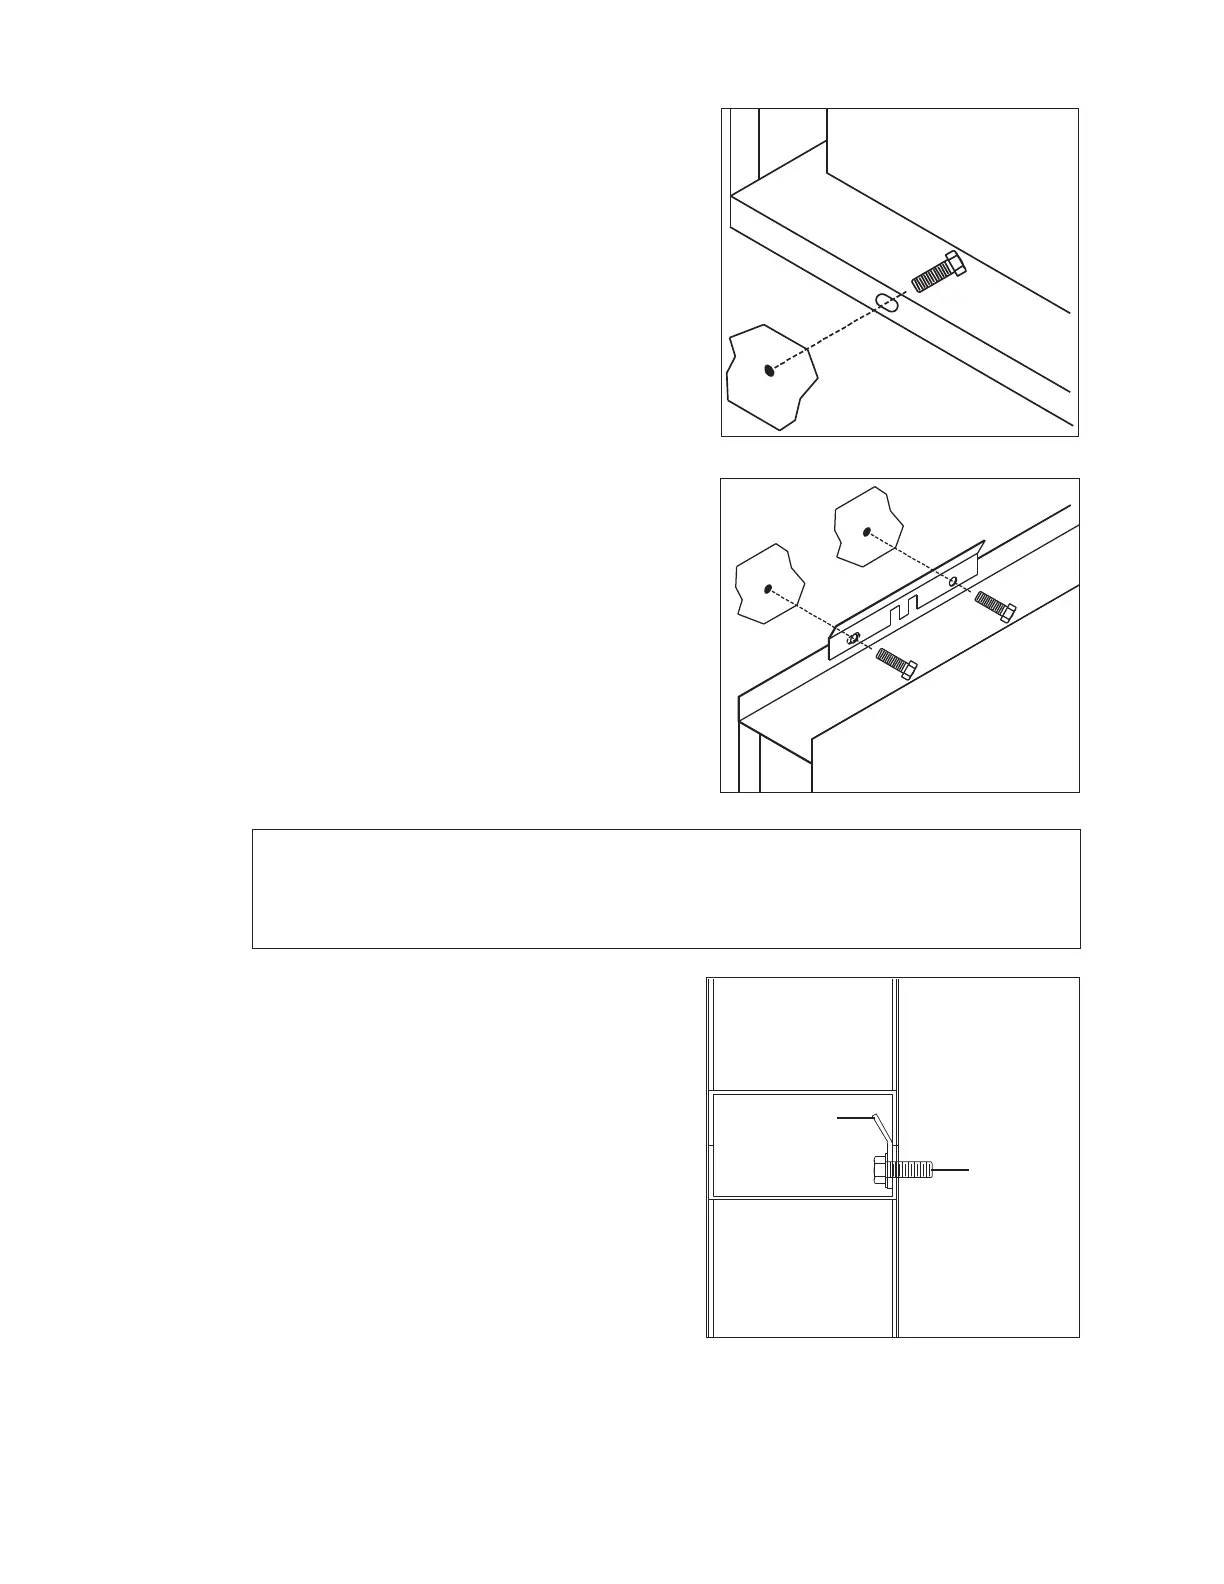
2� Ensure the cabinet is level, and secure it to
the wall by attaching 1/2" mounting hardware
through all obround holes on the bottom rear
ange of the cabinet (Figure 6).
3� Mounting brackets must be used inside the
top cabinet channel as shown in Figure 7.
a� Line up the outer hole on the bracket with
the mounting hole in the top rear ange.
b� Using the bracket as a template, drill
another hole through the top rear ange.
c� Secure the top rear ange and bracket to
the wall with 1/2" hardware through the
existing and drilled holes.
d� Repeat Steps a–c for the other mounting
bracket(s).
4� Repeat Steps 1–3 for all other cabinets that
will be mounted to the left and right of the rst
installed section.
Note: Before upper cabinet sections are attached, it will be easier to make power
and signal connections between each bottom cabinet section. Refer to
Section 3: Electrical Installation (p�8) for more information on power/signal
installation.
5� Remove the eyebolts from the bottom
cabinets, and use them to lift the upper
cabinets into place. The bottom rear anges
of upper cabinets will not be mounted to
the wall; instead, they will rest inside the
mounting brackets of the cabinets in the row
below. Refer to Figure 8.
6� Secure the upper-most sections to the
wall by attaching 1/2" mounting hardware
through all obround holes on the top rear
ange of the cabinet (similar to the bottom
ange attachment shown in Figure 6).
Figure 6: Wall Mounting without Bracket
Figure 7: Wall Mounting with Bracket
Upper
Cabinet
Mounting
Bracket
Mounting
Hardware
in Wall
Lower
Cabinet
Figure 8: Upper Cabinet Placement