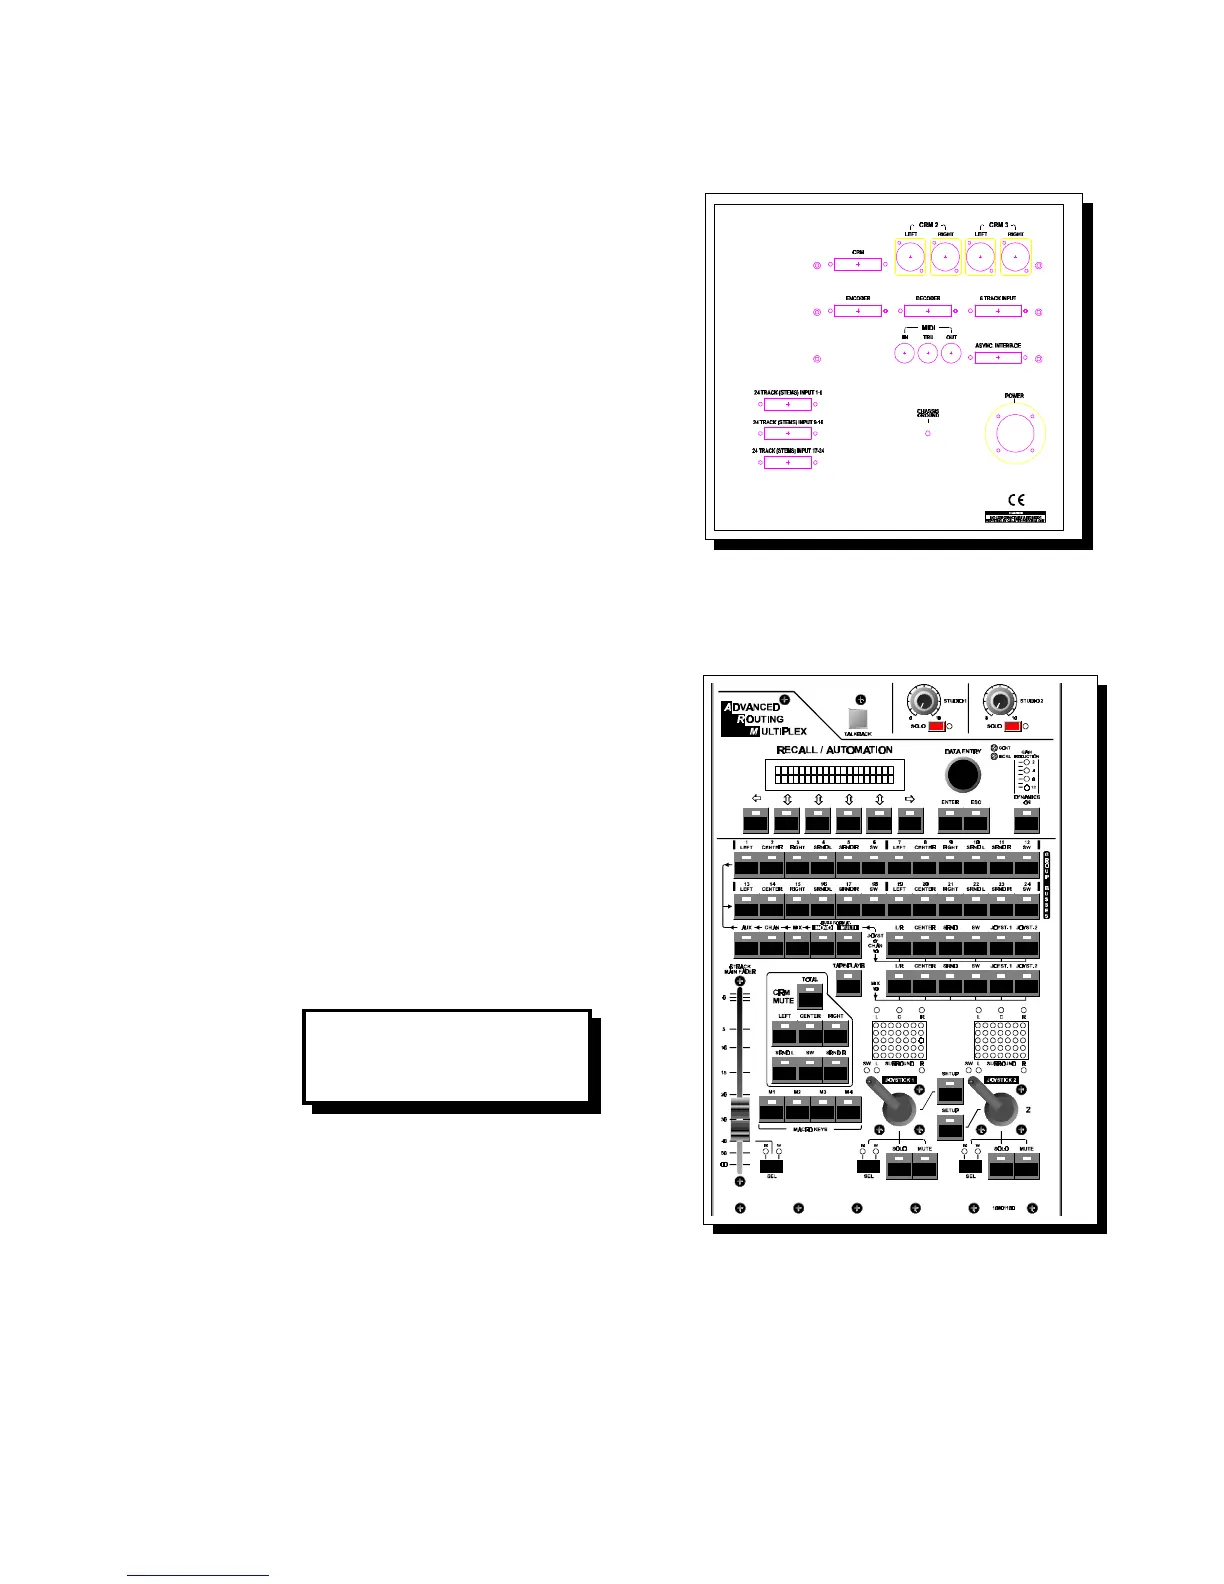
2.27 MASTER INPUTS/OUTPUTS
Cinemix interfaces easily with external equipment
such as two track master machines, signal
processors, headphone amps, and power amps.
Interfacing is possible using the connectors on the
master back panels, and through 25 pole sub D
male connectors. Listed below are all inputs and
outputs for the master modules.
The master backpanel houses the 24 Track Stems
inputs for a maximum of two 24 track machines,
the six (5.1) CRM outputs, encoder and decoder
sub-D connector. A six track input CRM 2 and 3
on XLR connectors. The PC computer connector
and the Midi in, thru, and out din type connectors.
A Speakon type connector is used for powering
up the Cinemix and a separate chassis ground is provided. A detailed connection
diagram will be shown in the installation section of the manual.
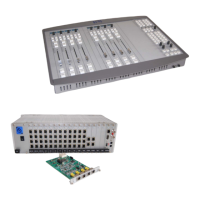
2.28 RECALL / AUTOMATION
If you would like to set-up for your first Cinemix
session, read the following simple steps. It is
most important to understand that the Recall
Automation is static and PowerVCA (faders,
Mutes) automation is dynamic and completely
separate. We will first discuss
Recall/Automation.
The LCDisplay boots up with the same
information it had when it was powered down.
Press ESC until it reads as follows:
PROJ. (Project) Numbering your Project.
For ease of understanding we will call the four of
the six grey Switches (below the LCD display)
S1 S2 S3 and S4.
After pressing S3 (Project), you can enter the
project number (from 1 to 30).
You can Call and Save projects in the same manner.
NOTE: A project stores all routing settings, Mute settings and the Joystick
set-up.
Cinemix manual page: 23
CRM: -10dB
ARM Dyn Proj Setup