19.1
INSTALLATION AND ALIGNMENT OF THE MATRIX MODULE
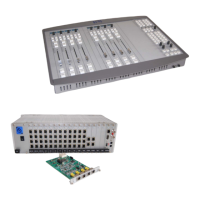
The STEMS/MATRIX module is built out of a number of horizontal PCB's
with very complex electronics, and we advice you to be very careful when
positioning the module inside the Cinemix console.
1) Power down the console.
Take out the 3 Blank modules positioned right of the Mastersection.
2) Connect the 10 wide flatcables to the corresponding 25pin Sub-D
connectors on the backpanel of the Mastersection*.
Connect the 16 pole flatcable coming from p.c. board "Matrix 7" (connector J3
, remove jumpers) in the STEMS module, to connector J11 ("to pre
recording") on p.c. board
"Cinem 3" (starting from the left, this is the first p.c. board in the
mastersection).
Now connect both 64 pole flatcables** of the console to the two 64 pole
connectors of the STEMS modules.
3) Check if everything is back on it's place again. Now power up the console.
If there are signs of fire, explosions or any other things you normally would
not expect from a mixing console, call D&R HQ.
4) Switch "Matrix to CRM" on.
Feed a balanced signal of +4dBu to input "Dir. 1" on the backpanel of the
Mastersection.
With the switches DIR/PLBK on the frontpanel you can switch between the
Direct and Playback inputs.
Route the signal to the CRM Left, Right or Center output of the
Mastersection.
The level of the input now has to trimmed with the trimpot on the p.c. boards
"Matrix 5". These are the 2 p.c. boards at the bottom of the STEMS module.
Both these boards are totally equal to eachother.
The upper one is for the inputs 1-12 , the lower one is for the inputs 13-24. To
trim the level of input "Dir. 1" you have to adjust trimpot "Dir1/13" on the
upper p.c. board.
The input must be trimmed in such a way that the Master VU meters are at
0dB with an input signal of +4dBu (***).
Repeat this procedure for all remaining 23 "Dir." inputs and all 24 "Plbk"
inputs.
5) After the installation of the STEMS module the communication between the
module and the mastersection must be checked. See if the SOLO and
MATRIX TO MAIN functions are working properly.
Cinemix manual page: 68