INSTRUCTIONS FOR
OPERATION
6.0 Instructions for operation
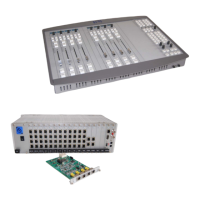
The Cinemix is designed to be the perfect answer for Post Production, multitrack
and MIDI studios. In order to get more familiar with the Cinemix, we shall
discuss the entire recording process and divide it into five basic sequences.
Sequence 1 through 4 are for the more conventional recording studios, and
sequence 5 is for the MIDI studio.
1. The session - Recording from microphone or line input onto the multitrack
machine. This could be from one or more channels at a time.
2. The playback - In this mode you would listen to what has been recorded on
the multitrack machine.
3. The overdub - Overdubbing is listening to already recorded tracks and
recording on empty tracks until all tracks are filled.
4. The remix - Playing of all recorded tracks together with signal processing
equipment and all that is necessary to create the final mixdown.
5. The MIDI or Virtual Tracking - Programmed keyboards, drum machines,
reverbs, effects, any singing and who knows what else, all at the same time direct
to your Dat Machine, two track master machine, or cassette deck.
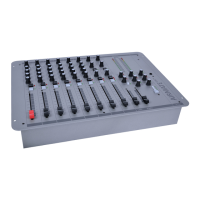
6.1 The Tracking Session
This is normally the beginning of a project. All input channels are placed in the
mic mode by leaving the line switch in the up position if the microphone input is
to be used in this channel. Phantom powering is applied if necessary. The EQ
switch should be in the up position unless you require EQ on that channel signal.
The signal flows through the Channel fader and is available postfader to be
routed by way of the ARM system feeding the input to your multitrack recorder.
The LED bargraph reads the outgoing signal if the master Tape switch is in its
off state.
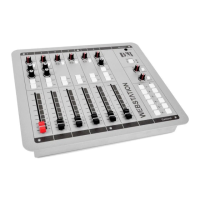
Microphone / Line Gain
The amount of gain required may depend on the type of microphone being used,
the sound pressure level, and the distance between the sound source and
microphone. When the line switch is activated, the same (upper) gain control
varies the gain of the separate electronics for the balanced line input.
The "phase" switch affects both mike and line inputs. After plugging in a mike or
line signal, depress the channel solo switch alongside the channel fader you are
setting, set the solo status switch to pfl in the master section, then turn the gain
control (of that channel) clockwise until a "0" output level is reached on the
master ledbargraph/VU meters. Now slide up the channel fader to "0". Now
switch the solo out. If the signal source gets louder or softer, it may be necessary
to re-check this setting.
The volume will also fluctuate if you boost or cut the equalizer section.
Cinemix manual page: 43