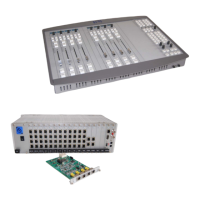
AUTOMATION.
Paragraph 12.0 PowerVca automation will outline the setup and use of D&R's
PowerVCA SMPTE based Automation. Since this section of Cinemix's manual
is an insert, the page numbers will not be in sequence with the balance of this
manual. Optional PowerFade (D&R's moving fader automation) is available,
however not discussed in this section
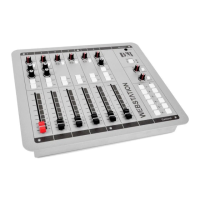
SETUP FOR AUTOMATED JOYSTICKS.
A unique feature in Cinemix are the two automated joysticks with its Virtual
Vision concept of showing you the position of the audio signal when controlled
from D&R's PowerVCA automation.
The "Set-up" switch serves actually the same purpose as the
ARM switches in the modules.
As soon as the Setup switch is activated the following menu
will be shown>
Depressing S1 (Buss) will display the following assignments.
Main busses
Group busses 1......8
9.....16
17...24
Depresing S2 (Format) will display the following selection criteria.
Left, Right
Surround left, Surround Right
Left, Center, Right
L,C,R mono Surround
L,C,R, Stereo srnd
off
The third selection (S3) is the Sub Woofer. The level of the Sub Woofer can be
adjusted between off and unity gain with a range of 63 dB in 0.5dB steps. to
accomodate any requested level.
ASSIGNING A CHANNEL TO A JOYSTICK
To assign a channel to a Joystick follow the next steps.
a. depress an ARM switch in a module and be sure that no master routing switch
such as L/R, Center, SRND L/R, is assigned at that moment.
b. Select Joystick 1 or/off Joysttick 2.
Cinemix manual page: 28
CRM: -10dB Setup: JS 1
Buss Formt SW