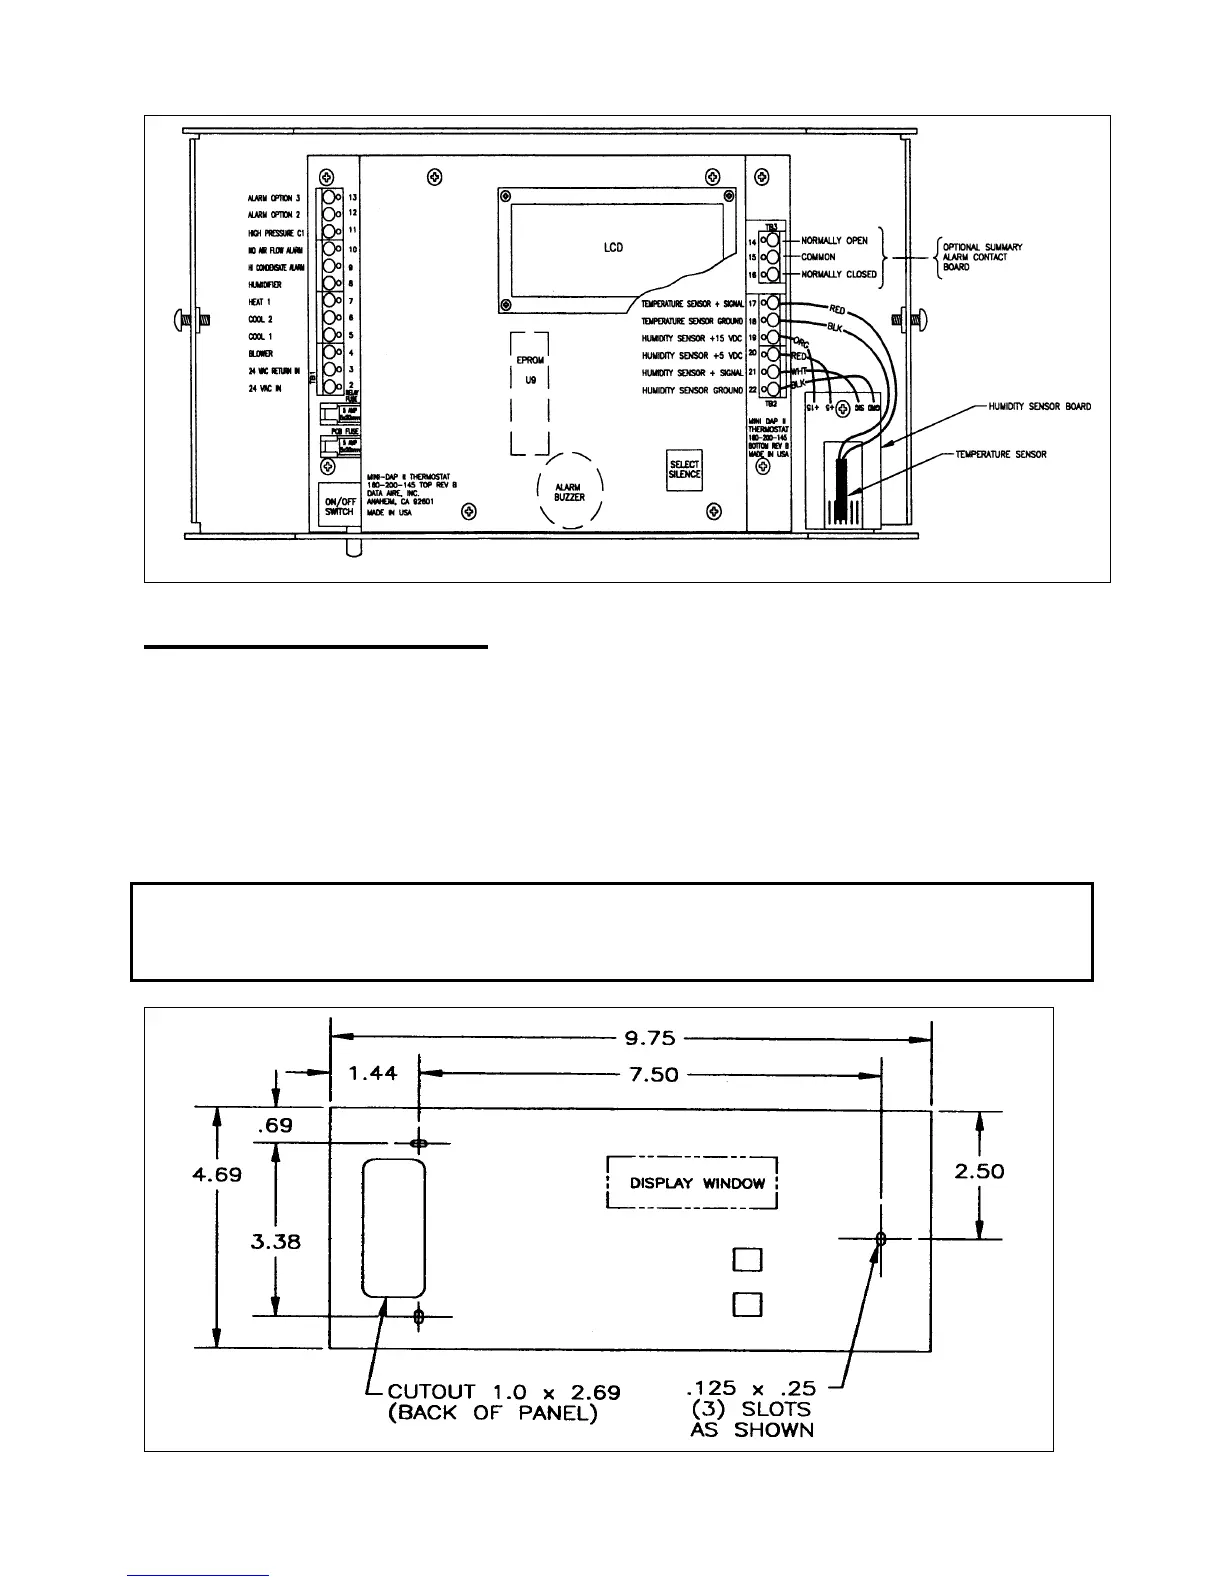
Figure 2: Terminal identification and circuit board details.
Installation and Wiring
To install and wire the MINI-DAP II panel:
1. Use a Phillips screwdriver to loosen the side screws of the panel.
2. Remove the cover of the MINI-DAP II panel. Place the panel against the wall, mark the location of
three mounting holes. See figure 3.
3. Use plastic anchors and screws for mounting on drywall or plaster (recommended).
4. Connect one end of the factory provided cable to the unit terminal strip, refer to unit wiring diagram for
details. Use the color coded wires to designate the functions and terminal number. See figure 2.
5. Use color code to identify the wire function and connect the other end of the cable to MINI-DAP II
panel.
CAUTION: Equipment Damage Hazard. Before applying power, make all wiring connections and
check the connections. Short circuited or improperly connected wires may result in permanent damage to
the unit.
Figure 3: Wall mounting hole location
REV 8/03
6