REV 8/03
7
Installing the Optional Remote Alarm Contact
1. Turn the Mini-Dap II off. Loosen the side screws and remove the panel cover.
2. Remove four screws that secure the 2
nd
layer board to the base board. See figure 4.
3. Unplug the 2
nd
layer board.
4. Plug the summary alarm contact board to CON4 plug on the base board. See figure 4.
5. Reinstall the 2
nd
layer board back to the base board.
Panel Operation
Button Functions
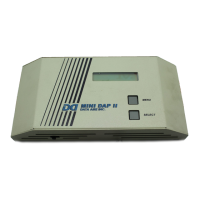
Menu: Press Menu button to go to desired menu.
Select: Press Select button to display current setting, to change setting or to exit menu mode.
Alarm Silence: Press Select button to silence an audio alarm.
Note: The last value to appear is stored for use. Go to Exit menu, press Select button twice to
Return to the normal operation.
Menu Designation
* Apply for night setback option only. These menus will only show when menu #13 is set to “Y”.
1. SETPOINTS
2. OVERRIDE RQST*
3. PASSWORD A
4. TEMP SETPOINT
5. HUMID SETPOINT
6. COMP LEAD/LAG
7. ADJUST RATE
8. SET TIME
9. CALIB CLOCK
10. TEMP/HUM HIST
11. ALARM HISTORY
12. PASSWORD B
13. DAY SCHEDULE
14. OVERRIDE ENBL*
15. OVERRIDE TIME*
16. SETUP COOL*
17. SETBACK HEAT*
18. SETUP DEHUM*
19. SETBACK HUMID*
20. MON SCHEDULE *
21. TUE SCHEDULE*
22. WED SCHEDULE*
23. THU SCHEDULE*
24. FRI SCHEDULE*
25. SAT SCHEDULE*
26. SUN SCHEDULE*
27. TEMP SCALE
28. TEMP DEADBAND
29. HI TEMP LIMIT
30. LO TEMP LIMIT
31. CALIB TEMP
32. HUM DEADBAND
33. HI HUM LIMIT
34. LO HUM LIMIT
35. CALIB HUMID
36. AUDIO ALARM
37. RESTART MODE
38. START DELAY
39. FIRE STAT
40. OPT ALARM 1
41. OPT ALARM 2
42. OPT ALARM 3
43. FAN MODE
44. COOLING EQUIP
45. HEATING EQUIP
46. HUMIDIFIER
47. DEHUMIDIFIER
48. PASSWORD A
49. PASSWORD B

 Loading...