6-102 Removal and Replacement
8. Loosen but do not remove the Upper Foil Drive Assembly (page 6-126). The
assembly needs to be just loose enough to reach the intermediate roller’s
drive gear, so it isn’t necessary to remove the wires from the assembly.
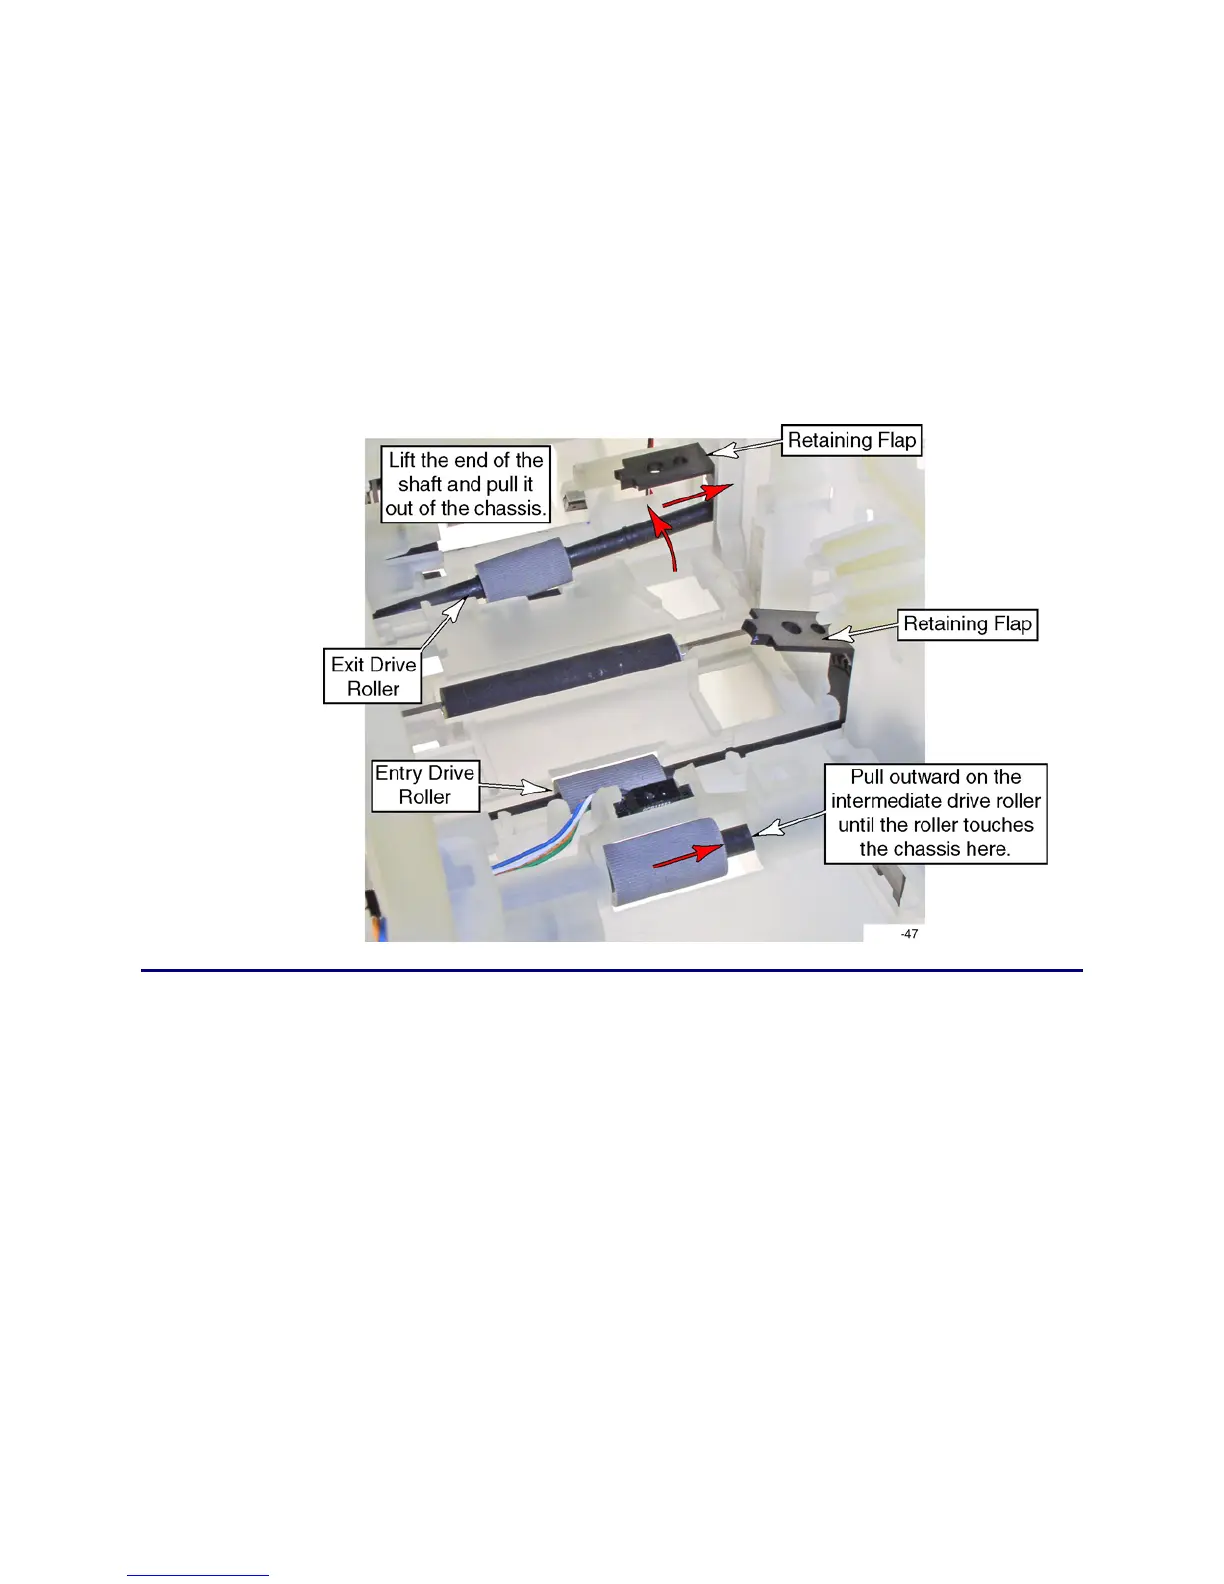
9. Pull outward on the intermediate roller drive gear so it disengages from the
other transport gears. (Note the extra space to the right of the roller in the
photograph below.)
10. Remove the laminator entry and exit drive rollers:
A. Open the retaining flap above the roller.
B. Lift the gear-end of the roller, and pull it out the side of the chassis.
Follow-up Procedure
• Refer to the Laminator Cable Connection Diagram and Laminator Rear Wire
Routing Diagram for replacement details.
• Print several laminate test cards.

 Loading...


