Chapter 3 – Printer Operation 15
Once you have installed the DMXConfig utility:
1. Connect the host to the printer with a
serial or parallel cable.
2. Turn on the printer.
3. Launch the DMXConfig utility.
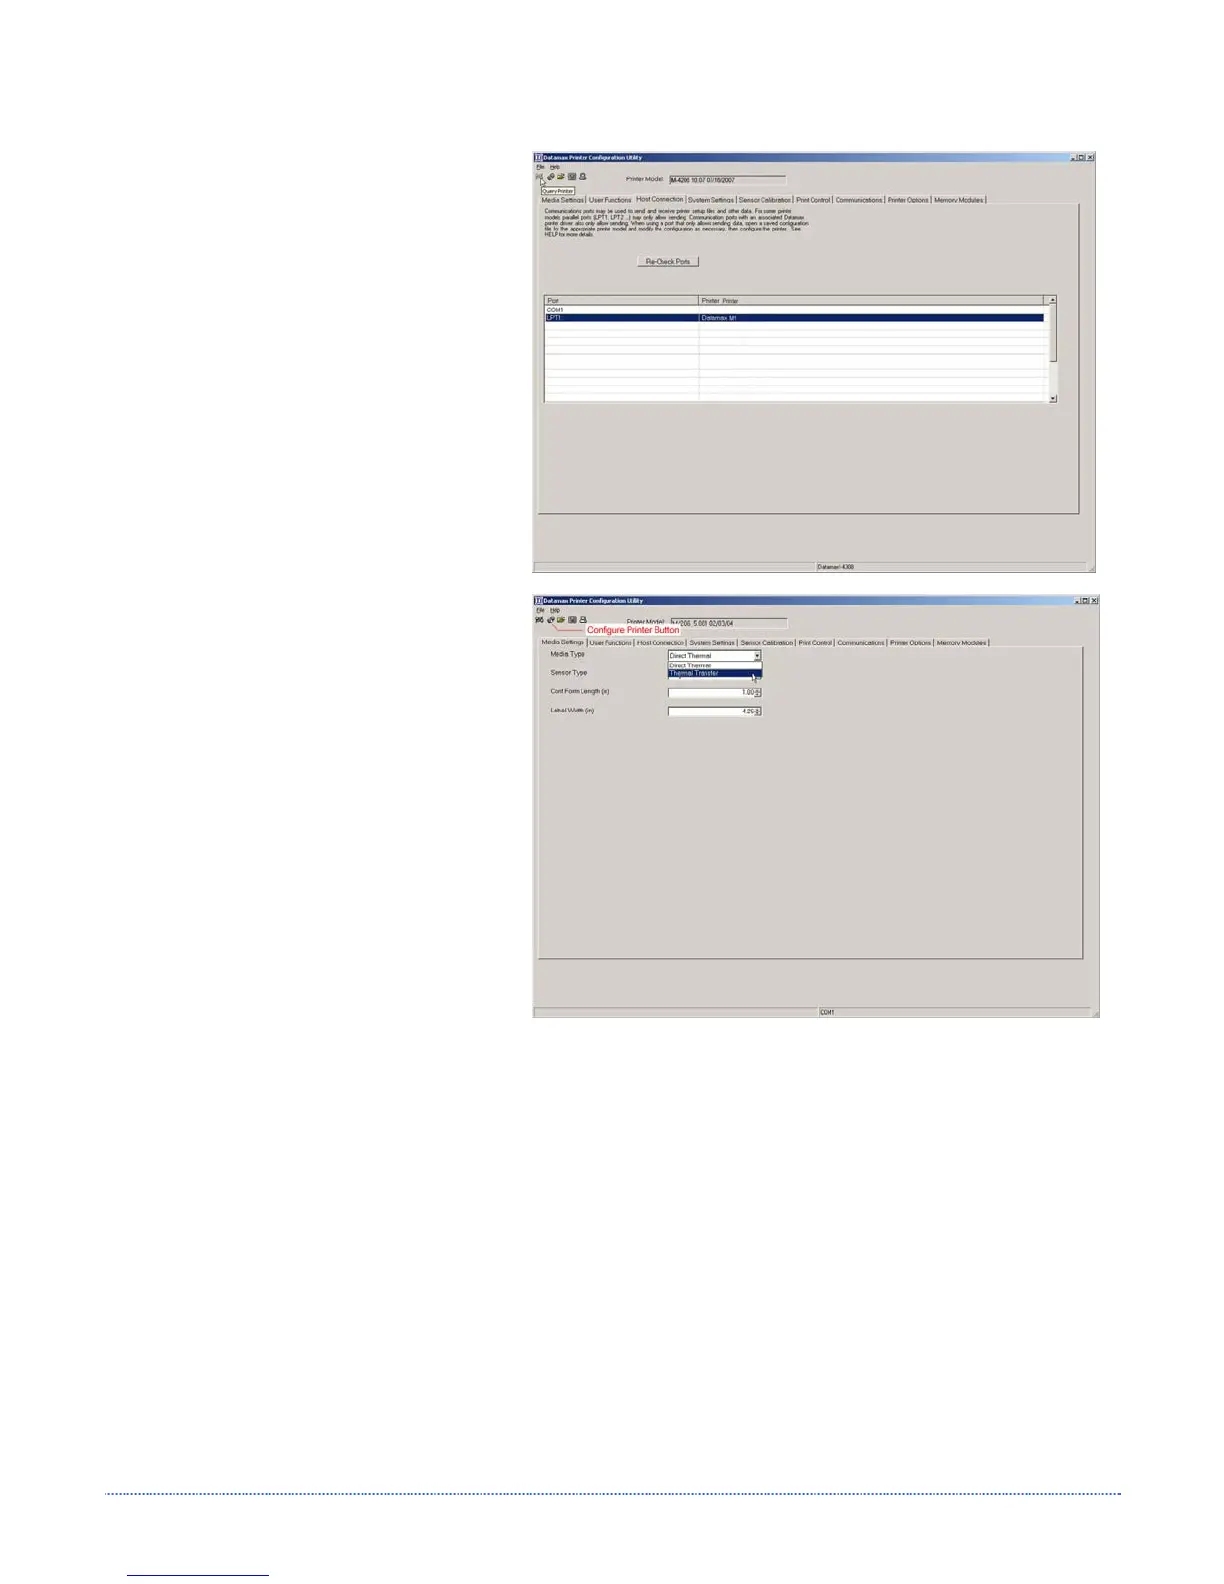
4. Query the printer by using the ‘Query
Printer’ toolbar button (top-left). This
will connect to the printer and get the
current printer settings.
5. At this point you may browse the tabs
and make any changes necessary to the
printer configuration. Once complete,
send the new settings to the printer
using the ‘Configure Printer’ toolbar
button. The example below illustrates
changing the Media Type setting to
“Thermal Transfer.
6. Select the ‘Media Settings’ tab, in the
‘Media Type’ drop-down box select
‘Thermal Transfer’.
7. Send the settings to the printer using
the ‘Configure Printer’ toolbar button.
The printer is now configured to ‘Thermal
Transfer’. You may close the DMXConfig
utility and begin printing using ribbon.
Other parameters can be changed using this
procedure as well.