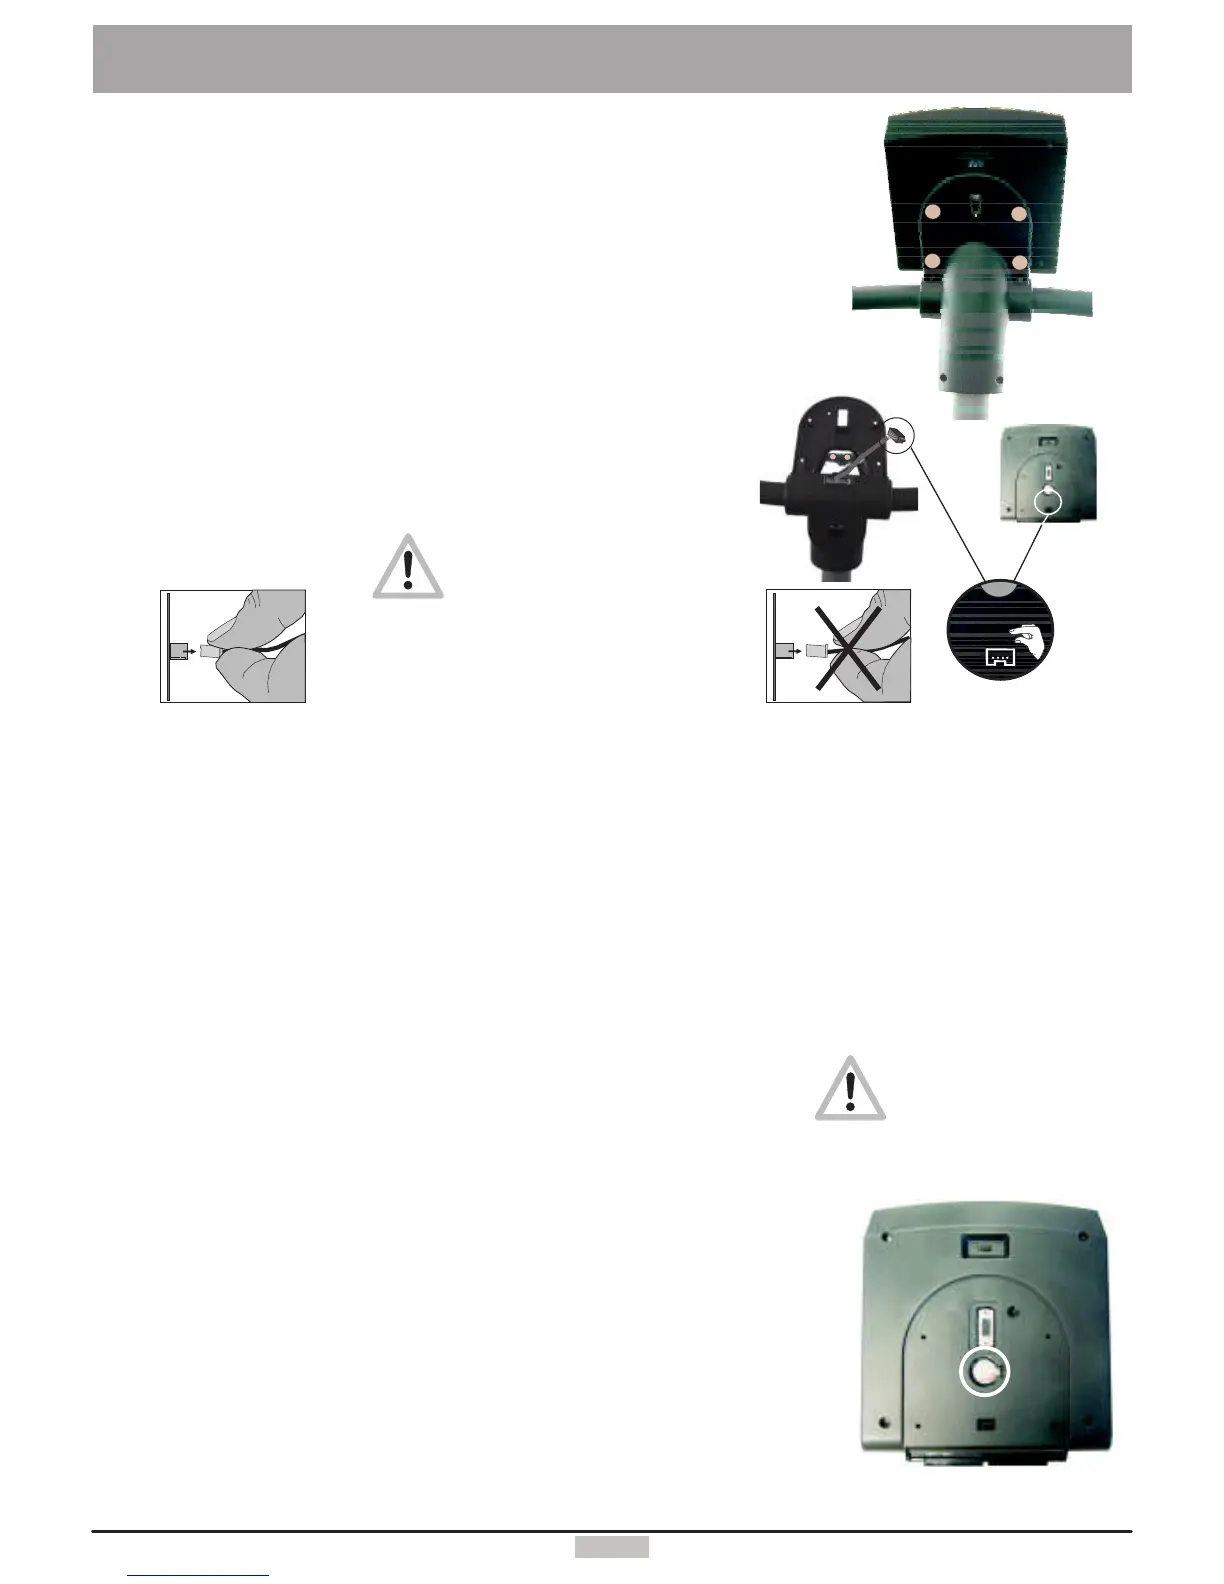
A buttoncellbattery(CR2032)islocatedontheundersideofthedashboardcircuitboard.Thisbatterymustbereplacedwhenthe
timeanddatekeepingfunctionfails.Problemswhenturningonthemachineanddisplayfailuresarealsosignsofanempty
battery.
Warning:ThedevicemustbeswitchedOFFwhenreplacingthebattery.
Afterwardyoumustsetthedateandtime.
Unscrewandremovethe4screwsonthelowerpartofthedashboard.
Thentilttheupperpartofthedashboardupcarefully.
Takecarenottoseparateanycableconnection.Nevertouchtheelectronicpartsofthe
dashboardwithyourfingers!Chargesofstaticelectricitycandestroythesensitiveparts.
Presstheclipholderoutwardwithapentoreplacethebattery,removethebattery
andinsertanewonewiththeplussymbolup.
Reassembletheupperpartofthedashboardcarefully.
Caution!Donotpinchanycable!
Notesaboutusedbuttoncellbatteries
-Keepbatteriesawayfromchildren,anddonotswallowthem!
-Donotrechargeemptybatteriesanddonotthrowtheminfire.
Pleaserecycleusedbatteriesbybringingthemtotheappropriatecollectpoint,
orreturnthemtoyourdealer.
51
ExchangingtheDashboard/ReplacingtheBattery
Neverpullthecable!
Itcouldtearoff!
CAUTION!Failureto
correctlyreplacethe
batterymaycreatean
explosionrisk.
Followthesamestepsinreversesequencetoreassemblethedashboardtoppart
5.
6.
7.
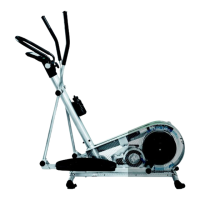
Plugthedashboardconnectortothefemaleconnectorofthecorrespondingcolouruntiltheylockinposition.Thenpull
carefullythecablethroughtheopeningofthebottompartofthedashboardandthedashboardsupportandtakecarenot
tojamthecablewhenyoureinstallthetoppartofthedashboardonthebottompart.
Screwtheremovedhousingscrews(A,B,C,D)fromunderneaththedashboardandtightenthemuntiltheyattachto
theupperpartofthedashboard.
Youcanknowplugthepowercord,turnonthedeviceandtestitsoperation.
Replacingthedashboardbattery
A
B
D
C
X
X
X
X
X
X
X
X
X
X
+
+
4.
Becarefulwhenpullingtheconnectorinorder
toavoiddamagingthecircuitboardandthe
electronicparts!
+
Requiredtools:
1.Unplugthepowercord!
2.
3.
4. Neverpullonthecabletounplugit!!
Thiswouldtearitoff!
Phillipsscrewdriver/Blade1x70mm
(Foryourpersonalsafetyandtoprotectthesensitiveelectronicparts
insidethedashboard)
Thetoppartofthedashboardissecuredtothebottompartbymeanof4Phillipsscrews(A,B,
C,D).Useanappropriatescrewdrivertounscrewthesescrewsfromunderneaththedashboard.
(Seethefiguretotheright)PleasenotethatthescrewsC&Darelocatedtowardtheoutward
borderandaredeeplyrecessedinthedashboardbottompart.Donotunscrewthenearbylocated
screws(X)!
Thenyoucanremovethetoppartofthedashboardverycarefully.Firstopenthedashboard
housingbyraisingitfromthehighersideslightlyandgrasp(hold)withbothhandsunderneaththe
topshellofthedashboard.Raisethehigherpartofthedashboardtopshellfurtheruntilthelower
sideseparatesfromthedashboardsupport.Becarefultoraisethetopshellofthedashboard
housingonlyuntilyoufeelaslightresistancefromthecablethatisconnectedfrom
underneath,anduntilyoucanreachtheconnectorsonthecircuitboardwithyourthumb
andindexfinger.
Youmustunplugtheconnector.
 Loading...