DriveRack
®
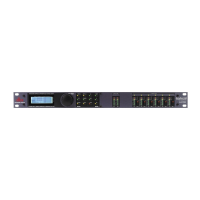
DriveRack® 260 User Manual
39
Utilities/Meters
Section 5
To set the PUP Program option use the following procedure:
• From Program mode, press the UTILITY button and use the PREV PG or NEXT PG buttons to move to the
page that appears as follows:
•
Utility
LCD Contrast 10
Auto EQ Plot RTA
Power Up Modes
PUP Program Stored
PUP Mute Current
ZC Setup
Panel 1 None
(STORE) - EDIT PANEL
Panel 1 ZC-2
Boost 0dB Cut 0dB
Output
1 3 5
2 4 6
Set Security Level
Pre EQ
Low
Set 260 Device Level
High
Password
Enter Password
Password
Edit High Password
Edit Med Password
Press Store to Change
Press Store
Program List
List Size 10
List Index 1
Program 1
Prog Change Mode
Program List
Prog Lock 24
Output Jumpers
Output 1
Setting 30
Panel 1 ZC-3
Select A
No Change
Panel 1 ZC-4
Switch
No Change
123 4
<DATA> - SELECT CHARACTER
<PREV/NEXTPG> - LEFT/RIGHT:
<STORE>-SAVE/<UTIL>-EXIT
NAME: ROCK VENUE
<DATA> - SELECT CHARACTER
<PREV/NEXTPG> - LEFT/RIGHT:
<STORE>-SAVE/<UTIL>-EXIT
NAME:
With the arrow next to the PUP Program option, turn the DATA wheel to make the desired selection.
To change the PUP Mute setup, use the following procedure:
• From Program mode, press the UTILITY button and use the PREV PG or NEXT PG button to move to the
page that appears as follows:
•
Utility
LCD Contrast 10
Auto EQ Plot RTA
Power Up Modes
PUP Program Stored
PUP Mute Current
ZC Setup
Panel 1 None
(STORE) - EDIT PANEL
Panel 1 ZC-2
Boost 0dB Cut 0dB
Output
1 3 5
2 4 6
Set Security Level
Pre EQ
Low
Set 260 Device Level
High
Password
Enter Password
Password
Edit High Password
Edit Med Password
Press Store to Change
Press Store
Program List
List Size 10
List Index 1
Program 1
Prog Change Mode
Program List
Prog Lock 24
Output Jumpers
Output 1
Setting 30
Panel 1 ZC-3
Select A
No Change
Panel 1 ZC-4
Switch
No Change
123 4
<DATA> - SELECT CHARACTER
<PREV/NEXTPG> - LEFT/RIGHT:
<STORE>-SAVE/<UTIL>-EXIT
NAME: ROCK VENUE
<DATA> - SELECT CHARACTER
<PREV/NEXTPG> - LEFT/RIGHT:
<STORE>-SAVE/<UTIL>-EXIT
NAME:
Select the PUP Mute option by pressing the DATA wheel until PUP Mute is selected. Once the PUP Mute option
has been selected, proceed to rotate the DATA wheel until the desired mute setting is selected. To exit, press
the PROGRAM/CONFIG button.
5.3 ZC Setup
A unique feature of the DriveRack 260 is its ability to interface with dbx proprietary Zone Controller wall-panels.
This feature gives you the ability to control various parameters of the 260 such as Output Levels, Mute and Program
Changes. Up to six ZC panels can be connected to a DriveRack 260. To program a ZC panel, proceed with the following
instructions.
• From Program mode, press the UTILITY button and use the PREV PG or NEXT PG button to move to the
page that appears as follows:
Utility
LCD Contrast 10
Auto EQ Plot RTA
Power Up Modes
PUP Program Stored
PUP Mute Current
ZC Setup
Panel 1 None
(STORE) - EDIT PANEL
Panel 1 ZC-2
Boost 0dB Cut 0dB
Output
1 3 5
2 4 6
Set Security Level
Pre EQ
Low
Set 260 Device Level
High
Password
Enter Password
Password
Edit High Password
Edit Med Password
Press Store to Change
Press Store
Program List
List Size 10
List Index 1
Program 1
Prog Change Mode
Program List
Prog Lock 24
Output Jumpers
Output 1
Setting 30
Panel 1 ZC-3
Select A
No Change
Panel 1 ZC-4
Switch
No Change
123 4
<DATA> - SELECT CHARACTER
<PREV/NEXTPG> - LEFT/RIGHT:
<STORE>-SAVE/<UTIL>-EXIT
NAME: ROCK VENUE
<DATA> - SELECT CHARACTER
<PREV/NEXTPG> - LEFT/RIGHT:
<STORE>-SAVE/<UTIL>-EXIT
NAME:
Important Note: The dip switches on the ZC panel(s) must match the Panel (ID) number displayed in this page.
• If any ZCs are currently connected and their dip switches properly set, the display will read ‘Panel Detected’ for
any such corresponding Panel (ID) numbers. Rotate the DATA wheel to select the desired Panel (ID) number
(options are 1-6). Once the panel to edit has been selected, press the STORE button. The display will now give
you the option of selecting one of the following by rotating the DATA wheel: