46
Make sure to turn it off before disassembly. Risk of electric shock.
PART NAME
DESCRIPTION FIGURE
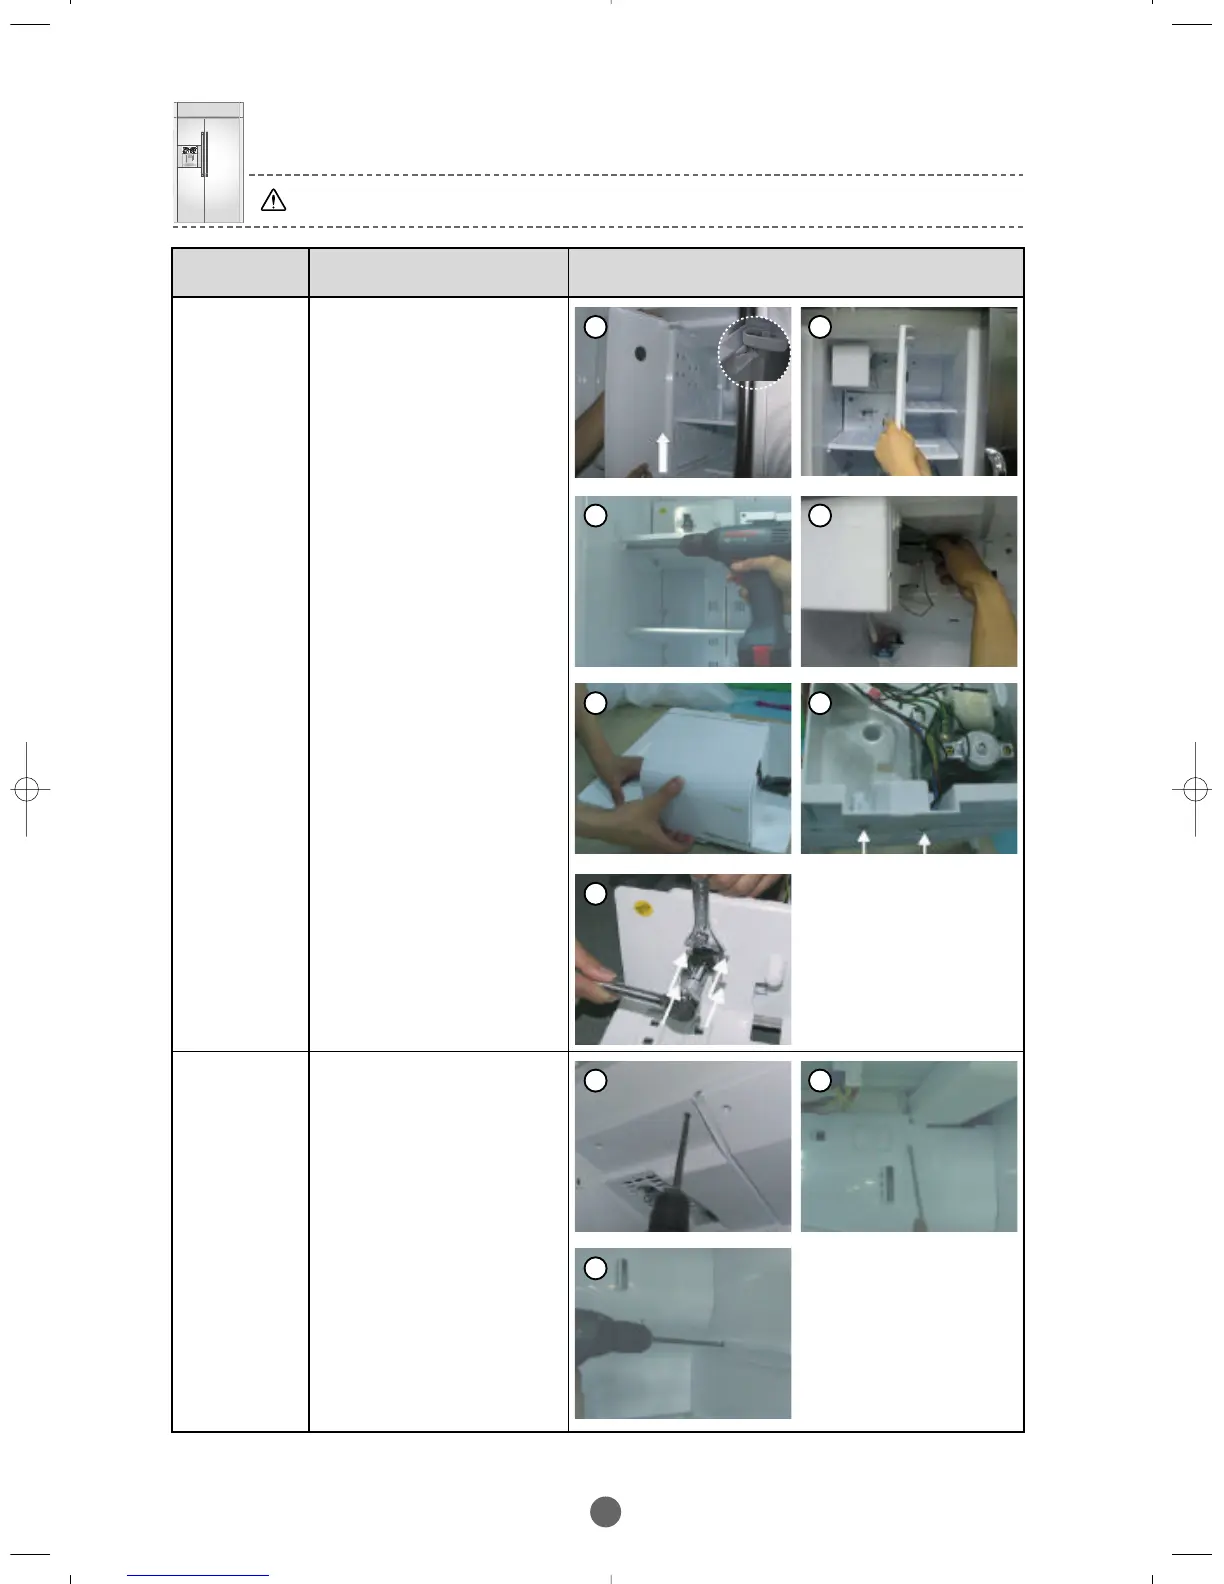
Ice Maker
① Remove the Ice Storage Bin
then lift up the cover of
Winter Closet to the
direction of the arrow mark
to remove. (Insert the spring
into its seat when
assembling it again.)
② Pull the partition out with the
center of the shelf pressed
down as shown in the photo,
and remove the 2 screws
below at the right left sides
to disassemble the
Auger Motor Ass’y.
Pull the Ass’y out slightly to
remove the wire housing on
the rear left of the auger
motor.
③ Remove the 2 screws over
the Ice Maker and the power
cord housing, pull the
Ice Maker Kit forward to
disassemble.
④ Lift up the rear cover of the
Auger Motor Ass’y to
disassemble. When
replacing the Ice Maker
Geared Motor, remove the 2
screws indicated with the
arrow marks in the photo.
⑤ When replacing the Auger
Motor, remove the 4 screws
indicated with the arrow
marks and remove the hex-
nut at the motor axis to take
the motor body and the
rotation blade apart, finally
remove the housings off the
parts to replace.
F-Room
Evaporator
① Loosen the 4 screws to
remove the upper cover of
the F-Room remove the
screw from the cover of the
F-Room Evaporator after
taking out the screw cap. To
remove the cover, only
remove the screw on the
inner side of the auger motor
support and have the
support hanging.
1 2
2 3
4
5
4
1 1
1
BRANDSOURCE-SM(EN) 2007.1.23 10:31 AM 페이지46