Removing and Installing Parts 91
3
Push from the inside and pivot the drive panel to the left to release the panel from its side
hinges.
4
Set the drive panel aside in a secure location.
Removing the Drive-Panel Insert
1
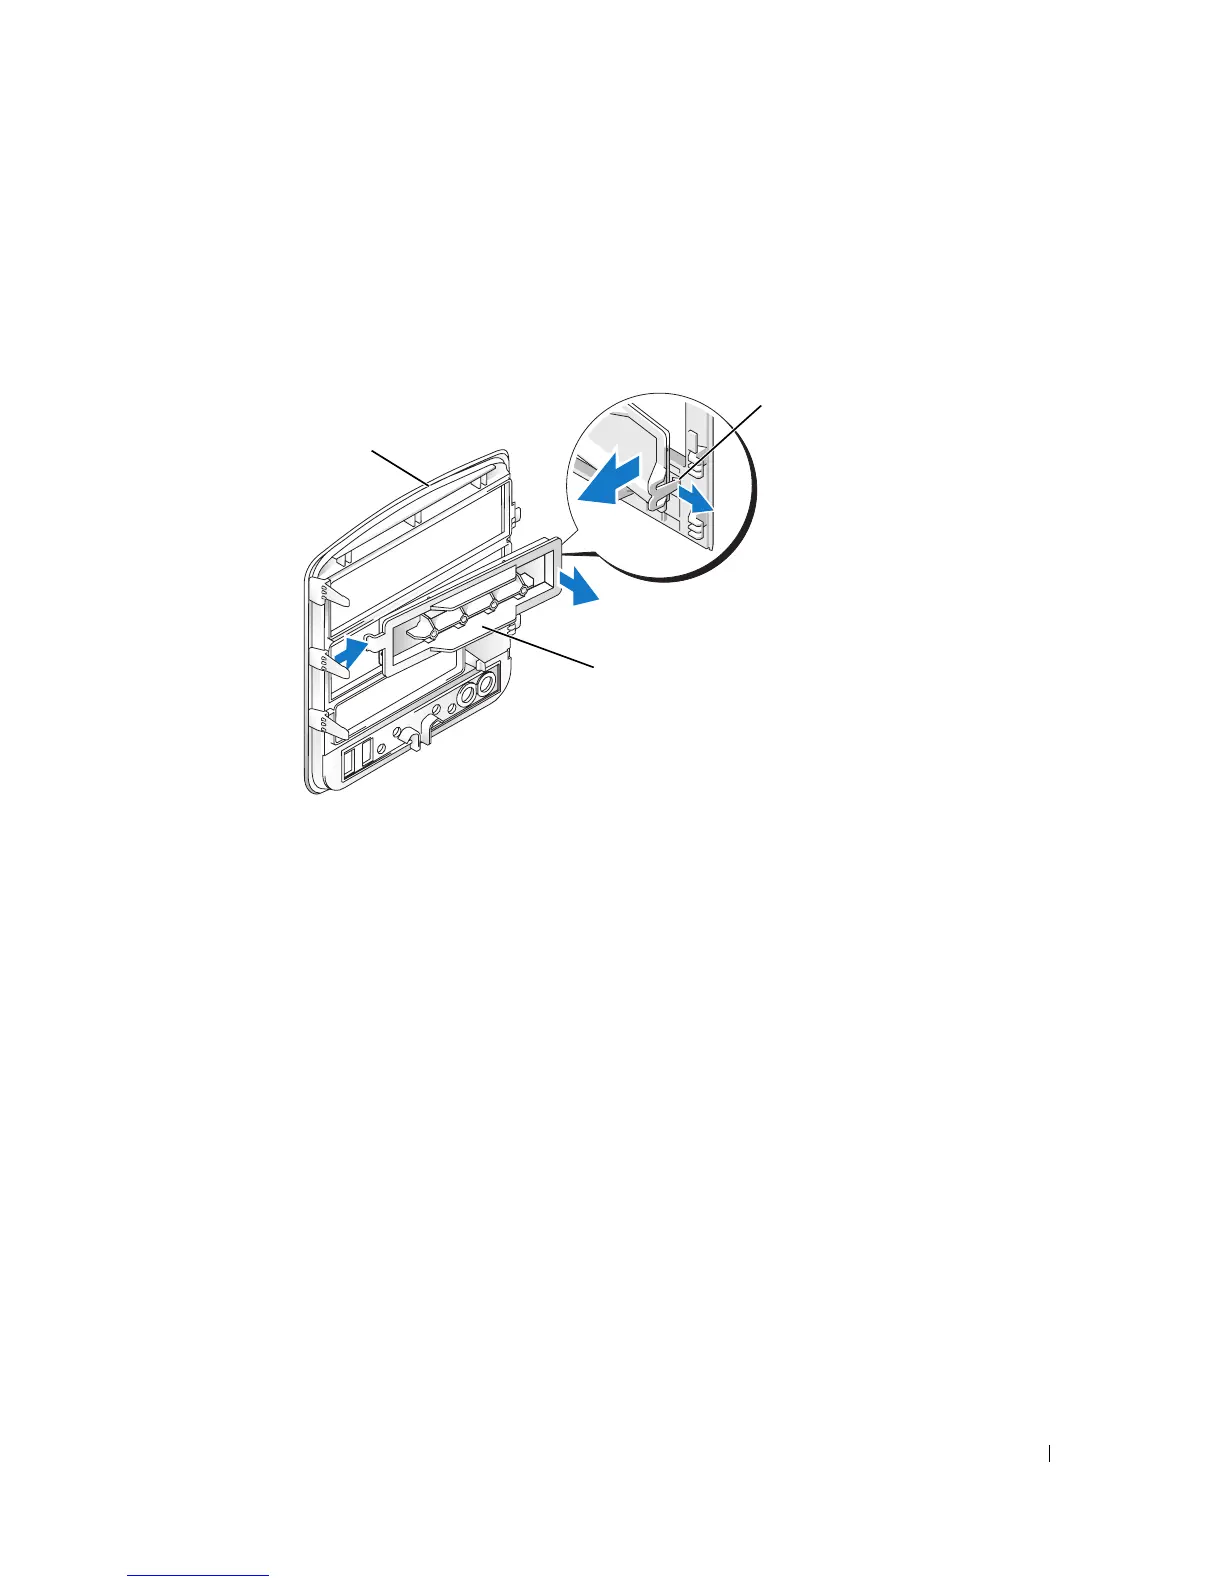
Turn the drive panel sideways and find the tip of the drive-panel insert tab that latches over a
tab on the right side of the drive panel.
2
Pull the inner tip of the drive-panel insert tab away from the drive panel.
3
Pivot the drive-panel insert out and away from the drive panel.
4
Set the drive-panel insert aside in a secure location.
drive panel
drive-panel insert
drive-panel
insert tab