Lépések
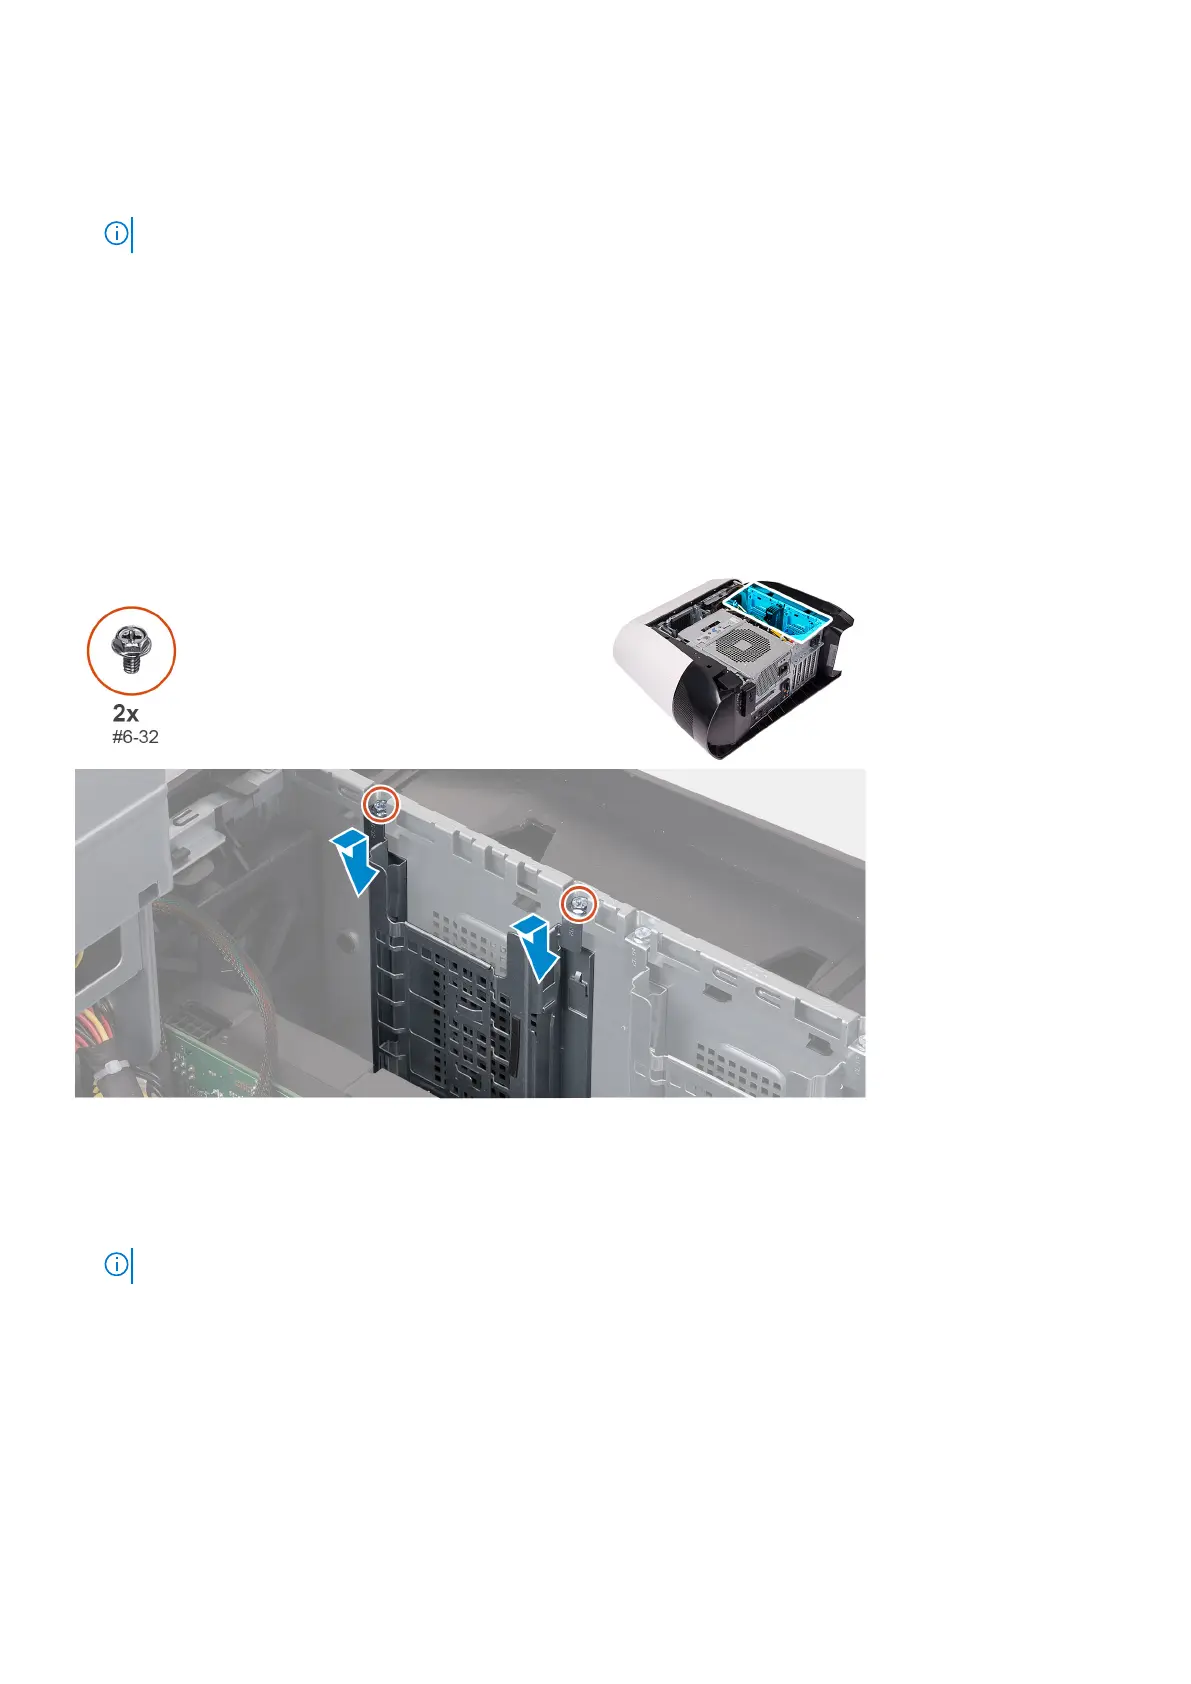
1. Távolítsa el a 2,5 hüvelykes merevlemez-meghajtó keretét a házhoz rögzítő két csavart (#6-32).
2. Csúsztatva emelje ki a 2,5 hüvelykes merevlemez-meghajtó keretét a házból.
MEGJEGYZÉS: További 2,5 hüvelykes merevlemez-meghajtó keretek eltávolításához ismételje meg az 1–2. lépést.
Installing the 2.5-inch hard-drive cage
Prerequisites
Ha valamelyik alkatrész cseréjére van szükség, távolítsa el az eredetileg beszerelt alkatrészt, és ezt követően végezze el a
beszerelési eljárást.
About this task
The following images indicate the location of the 2.5-inch hard-drive cage and provides a visual representation of the installation
procedure.
Steps
1. Insert the 2.5-inch hard-drive cage into its slot on the chassis.
2. Align the tabs on the cage with the tabs on the chassis.
3. Replace the two screws (#6-32) that secure the 2.5-inch hard-drive cage to the chassis.
NOTE: Repeat the procedure from step 1 to step 3 to install the other 2.5-inch hard-drive cage.
Next steps
1. Follow the procedure from step 3 to step 4 in installing the 2.5-inch hard drive, if installed.
2. Install the left-side cover.
3. Follow the procedure in After working inside your computer.
26
Alkatrészek eltávolítása és beszerelése