Steps
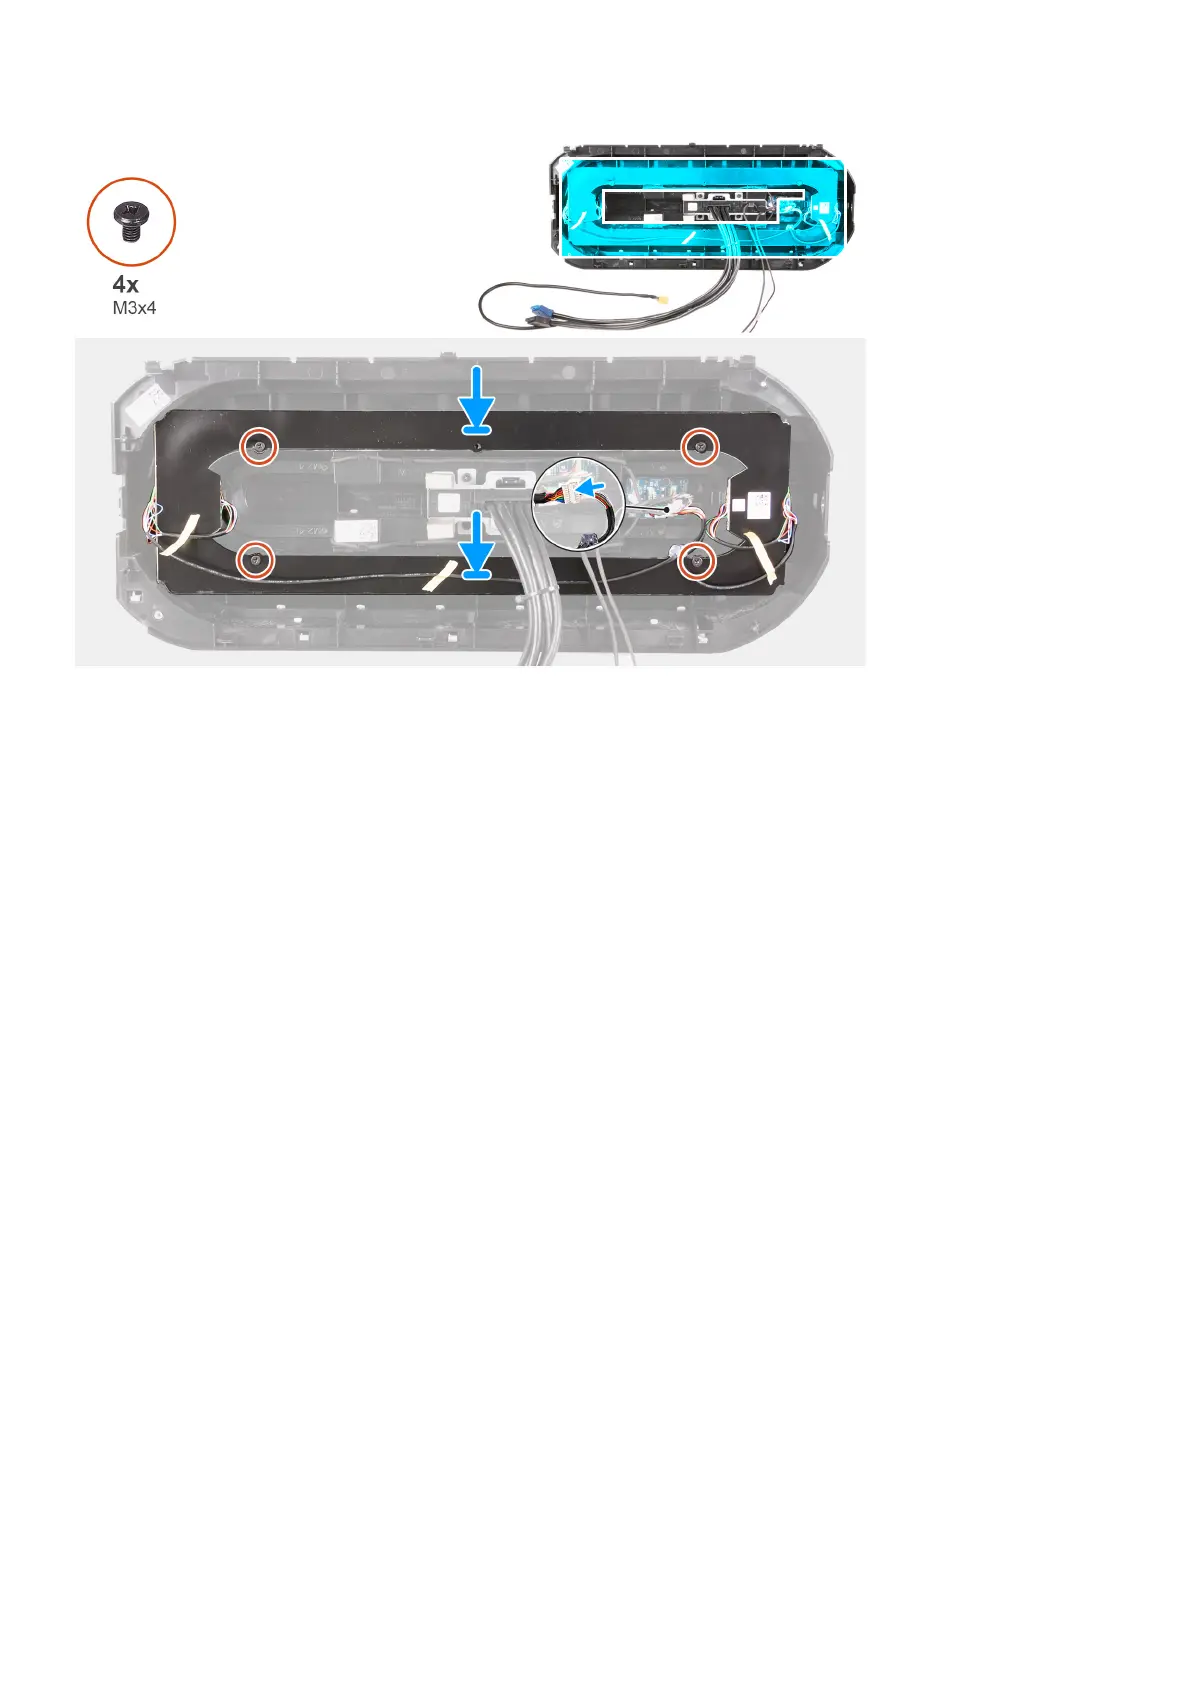
1. Align the screw hole of the AlienFX LED board to the screw hole on the front bezel.
2. Replace the four screws (M3x4) that secure the AlienFX LED board to the front bezel.
3. Connect the AlienFX LED board cable from a Y-cable.
Next steps
1. Install the front bezel.
2. Install the top-cover.
3. Install the right-side cover.
4. Install the left-side cover.
5. Follow the procedure in After working inside your computer.
Bekapcsológomb-panel
Removing the power-button board
Prerequisites
1. Follow the procedure in Before working inside your computer.
2. Remove the left-side cover.
3. Remove the right-side cover.
4. Remove the top-cover.
5. Remove the front bezel.
About this task
The following images indicate the location of the power-button board and provides a visual representation of the removal
procedure.
Alkatrészek eltávolítása és beszerelése
89