Steps
1. Align the ports on the system-board assembly with the slots on the chassis and align the system-board assembly in place.
2. Slide the system-board assembly to engage the latches that secure it to the chassis.
3. Replace the eight screws (#6-32) that secure the system-board assembly to the chassis.
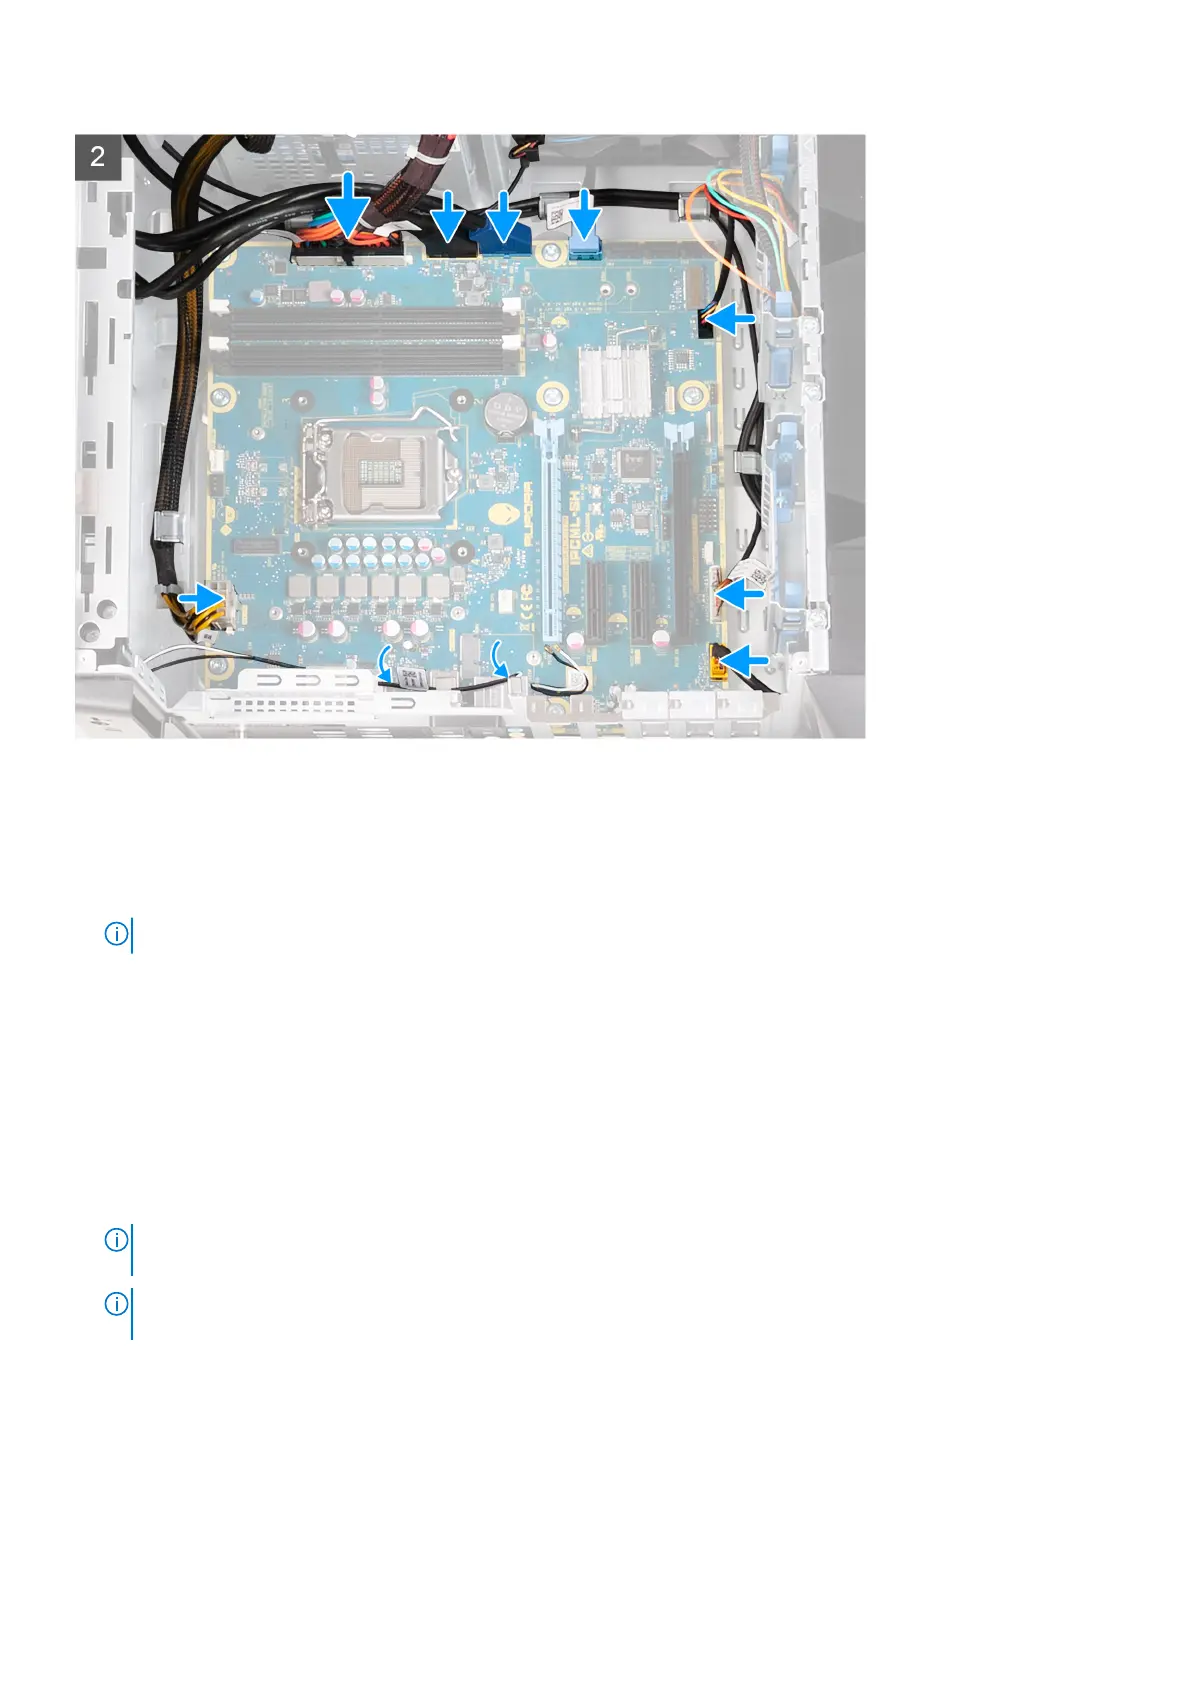
4. Route and connect the cables that you disconnected from the system-board assembly.
NOTE: For information on system-board connectors, see "system-board components".
Next steps
1. Install the processor.
2. Install the single-graphics card or dual-graphics card, as applicable.
3. Install the processor liquid-cooling assembly or processor fan and heat-sink assembly, as applicable.
4. Install the wireless card.
5. Install the solid-state drive.
6. Install the memory modules.
7. Install the left-side cover.
8. Follow the procedure in After working inside your computer.
NOTE:
A számítógép szervizcímkéje az alaplapon található. Az alaplap cseréje után a BIOS-beállító programban meg kell
adnia a szervizcímkét.
NOTE: Az alaplap cseréje töröl minden módosítást, amit a BIOS-ban végzett a BIOS-beállító programmal. Az alaplap
cseréje után ismét el kell végeznie a megfelelő módosításokat.
A szervizcímke megadása a BIOS beállítási programban
Lépések
1. Kapcsolja be vagy indítsa újra a számítógépet.
2. Amikor megjelenik a DELL-embléma, nyomja meg az F2 gombot a BIOS-beállítási programba való belépéshez.
Alkatrészek eltávolítása és beszerelése
95