Steps
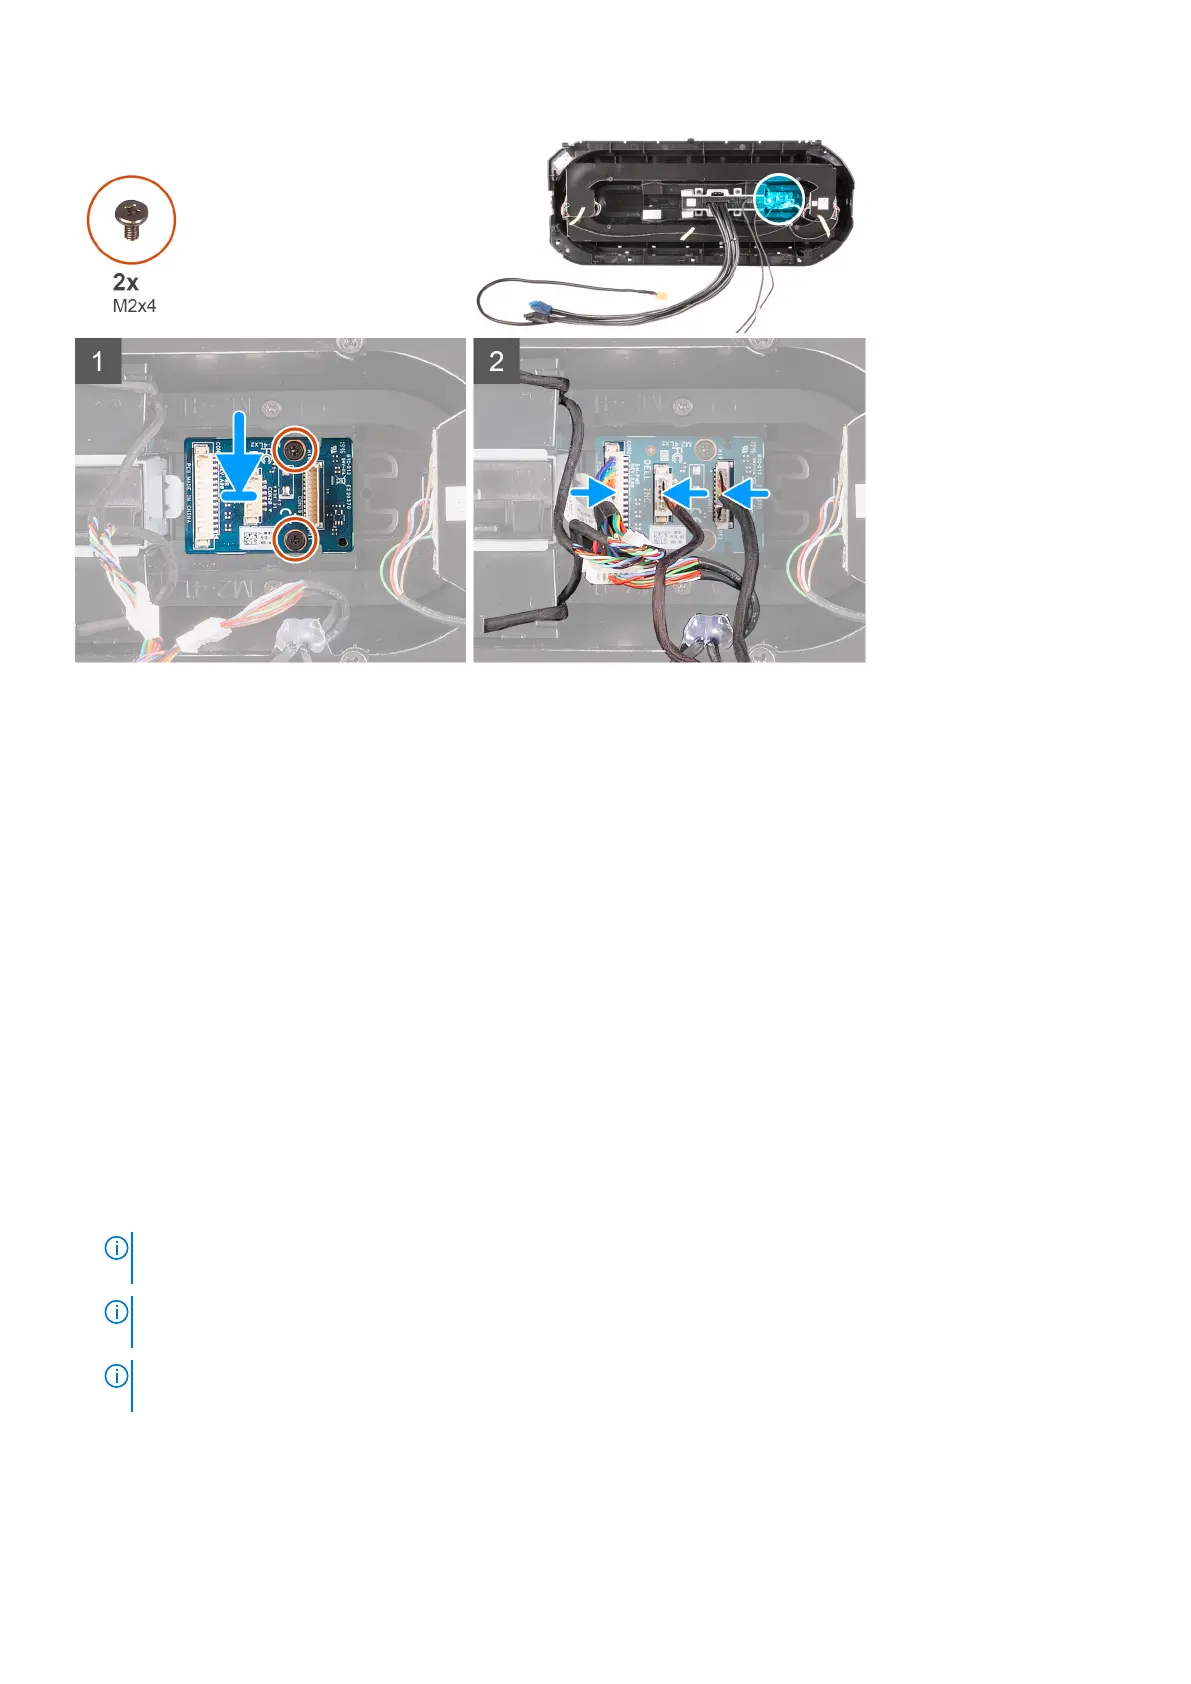
1. Align the screw holes on the power-button module with the screw holes on the front bezel.
2. Replace the two screws (M2x4) that secure the power-button module to the front bezel.
3. Connect the cables to the power-button module.
Next steps
1. Install the front bezel.
2. Install the top-cover.
3. Install the right-side cover.
4. Install the left-side cover.
5. Follow the procedure in After working inside your computer.
Alaplap
Removing the system board
Prerequisites
1. Follow the procedure in Before working inside your computer.
NOTE:
A számítógép szervizcímkéje az alaplapon található. Az alaplap cseréje után a BIOS-beállító programban meg kell
adnia a szervizcímkét.
NOTE: Az alaplap cseréje töröl minden módosítást, amit a BIOS-ban végzett a BIOS-beállító programmal. Az alaplap
cseréje után ismét el kell végeznie a megfelelő módosításokat.
NOTE: A kábelek alaplapról történő eltávolítása előtt jegyezze fel a csatlakozók helyét, hogy az alaplap
visszaszerelésekor azokat megfelelően vissza tudja csatlakoztatni.
2. Remove the left-side cover.
3. Remove the memory modules.
4. Remove the solid-state drive.
5. Remove the wireless card.
6. Remove the processor liquid-cooling assembly or processor fan and heat-sink assembly, as applicable.
Alkatrészek eltávolítása és beszerelése
91