Steps
1. Lay the computer on the right side.
2. Press the releasing clip on the power-cable connectors and disconnect the power cables from the graphics card.
3. Slide the power-supply unit cage release latches to the unlock position.
4. Lift the power-supply unit cage and rotate the power-supply unit cage away from the chassis.
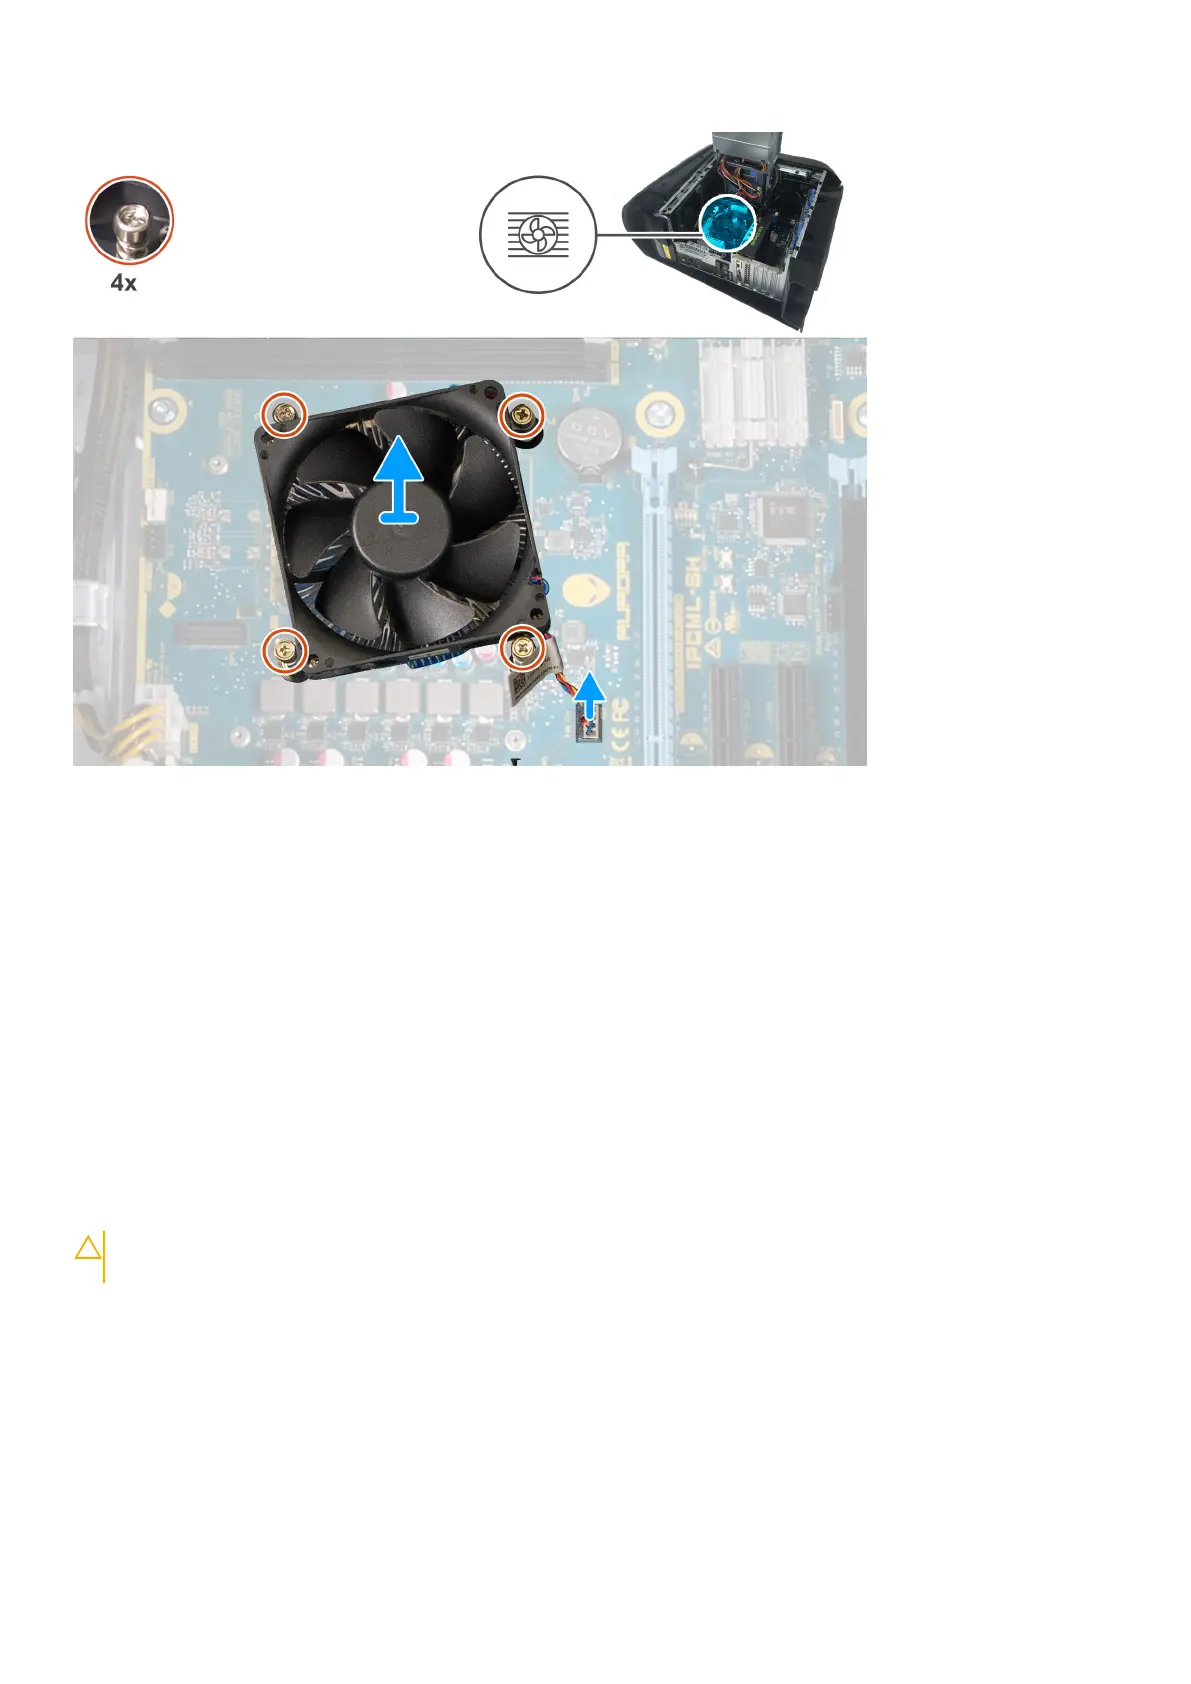
5. Disconnect the processor-fan cable from the system board.
6. In reverse sequential order, loosen the four captive screws that secure the processor fan and heat-sink assembly to the
system board.
7. Lift the processor fan and heat-sink assembly off the system board.
Installing the processor fan and heat-sink assembly
Prerequisites
Ha valamelyik alkatrész cseréjére van szükség, távolítsa el az eredetileg beszerelt alkatrészt, és ezt követően végezze el a
beszerelési eljárást.
CAUTION:
Ha akár a processzort, akár a hűtőbordát lecseréli, a hőelvezetés biztosításához használja a
készletben található hőelvezető pasztát.
About this task
The following images indicate the location of the processor fan and heat-sink assembly and provides a visual representation of
the installation procedure.
72
Alkatrészek eltávolítása és beszerelése