26 | Operating the monitor
Using the control buttons
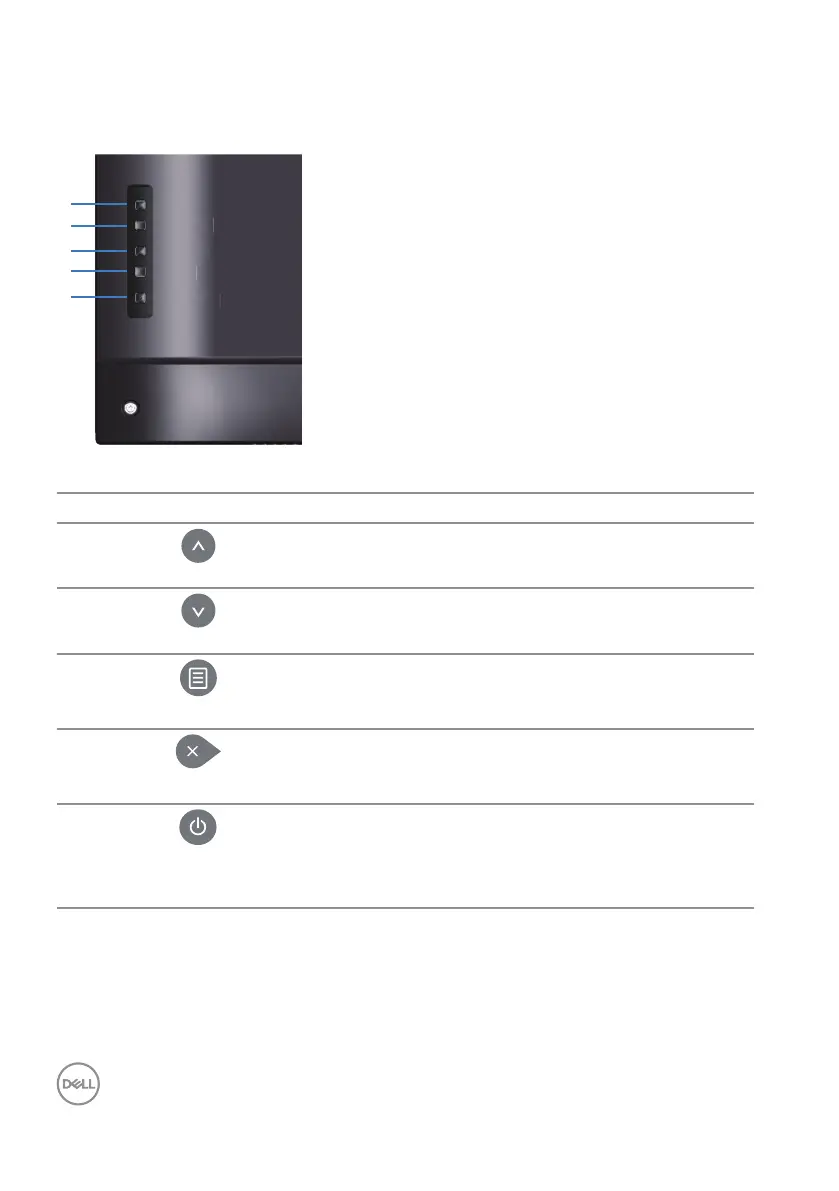
Use the keys on the back of the monitor to adjust the image settings.
Menu
Exit
Power
Down
Up
x
r
The following table describes the control buttons:
Control buttons Description
1
Up
Use the Up key to adjust (increase ranges) items in
the OSD menu.
2
Down
Use the Down key to adjust (decrease ranges) items
in the OSD menu.
3
Menu
Use the Menu button to launch the On-Screen
Display (OSD) and select the OSD Menu. See
Accessing the OSD menu.
4
Exit
Use the Exit key to exit on-screen display (OSD)
from menu and sub-menus. Hold about 10 seconds
will enable or disable OSD lock.
5
Power
Press the Power button to turn on/o the monitor.
Solid white light indicates the monitor is turned on
and functioning normally. Blinking white light indicates
the monitor is in Standby Mode.