Installing E300 Fan Tray | 29
6
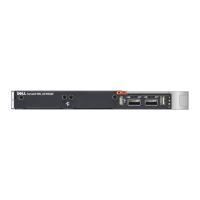
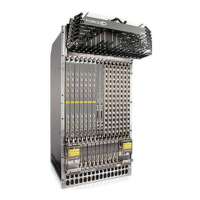
Installing E300 Fan Tray
WARNING: To ensure proper temperature and airflow control, the fan tray must always be installed.
Access the fan tray from the front of the chassis. The fan tray contains 16 fans that run at a constant
speed.
Figure 6-1. Inserting the Fan Tray
To install the fan tray:
For information on returning a fan tray to Dell Force10, see
Requesting a Hardware Replacement on
page 66
.
Step Task
1 Slide the connector end into the fan slot (located in the front of the chassis see
Figure 6-1
).
2 Gently push on the front of the tray until it stops.
3 Using a #2 Phillips screwdriver, secure the fan tray into place by tightening the screws at the top and bottom of
the fan tray.
R0
R
1
0
1
2
3
4
5
Fan
Status
C
C
-
E
3
0
0
-
F
A
N