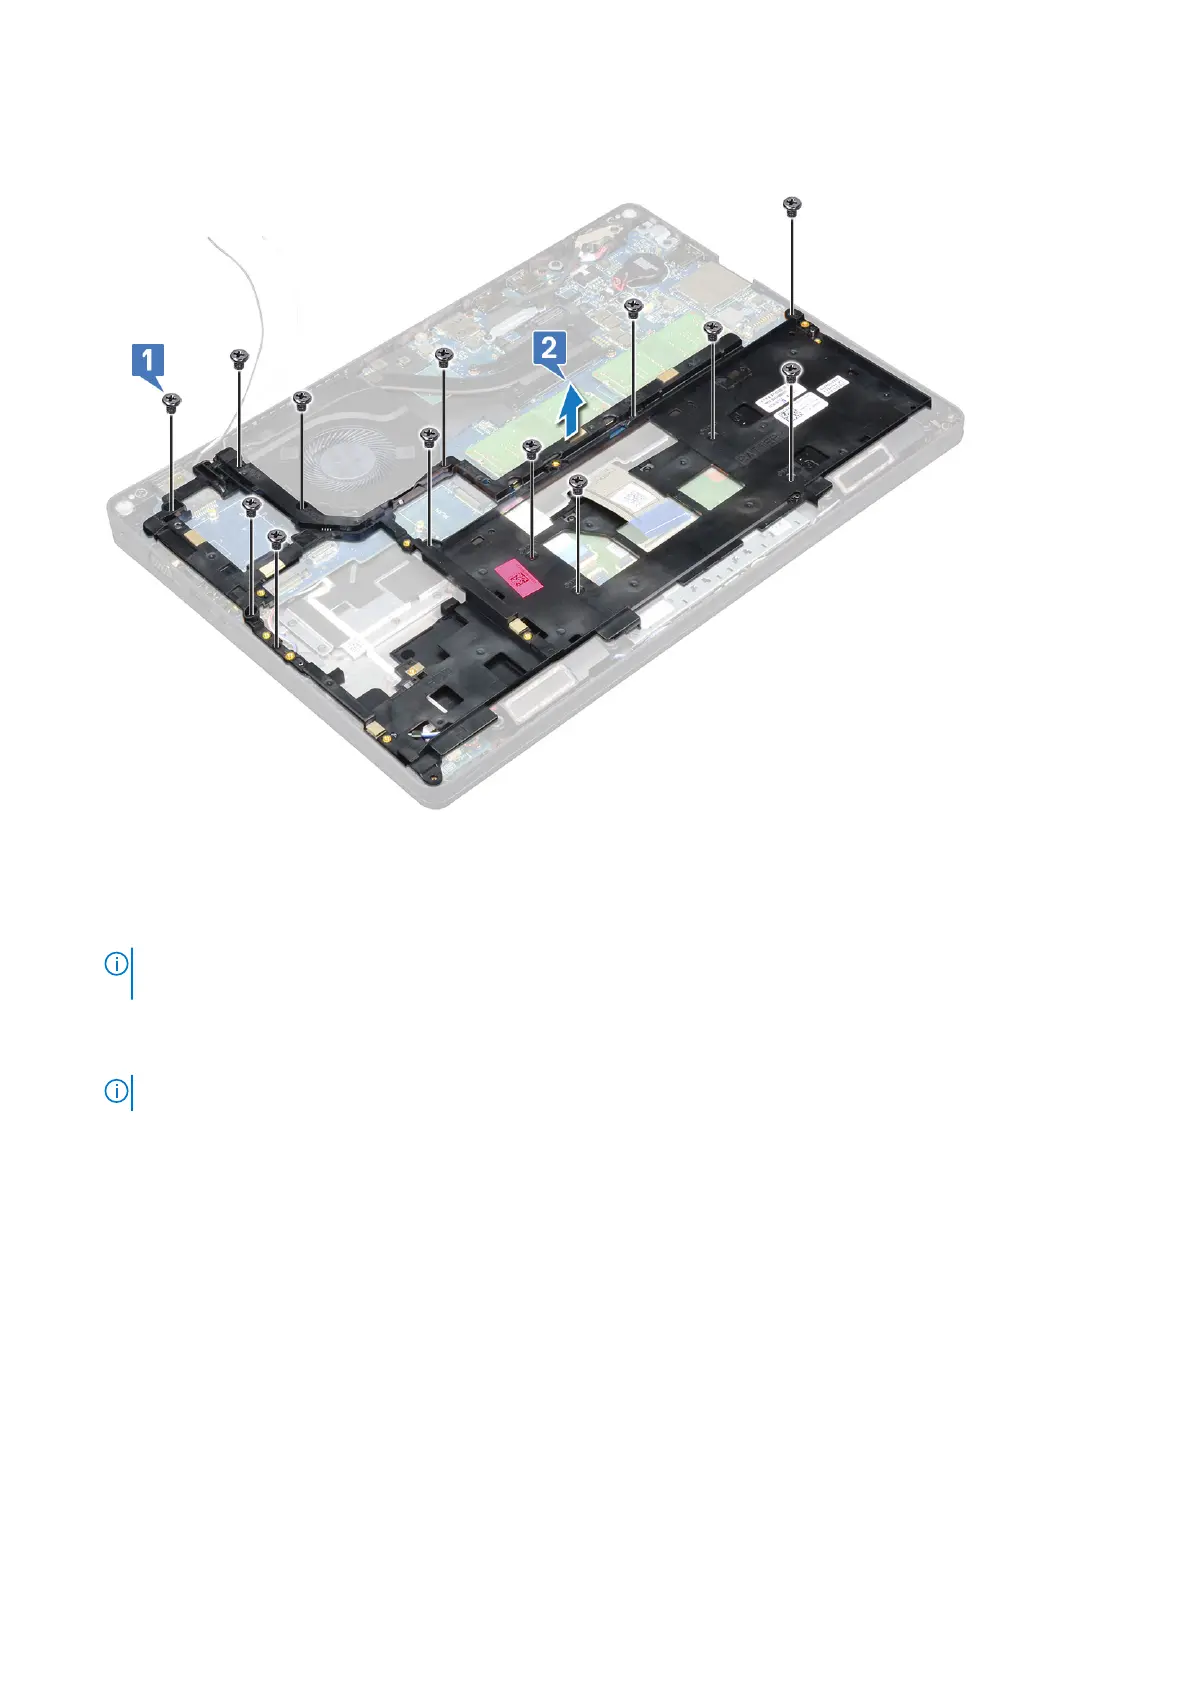
a. Remove the five (M2x3) screws and eight (M2x5) screws that secure the chassis frame to the system [1].
b. Lift the chassis frame from the system [2].
Installing the chassis frame
1. Place the chassis frame into the slot on the system.
NOTE:
Gently pull the keyboard cable and keyboard back light cables through the spacing in the chassis frame before
placing the chassis frame in the slot on the system.
2. Replace the five (M2x3) screws and eight (M2x5) screws to secure the chassis frame to the system.
3. Connect the keyboard cable and the keyboard backlight cable to their connectors on the system.
NOTE: There may be more than one cable to connect based on keyboard types.
4. Route the WLAN cables through the routing channels.
5. Install the:
a. WWAN card (optional)
b. WLAN card
c. SSD frame
d. SSD card
e. hard drive
f. battery
g. base cover
6. Follow the procedure in After working inside your system.
32
Removing and installing components

 Loading...