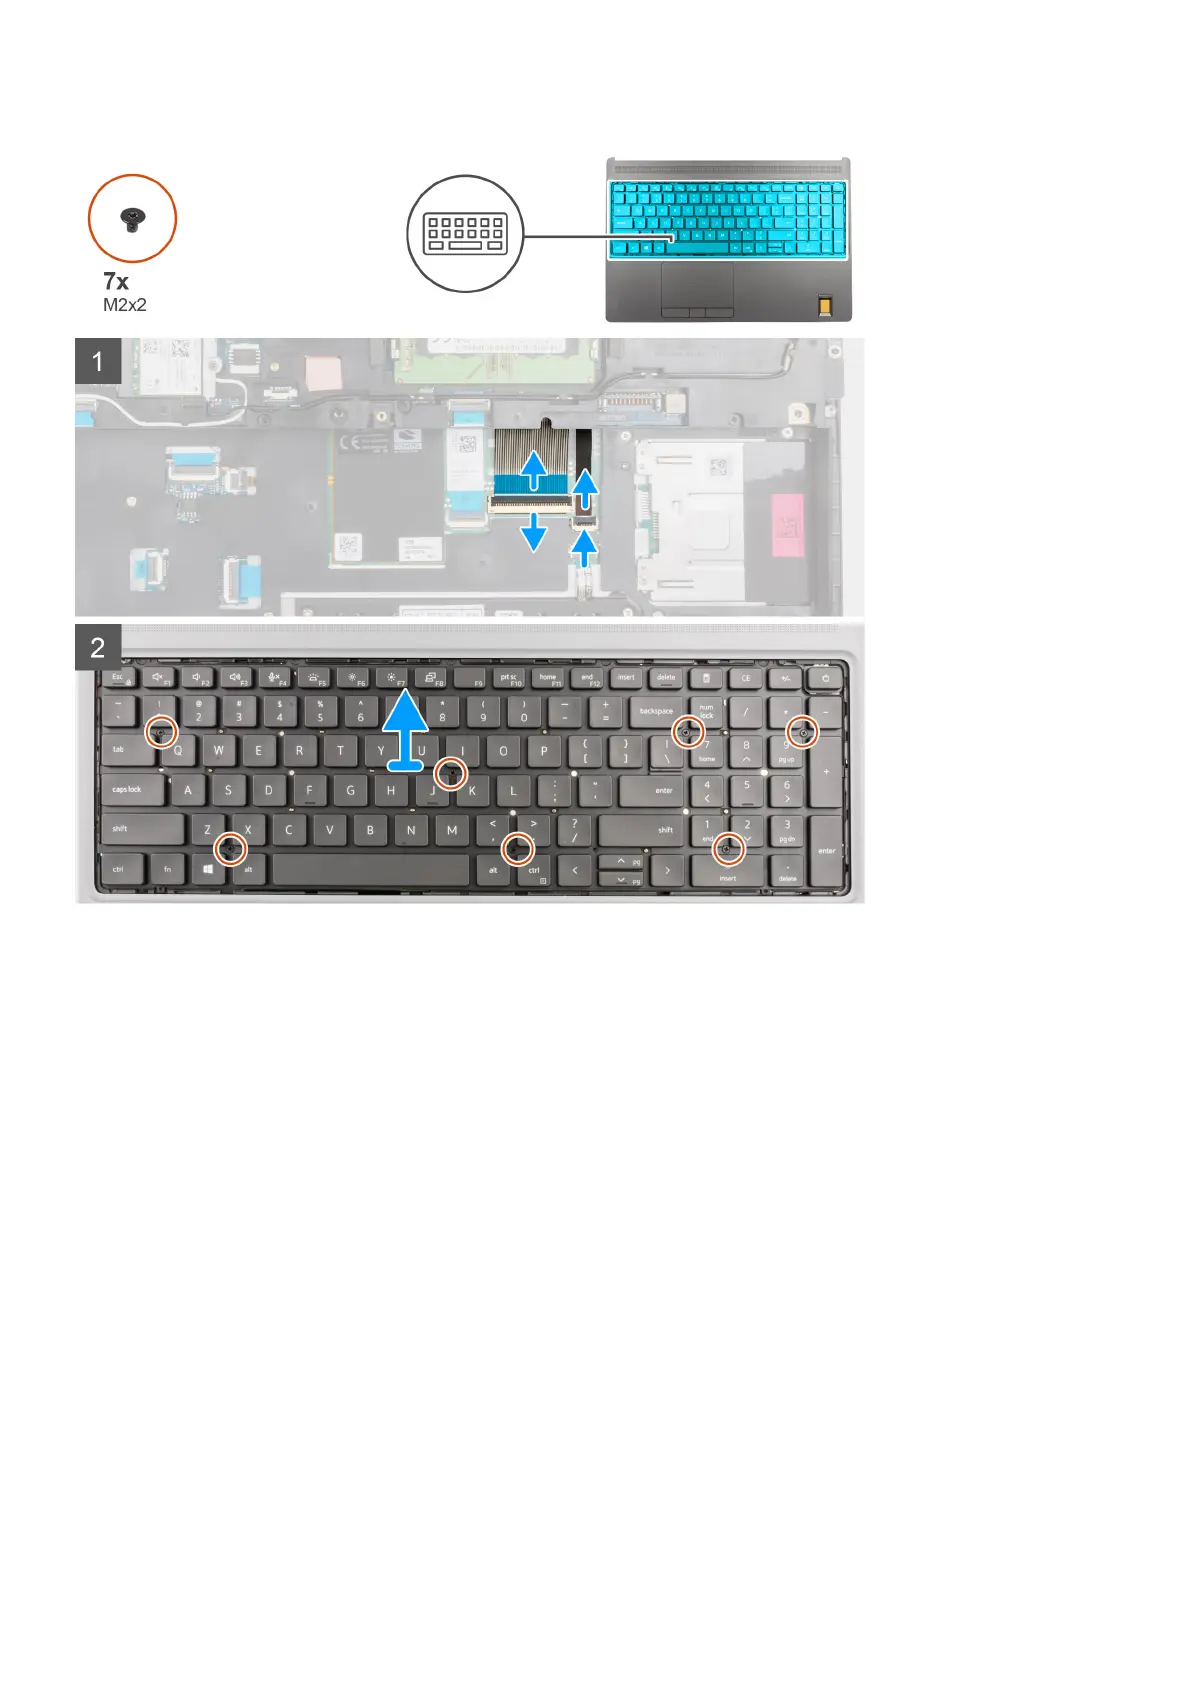
Steps
1. Lift the latch and disconnect the keyboard FPC and the keyboard backlight FPC from the connectors on the touchpad
module.
2. Turn-over and open the system at 90° angle.
3. Remove the seven (M2x2) screws that secure the keyboard to the palmrest.
4. Pry the bottom edge of the keyboard and then work along the left and the right sides of the keyboard.
5. Carefully unroute the keyboard backlight FPC and the keyboard FPC through the opening on the palmrest.
6. Remove the keyboard from the computer.
Installing the keyboard
Prerequisites
If you are replacing a component, remove the existing component before performing the installation procedure.
About this task
The figure indicates the location of the keyboard and provides a visual representation of the installation procedure.
44
Removing and installing components