268 Installing Blade Components
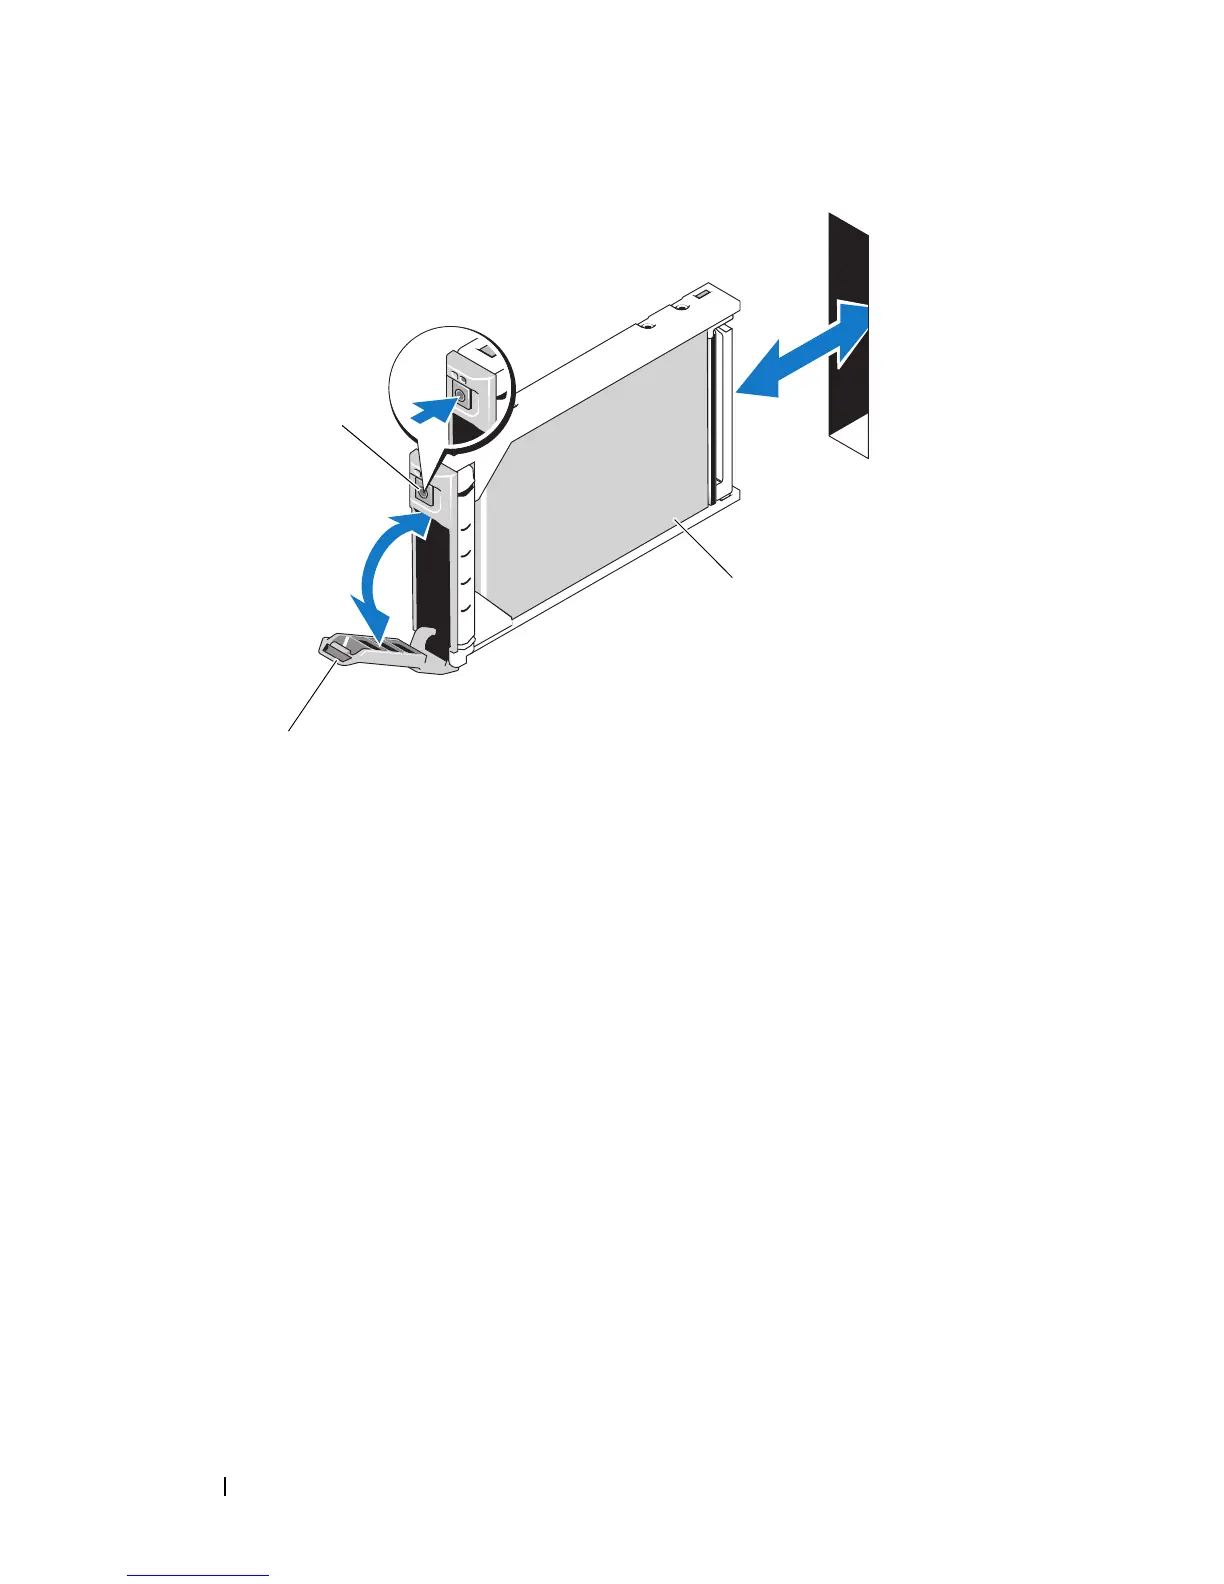
Figure 3-56. Installing a Hard Drive
2
Insert the hard-drive carrier into the drive bay. Carefully align the channel
on the hard-drive carrier with the appropriate drive slot on the blade.
3
Push the drive carrier into the slot until the handle makes contact with the
blade.
4
Rotate the carrier handle to the closed position while pushing the carrier
into the slot until it locks into place.
The status LED indicator displays a steady green light if the drive is
installed correctly. The drive carrier LED green indicator flashes as the
drive rebuilds.
1 release button 2 hard drive
3 carrier handle
 Loading...


