Installing System Components 105
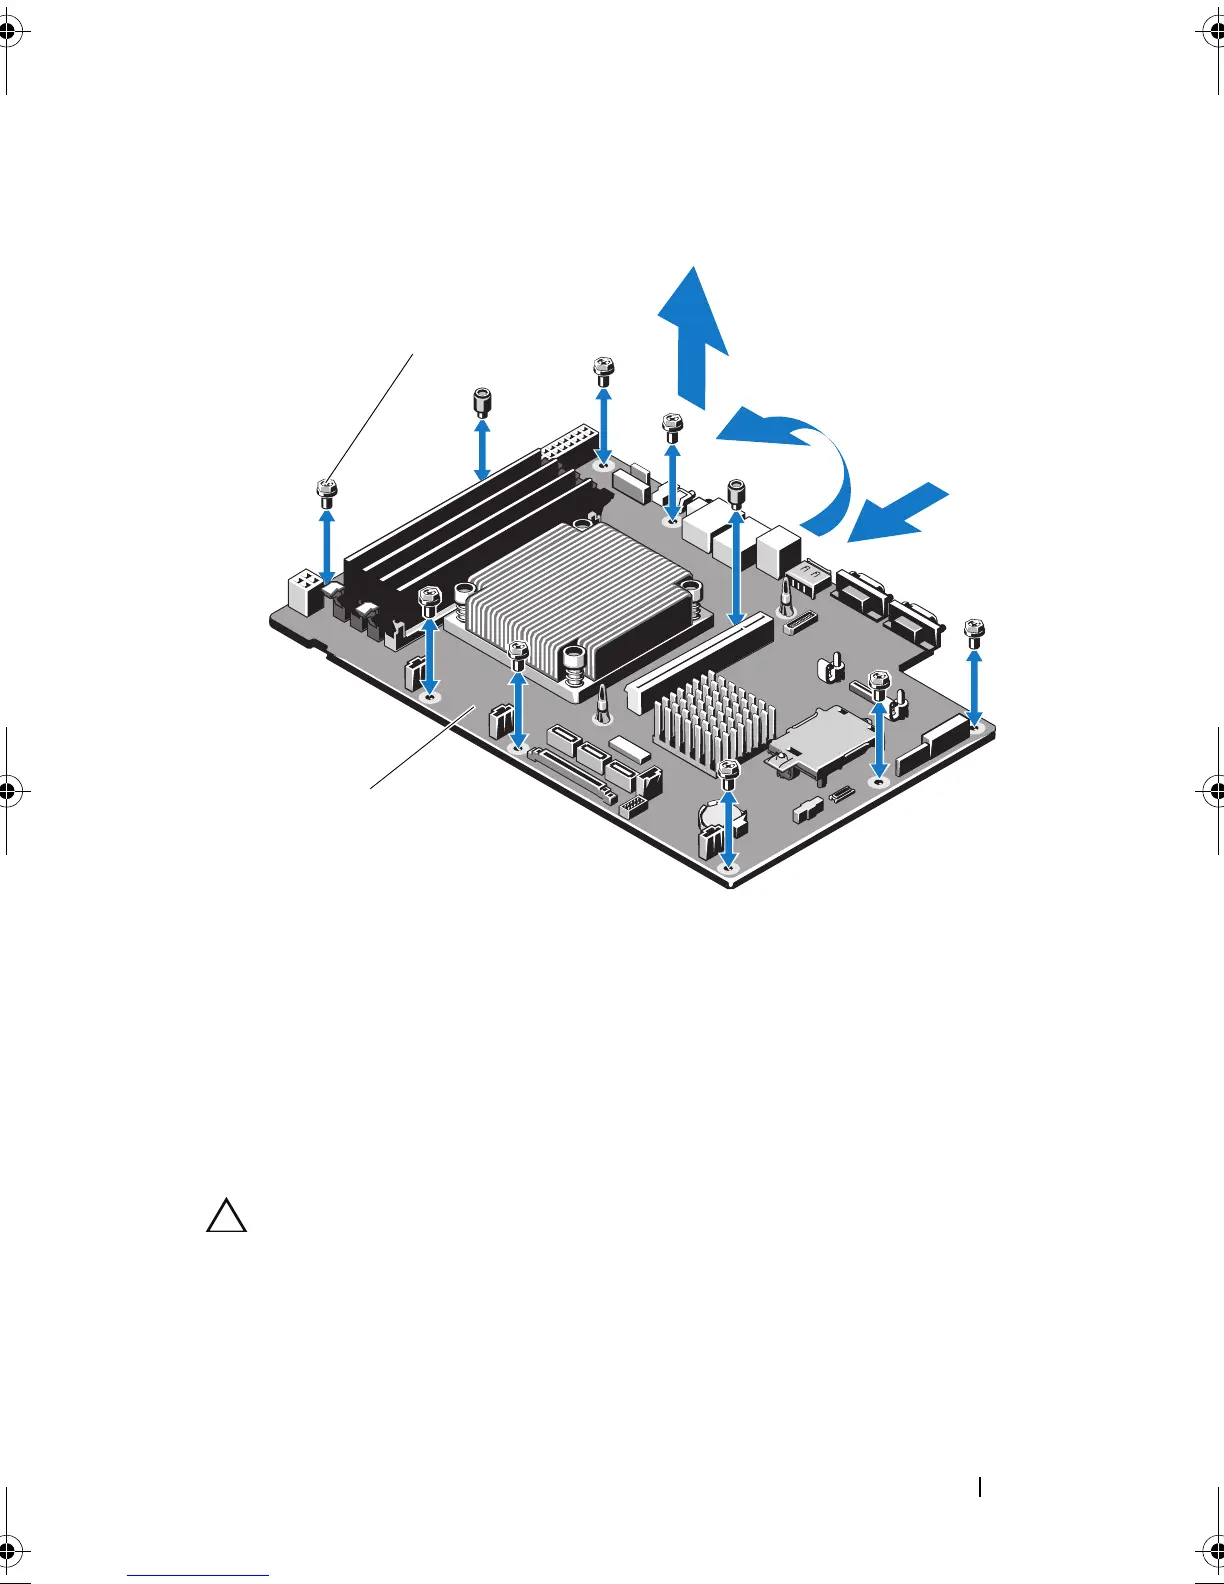
Figure 3-20. Removing and Installing the System Board
Installing the System Board
1
Unpack the new system board.
2
Remove the labels from the processor shield and affix them to the system
identification panel on the front of the system. See Figure 1-1.
3
Holding the system board by its edges, lower it into the chassis.
CAUTION: Do not lift the system board assembly by grasping a memory module,
processor, or other components.
4
Slightly lift up the front of the system board and maneuver the system
board to the bottom of the chassis until it lays completely flat.
5
Push the system board toward the back of the chassis until the board is in
place.
1 screws (10) 2 system board assembly
1
2
book.book Page 105 Wednesday, August 12, 2009 4:51 PM