Power interposer board
Th
is is a service technician replaceable part only.
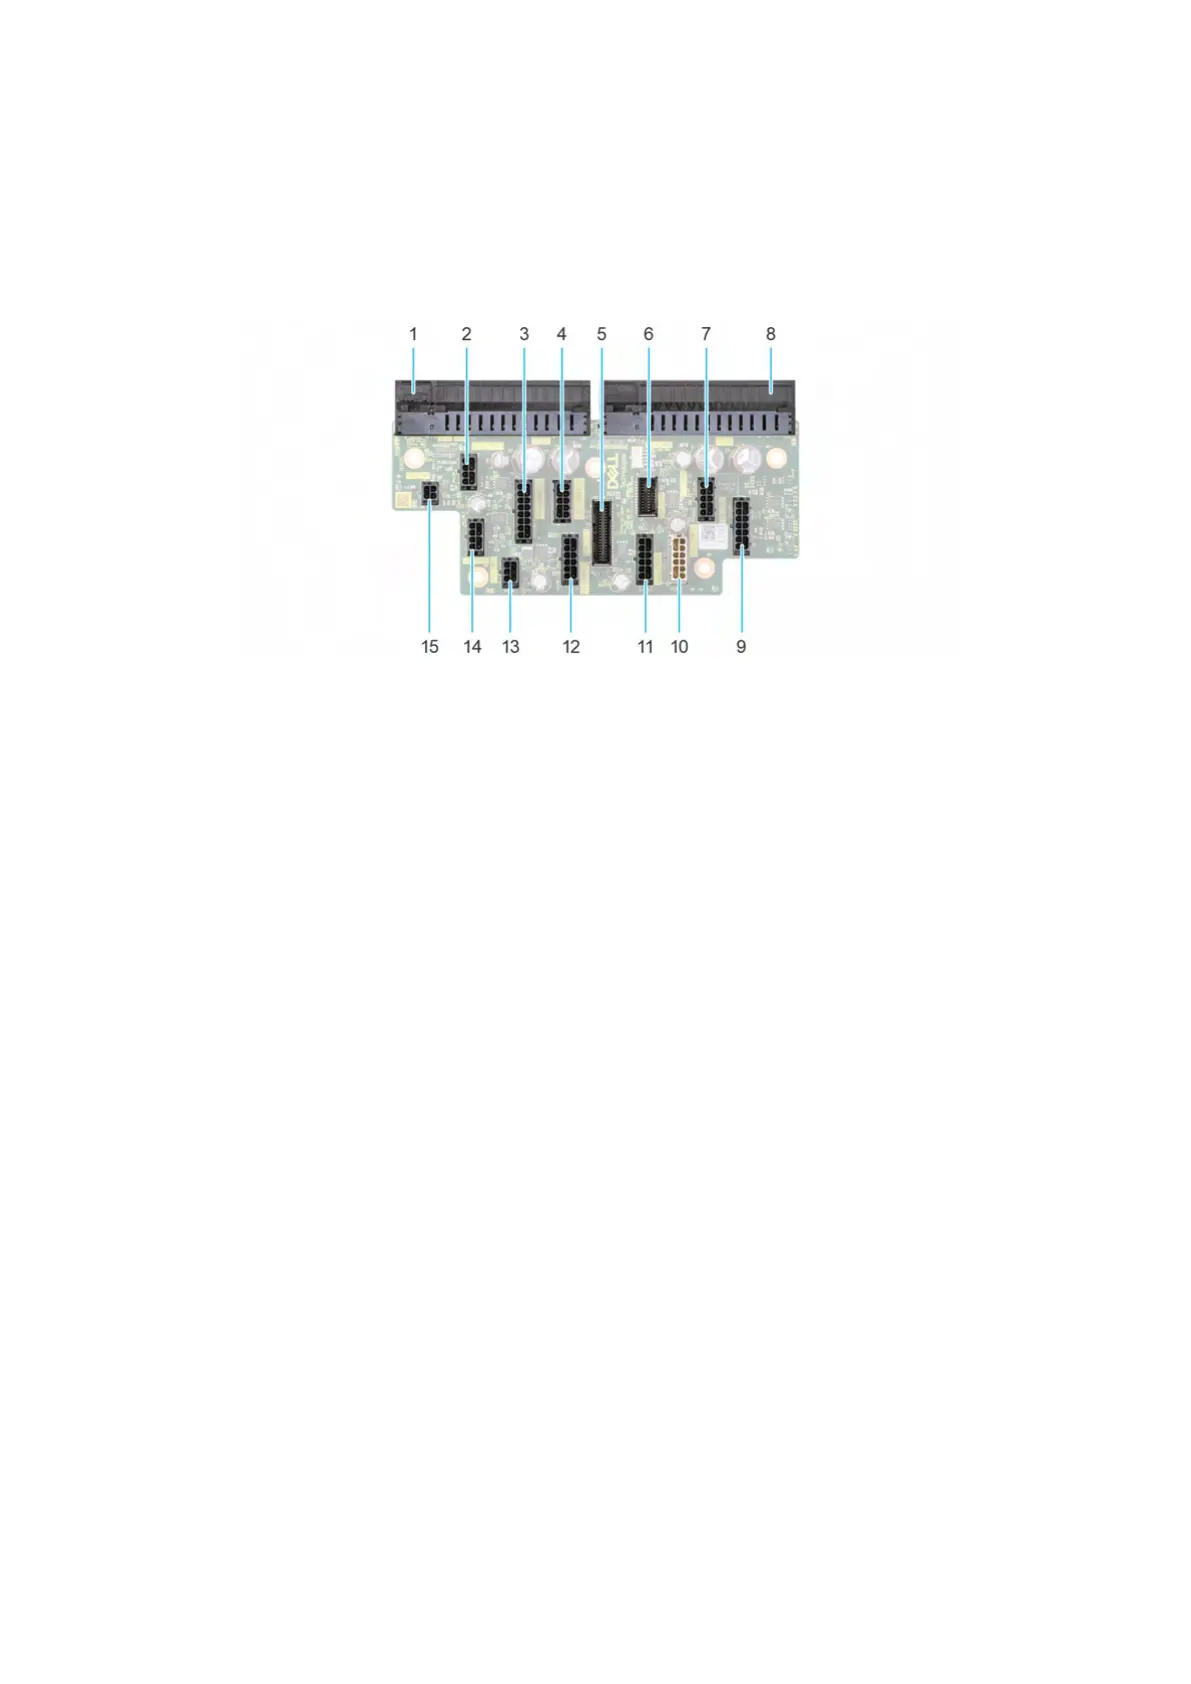
PIB board view
Figure 192. Power interposer board connectors
1. J
_PS1
2. GPU_PWR1
3. SYS_PWR1_1
4. SYS_PWR1_2
5. PIB_SIG1
6. PIB_SIG2
7. CPU_PWR2
8. J_PS2
9. FAN_PWR1
10. SIG_PWR_1
11. SIG_PWR_2
12. SIG_PWR_3
13. GPU_PWR_3
14. GPU_PWR_2
15. ODD_PWR
Removing the power interposer board
Prerequisites
1. Follow the safety guidelines listed in Safety instructions.
2. Follow the procedure that is listed in Before working inside your system.
3. Remove the air shroud.
4. Remove the PSU.
Steps
1. Disconnect all the power cables from the PIB.
2. Using the Phillips #2 screwdriver, remove the screws that secure the PIB to the system.
3. Lift the PIB out of the system.
232 Installing and removing system components