Steps
1. Slide the ports on the system board into the slots on the palm-rest and keyboard assembly and align the screw holes on the system
board with the screw holes on the palm-rest and keyboard assembly.
2. Replace the two screws (M2x3) that secure the system board to the palm-rest and keyboard assembly.
3. Align and place the USB Type-C port bracket.
4. Replace the two screws (M2x3) that secure the USB Type-C port bracket to the system board.
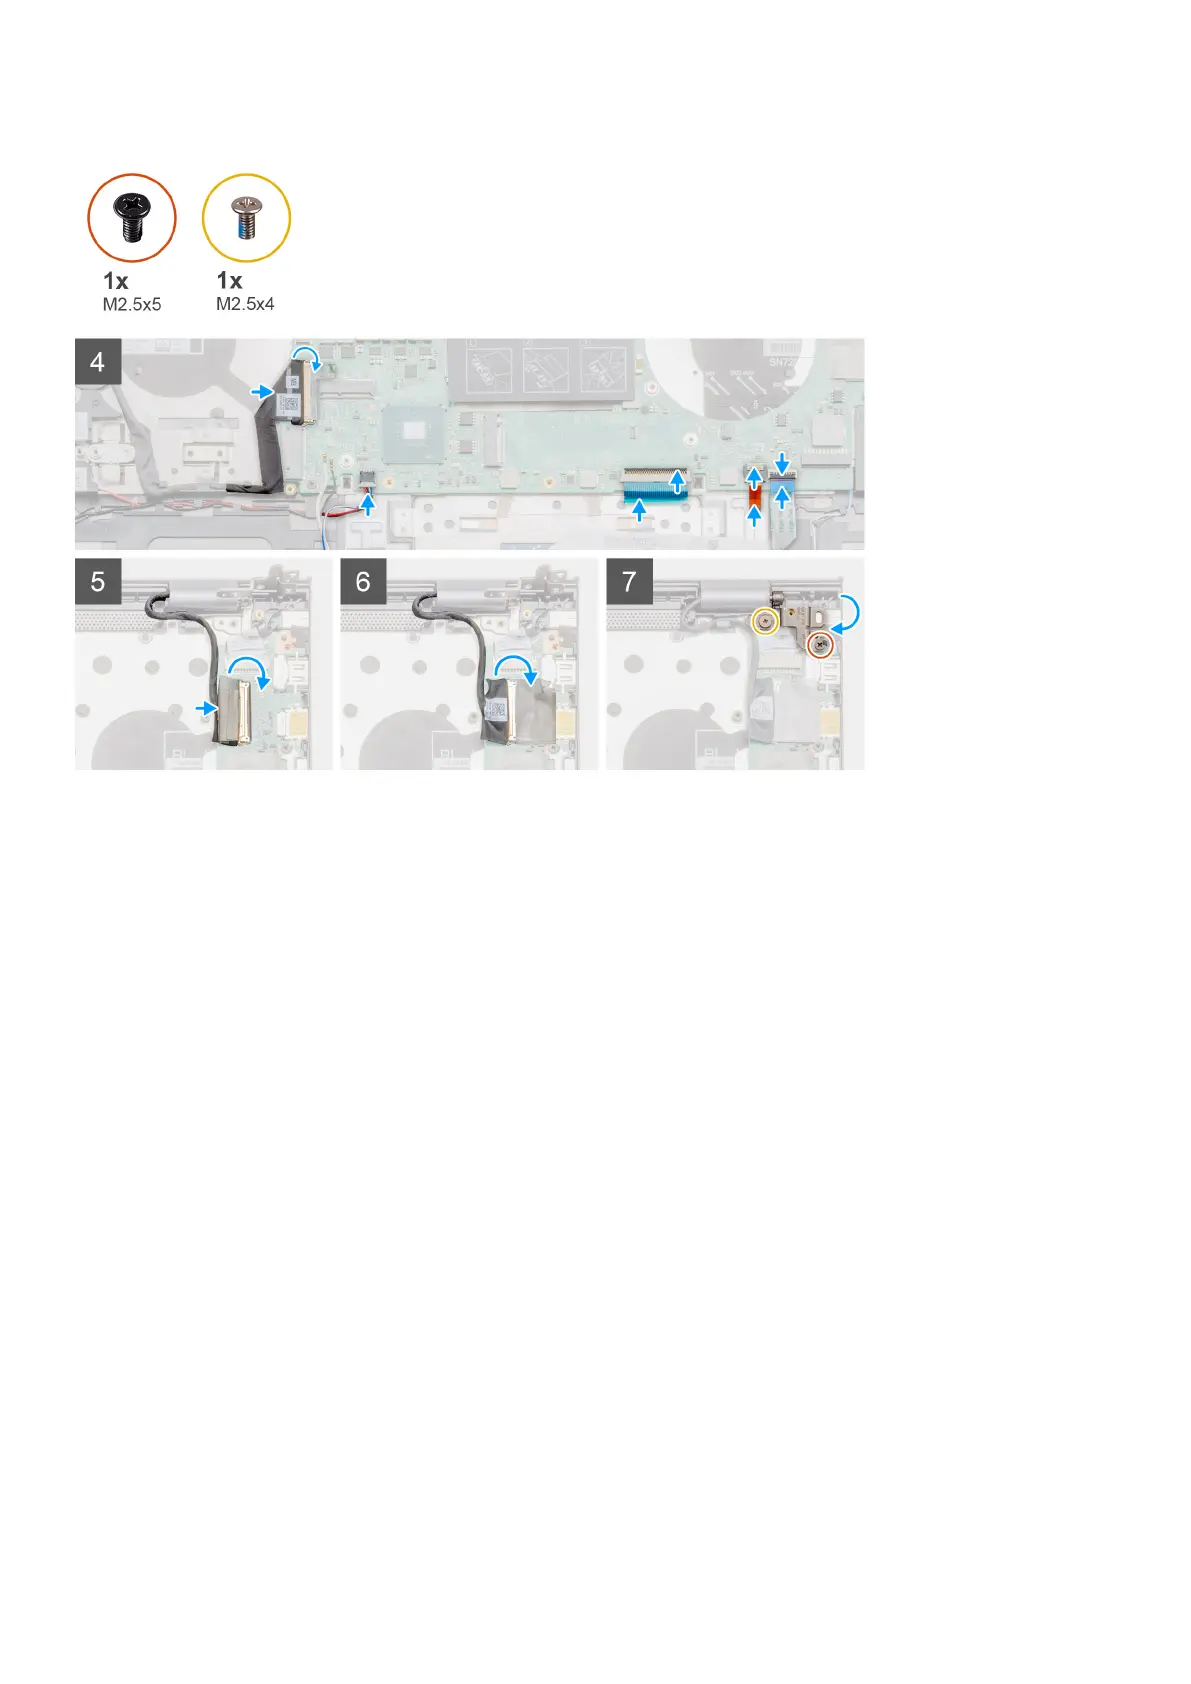
5. Connect the I/O-board cable to the system board and close the latch to secure the cable.
6. Connect the speaker cable to the system board.
7. Connect the touchpad cable to the system board and close the latch to secure the cable.
8. Connect the keyboard-backlight cable to the system board and close the latch to secure the cable.
9. Connect the display cable on to the connector on the system board.
10. Adhere the tape that secures the display cable to the system board.
11. Lower the right display hinge, and replace two screws (M2.5x5) and (M2.5x4).
Next steps
1. Install the memory module.
2. Install the heat sink - discrete or UMA based on the configuration selected.
3. Install the GPU fan.
4. Install the system fan.
5. Install the WLAN card.
6. Install the SSD-1 (M.2 2280 or M.2 2230).
7. Install the SSD-2 (M.2 2280 or M.2 2230).
8. Install the battery.
9. Install the base cover.
10. Follow the procedure in after working inside your computer.
Disassembly and reassembly
59


 To Next Page