7
Features
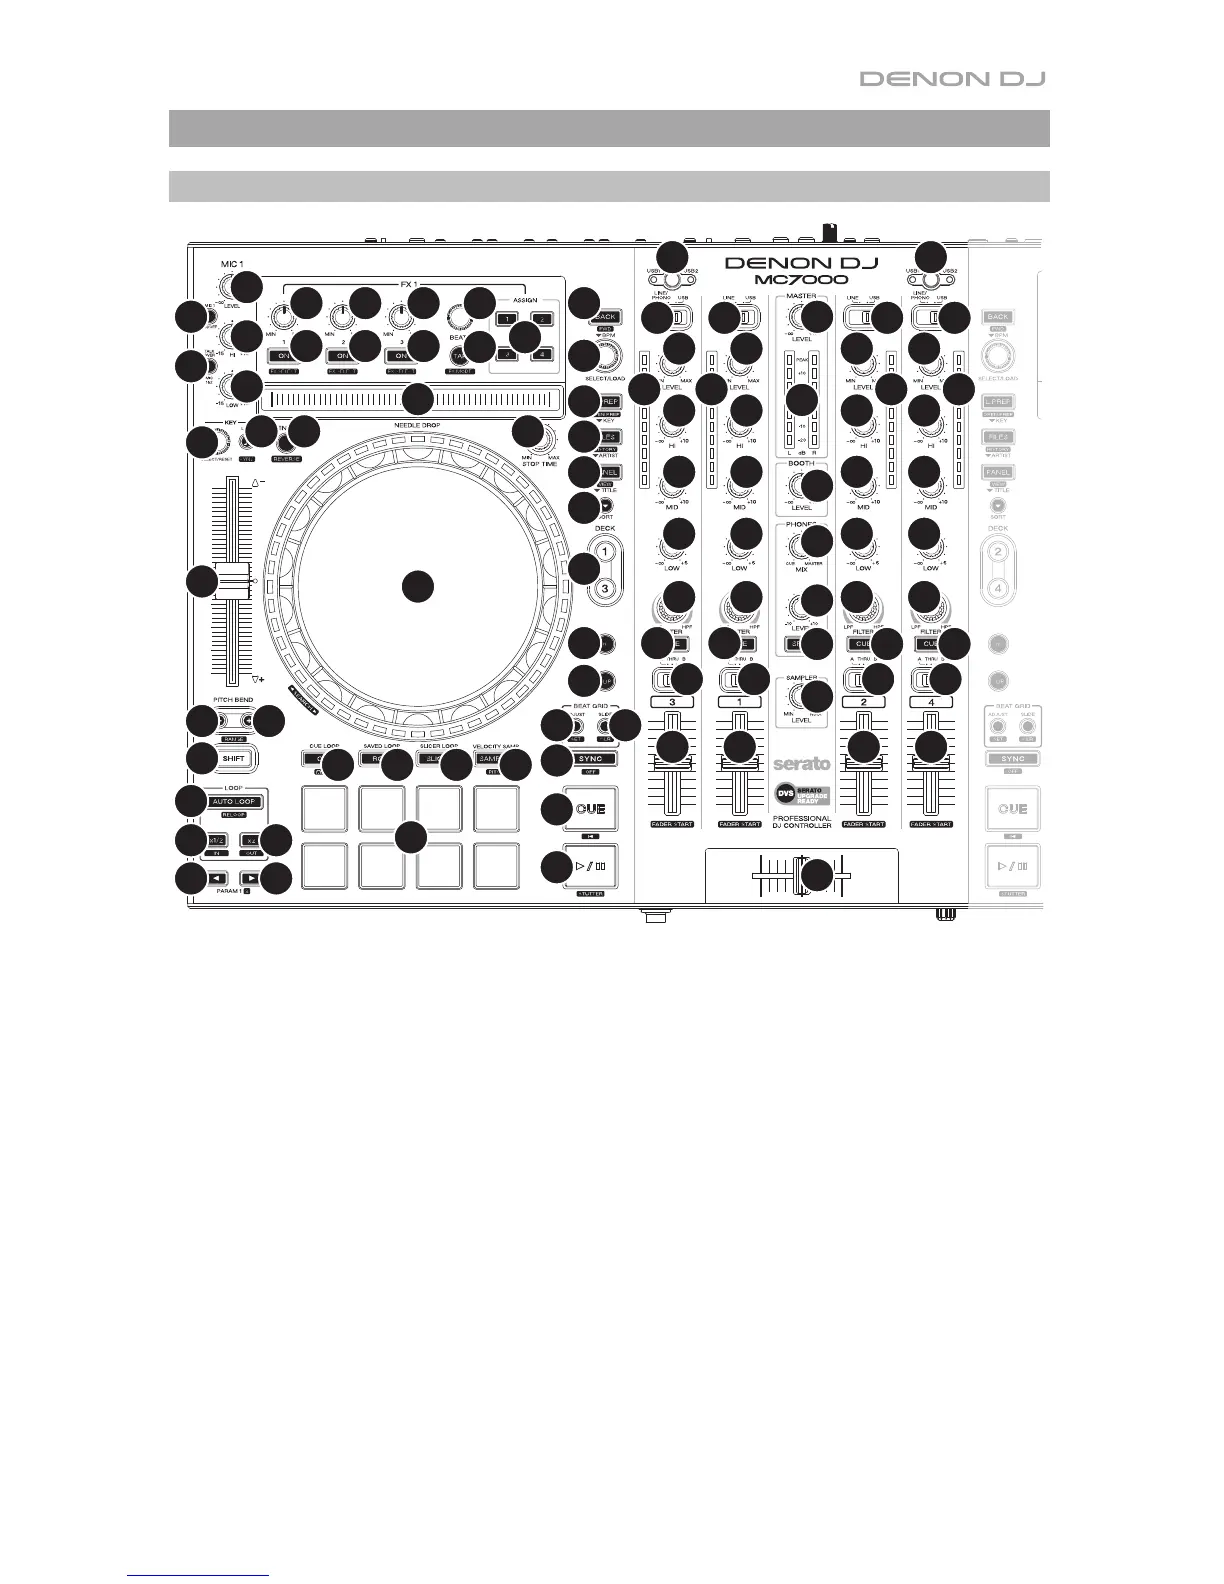
Top Panel
1
2
4
5
6
7
99 99
10
11
12
13
14
15
16
18
18
19
20
22
21
24
23
25
26
27
28
29
30
31
32 32
33
34
35
36
37
38
39
41
42
43 43
45
46
47
48
49
50
51
52
53
54
55 55
55 58
56 56 56
57
44
40
17
8
111
2
33 33
444
5
666
777
55
55 55
55 55
888
1. Input Selector: Set this switch to the desired audio source from this channel: USB (a track
playing on that layer in the software), Line (a device connected to the line input on the rear
panel), or Line/Phono (a device connected to the line/phono input on the rear panel).
Please note that the Line/Phono selector switches on the rear panel must also be set
properly. Also, a channel’s controls will only send MIDI information when its input selector
is set to USB.
2. USB Selector: Press this button to select whether the deck is controlling the computer
connected to USB Port 1 or USB Port 2. Remember to set the channel’s input selector
to USB if you want it to play the audio from that layer in the software.
3. Channel Level: Turn this knob to adjust the level of the pre-fader, pre-EQ audio signal for
the channel.
4. Channel Level Meters: These LEDs display the audio signal level of the channel.
5. Channel EQ: Turn these knobs to boost or cut the high, mid-range, and low frequencies
for the channel.
6. Channel Filter: Turn this knob to adjust the filter applied to the channel. Turn the knob
counterclockwise to apply a low-pass filter. Turn the knob clockwise to apply a high-pass
filter.
7. Channel Cue: Press this button to send the channel’s pre-fader signal to the headphones’
cue channel.