13
www.DentalEZ.com
866-DTE-INFO
13
DentalEZ
®
Equipment
PN: 2717-256E
Tools Required
• Phillips-head Screwdriver
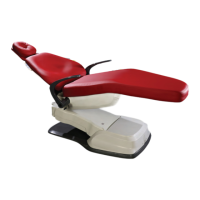
1. Disconnect the chair power.
2. Using a Phillips-head screwdriver and the
two 10-32 × 3/8 screws supplied in the kit,
attach the bracket to the lower lift arm casting
located in the base (Figure 8).
3. Route the foot control cable through the
bracket.
4. Install the wire strain relief into the bracket.
5. Plug the foot control cable into either the 6, 7,
or 13 J connection on the control board.
6. Reconnect the power to the chair and test for
proper function of the foot control.
Section III Installation
Wired Foot Control Wireless Controls
If wireless foot control and/or wireless touchpad
control options were ordered, they must be paired
with the NuSimplicity Chair.
Tools Required
• Phillips-head Screwdriver
Pair Wireless Devices to Chair
1. Raise chair base up its full UP position.
2. Remove two (2) Phillips-head screws from
front of base (pump) cover and loosen two (2)
screws in back of cover, then slide o cover
(Figure 9).
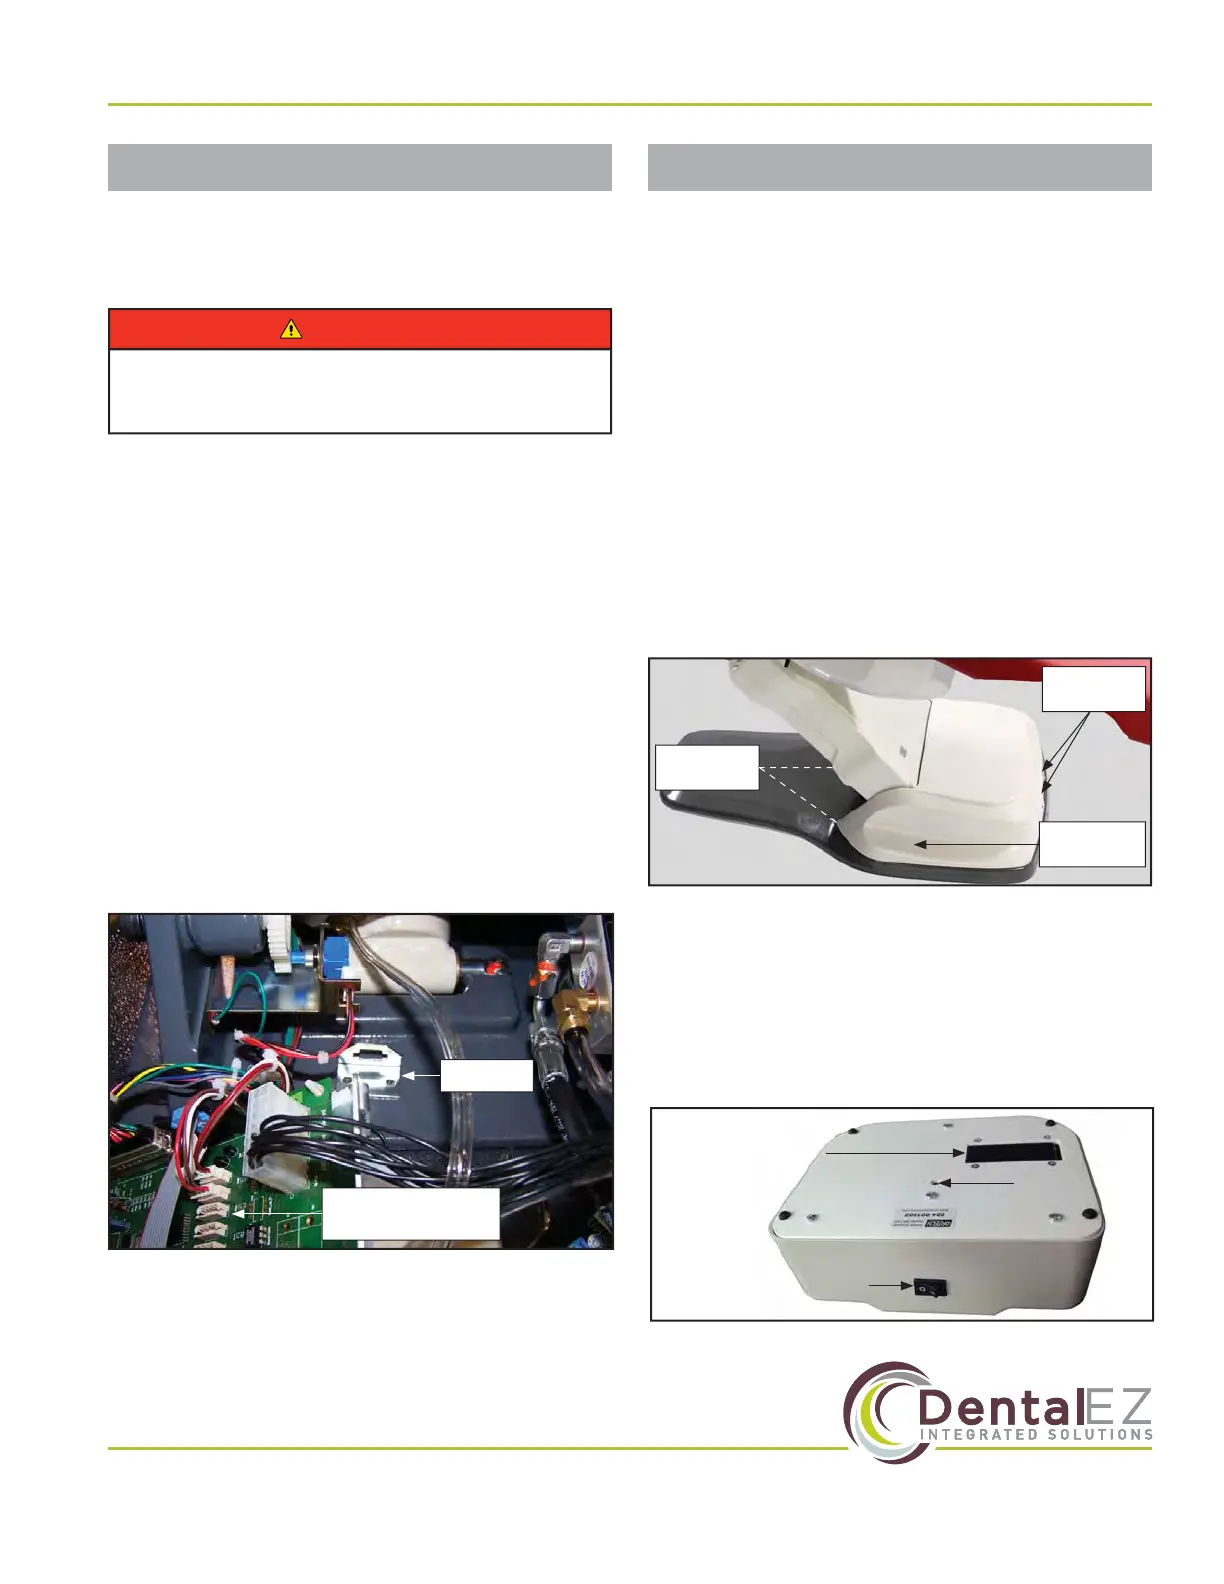
3. Make sure wireless device (foot control and/
or touchpad) has two (2) fresh AAA batteries
installed.
4. Turn wireless device to ON (Figure 10 and
Figure 11).
To prevent any chance of electrical shock,
always disconnect power when indicated.
WARNING
J Connections
Use 6, 7 or 13
Bracket
Figure 8. Control board
Remove
Screws (2)
Loosen
Screws (2)
Base Pump
Cover
Figure 9. Remove base pump cover
Battery
Compartment
ON/OFF Switch
(Shown in OFF Position)
Figure 10. ON/OFF switch for wireless foot control
Pairing
Switch