15
www.DentalEZ.com
866-DTE-INFO
15
DentalEZ
®
Equipment
PN: 2717-256E
Section III Installation
Air Glide (Optional)
NOTE: If the air glide option was ordered,
the air regulator was attached to the base
chassis prior to shipment of the chair.
1. Place the NuSimplicity Chair on a smooth, hard
and level (vinyl, tile or terrazzo type) oor.
2. Connect the air glide tubing to a regulated air
supply source (usually 552 kPa [80 PSI] on
most dental units) (Figure 15).
3. The air glide is pre-set at the factory to
138 kPa (20 PSI). Because of additional
optional equipment, it may be necessary to
increase the pressure. Slowly increase the
air pressure by adjusting the air regulator
on the base chassis until the chair begins to
“bounce”. This is an indication that the air
pillow is over-pressurized and can not seal to
the oor. Slowly decrease the pressure until
the chair stops bouncing.
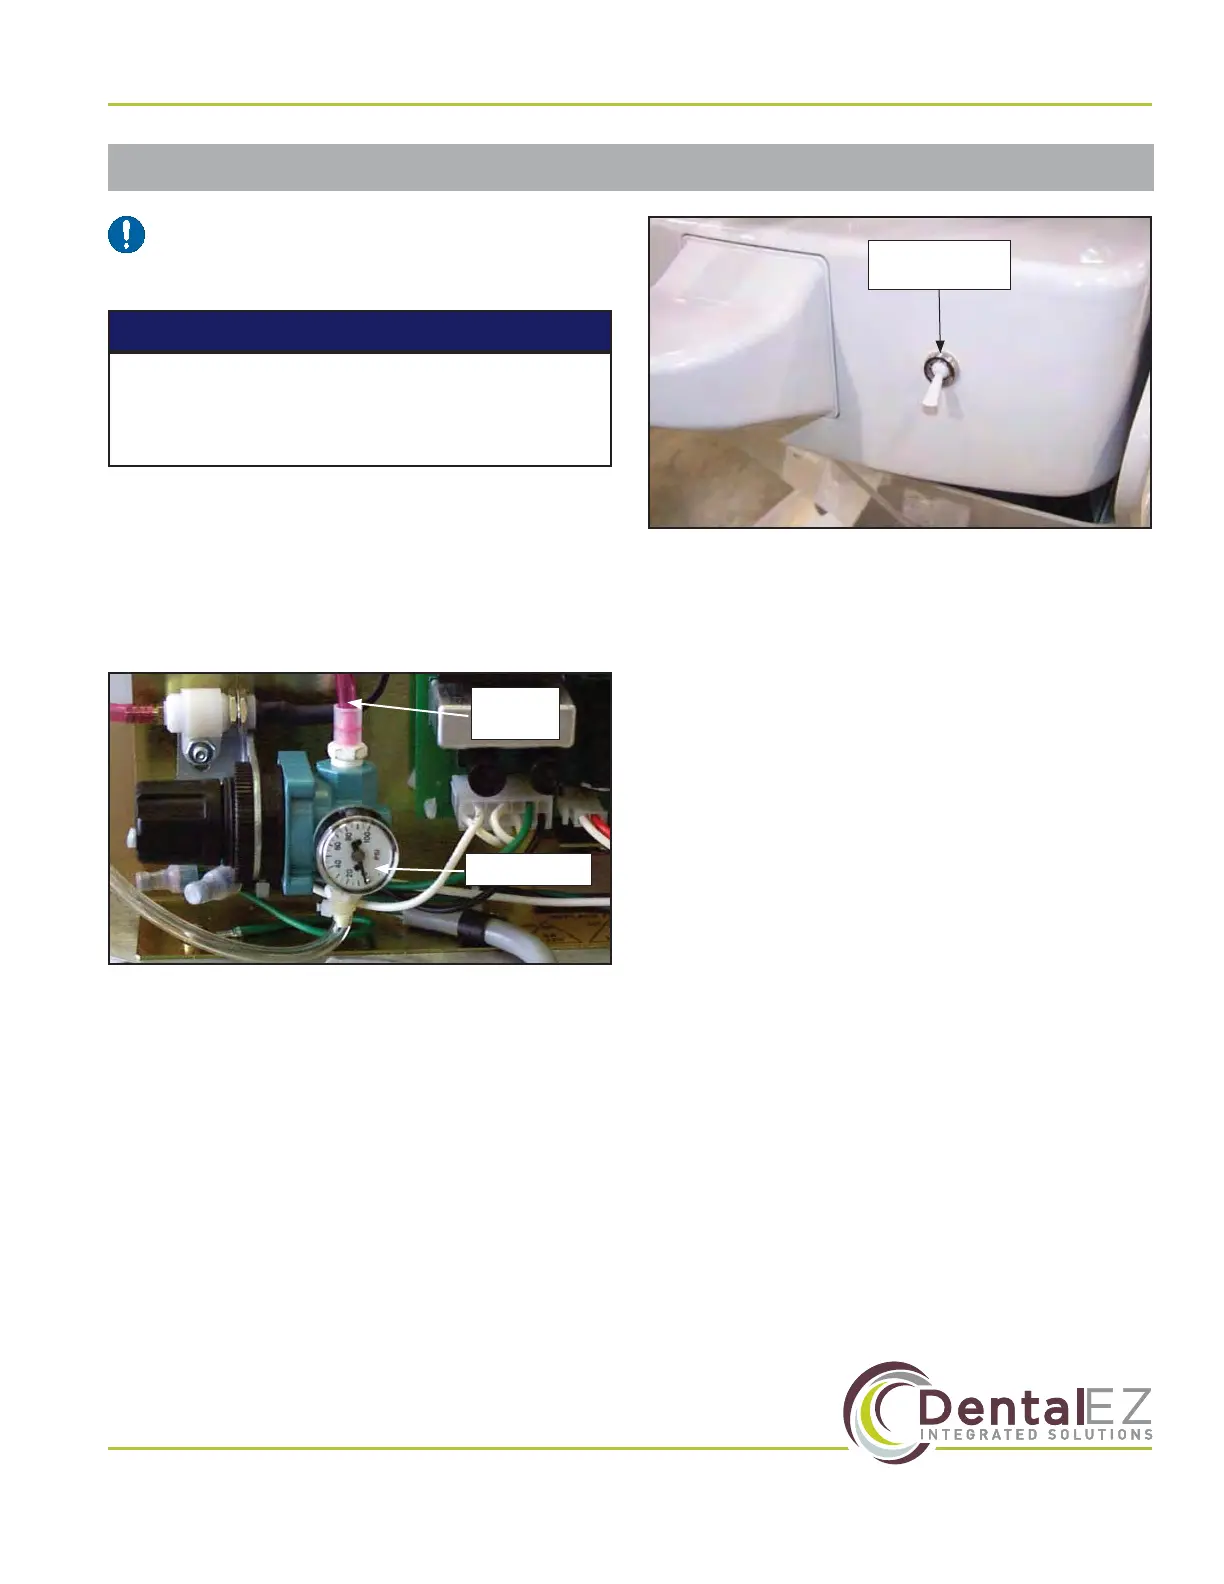
4. Actuate the air regulator toggle switch
(Figure 16) at the rear of the chair on the base
cantilever section cover.
Air Regulator
Air Glide
Tubing
Figure 15. Air glide tubing connected to air regulator
5. Check for proper air glide operation.
6. Make sure the doctor and sta receive proper
air glide feature operation instructions (see Air
Glide in Section IV Operation of this manual).
Air Regulator
Toggle Switch
Figure 16. Air regulator toggle switch
For proper air glide operation, the oor MUST
BE LEVEL and have a smooth, hard and non-
obstructive surface.
NOTICE