6
25880 0
25881 0
25882 0
● Close fuel stopcock.
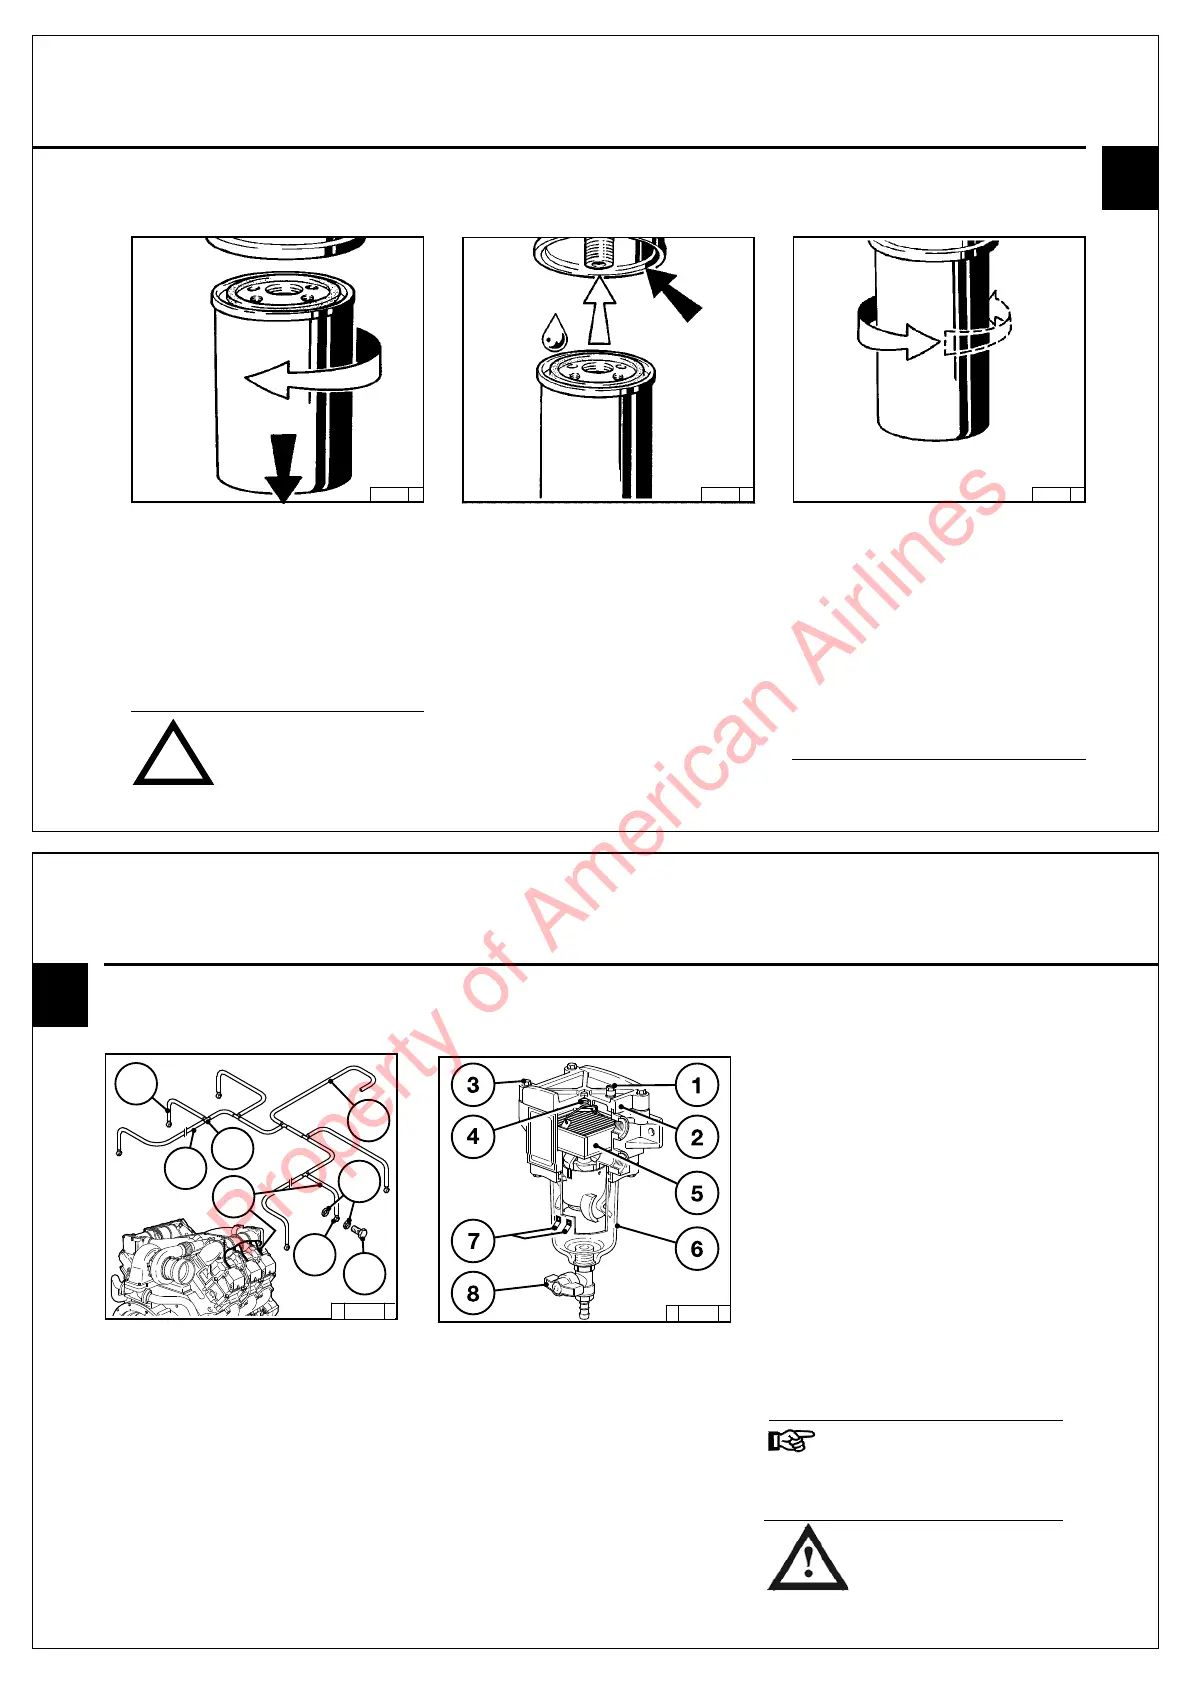
● Undo fuel filter cartridge with commercial tool
and spin off.
● Catch any escaping fuel.
● Clean sealing surface of filter carrier if
necessary.
● Apply light film of oil or diesel fuel to rubber
gasket of new fuel filter cartridge.
● Screw in the cartridge finger tight against the
gasket.
● Tighten fuel filter cartridge firmly.
● Open fuel stopcock.
● Check for leaks.
!
When working on the fuel system,
keep open flames away!
Do not smoke!
6.2.1 Renewing Fuel Filter
6.2 Fuel System Service and Maintenance
Bleeding of the fuel system is not necessary.
6
Service and Maintenance
6.2 Fuel System
© 31 891 0
1
5
7
3
2
3
4
6
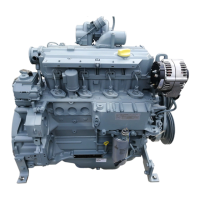
6.2.2 Replace fuel oil leak line
● Close the fuel shut-off valve.
● Remove valve cover.
● Loosen and remove banjo bolts 7.
● Remove rubber hoses 1, 3, 4, unions 2 and O-
rings 6 and dispose of in accordance with envi-
ronmental regulations; banjo union 5 and banjo
bolt 7 can be re-used.
● Connect new oil leak line (complete) with banjo
union 5 to rubber hoses.
Fasten oil leak line using existing banjo bolt 7 and
two new O-rings 6.
● Re-fit valve cover.
● Open fuel shut-off valve.
● Check for leaks after start-up.
6.2.3 Fuel Pre-filter Element
Clean/Replace if necessary
Clean (purge) - remove water:
● Turn off engine or, in the case of a change-
over filter, switch over to the other filter.
● Close the fuel stopcock or supply. (if
available)
● Open the bleed screw 1 on the cover 2
● Place the fuel collector underneath the fuel
pre-filter.
● Empty water and dirt from the bowl 6 by
opening (press in and turn slightly without
using force) the drain cock 8 and close the
drain cock 8 again
● Close the bleed screw 1 on the cover 2 again
● Bleed the fuel pipe according to instructions,
see 6.2.5 opposite
Changing the filter element 5:
Change at least once a year or as required
(drop in performance also after purging)
● Turn off the engine or switch to other filter in
case of changeover filter
● Close the fuel stopcock or supply (if available)
● Loosen the cover screws 3 diagonally
● Remove the cover 2
● Remove the spring cassette 4
● Remove the filter element 5 from the bracket
● Insert new filter element 5
● Place spring cassette 4 on the element
● Check that the cover seal is fit properly in the
cover 2 and check for damage (change if
necessary)
● Tighten the cover 2 with the screws 3
diagonally (torque 6 Nm)
● Check the cover 2 for proper fit and leaks
● Bleed the fuel system, see 6.2.3.
Naked flames are prohibited
when working on the fuel
system! Do not smoke!
Dispose of old fuel in an environ-
mentally friendly way!
The connection of a warning system
(lamp/horn) via contacts 7 is specified.
Immediate maintenance is necessary when
the warning system is triggered.
© 31 811 2
Property of American Airlines