6
26 407 0
A1 A2 A3
B1 B2 B3
A1 A2 A3
B1 B2 B3
A1 A2 A3
B1 B2 B3
A4
B4
A1 A2 A3
B1 B2 B3
A4
B4
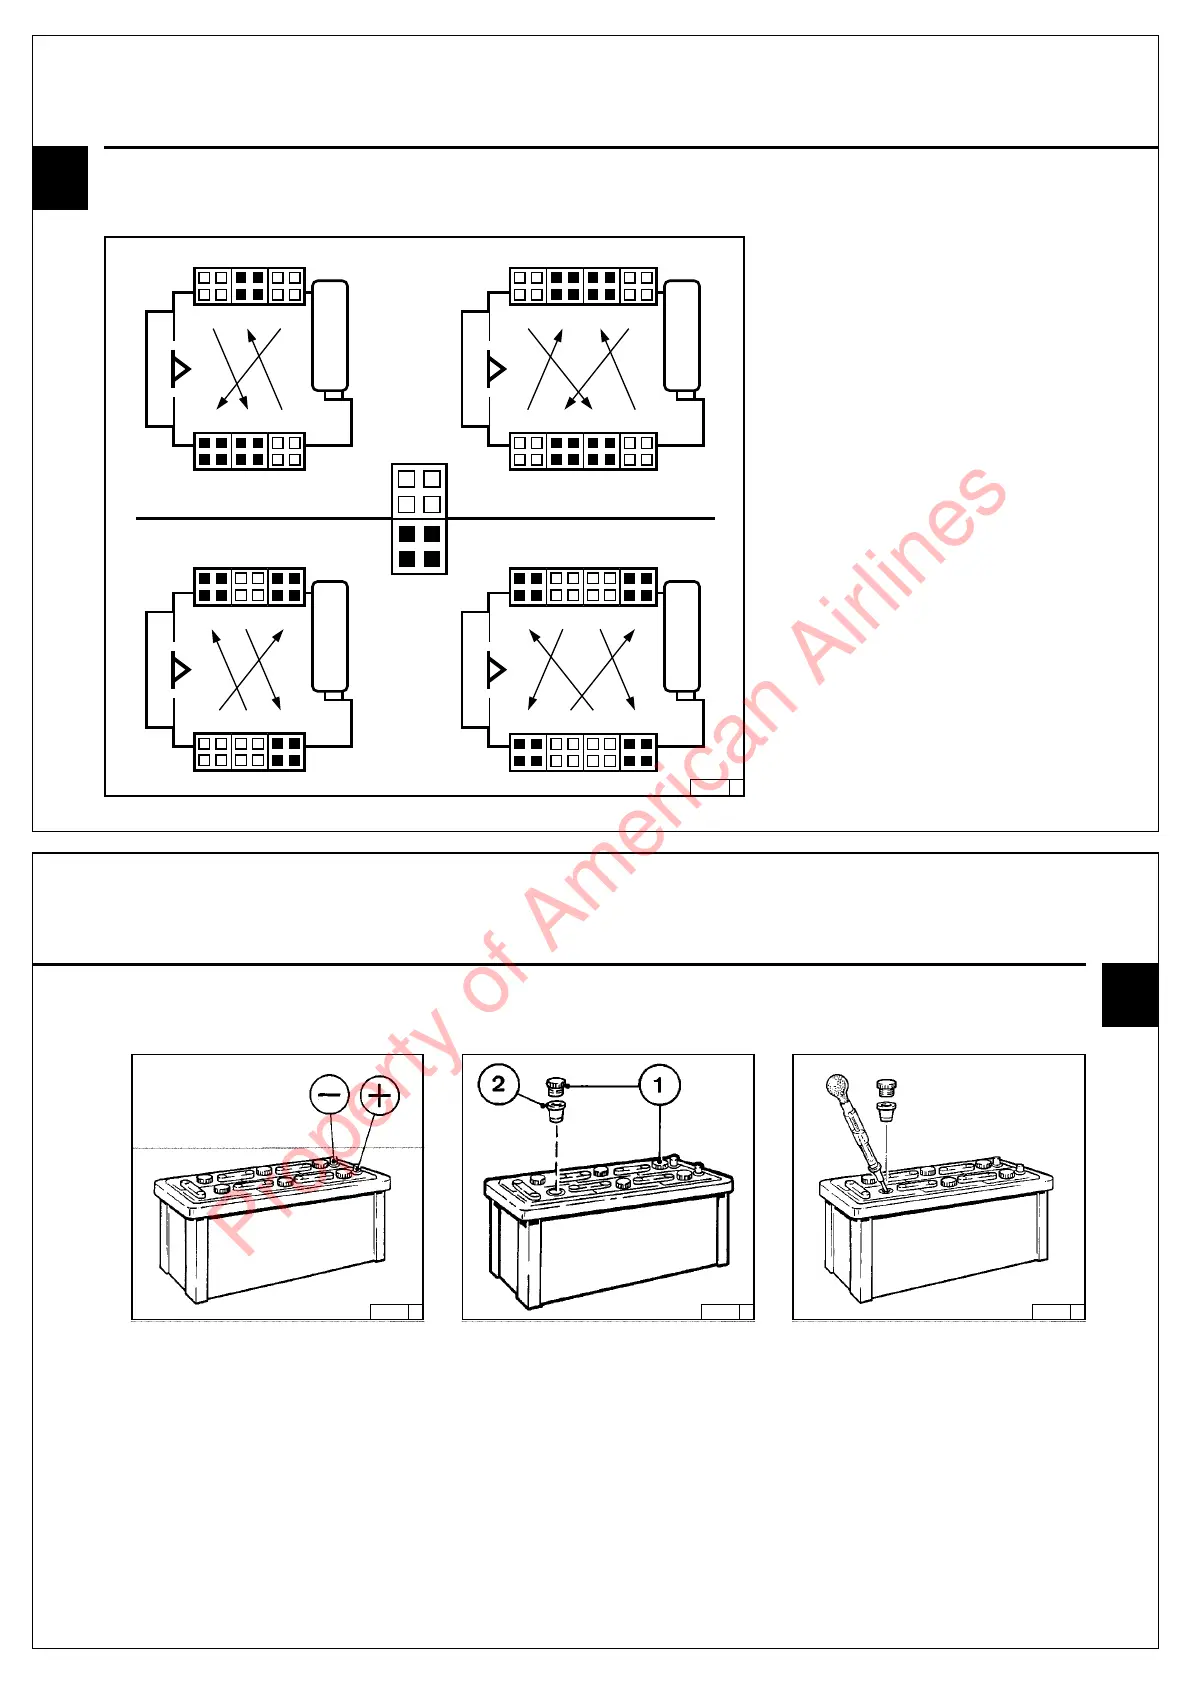
● Adjustment
Turn crankshaft according to sequence shown
in the diagram (starting with cyl. 1).
The valves of the relevant cylinder overlap,
marked in white, (exhaust valves about to
close, inlet valves about to open). Adjust
clearance of valves, marked in black,
according to schematic. Mark the respective
rocker arm with chalk to show that the
adjustment has been done.
Service and Maintenance 6.6 Adjustments
6
25895 0 24232 3 25896 0
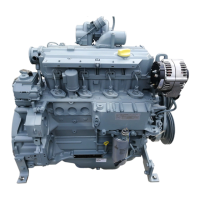
6.7.1 Battery
6.7.1.1 Checking Battery and Cable
Connections
6.7.1.2 Checking Electrolyte Level 6.7.1.3 Checking Specific Gravity of
Electrolyte
● Keep battery clean and dry.
● Undo soiled terminals.
● Clean battery plus and minus poles and
terminals and apply a film of acid-free and acid-
resistant grease.
● When reconnecting, ensure good contact of
terminals. Fasten clamping bolts finger tight.
● Remove cell caps 1.
● If electrolyte test elements 2 are fitted:
The level should be high enough to wet the
bottom of these.
● If no such elements are provided :
Check to make sure that the level is 10-15 mm
above the top edge of the plates.
● Top up with distilled water if necessary.
● Fit cell caps back in position.
● Measure the specific gravity of the individual
cells with a commercial hydrometer.
The measured values (see adjacent table)
indicate the state of charge of the battery.
During the measurement, the temperature of
the electrolyte should preferably read 20 °C.
6.7 Accessories Service and Maintenance
Property of American Airlines