EasyManuals Logo

DFI PS35-BC User Manual

DFI PS35-BC
122 pages
To Next Page IconTo Next Page
To Previous Page IconTo Previous Page
Page #47 background imageLoading...
Page #47 background image
47
2
Hardware Installation
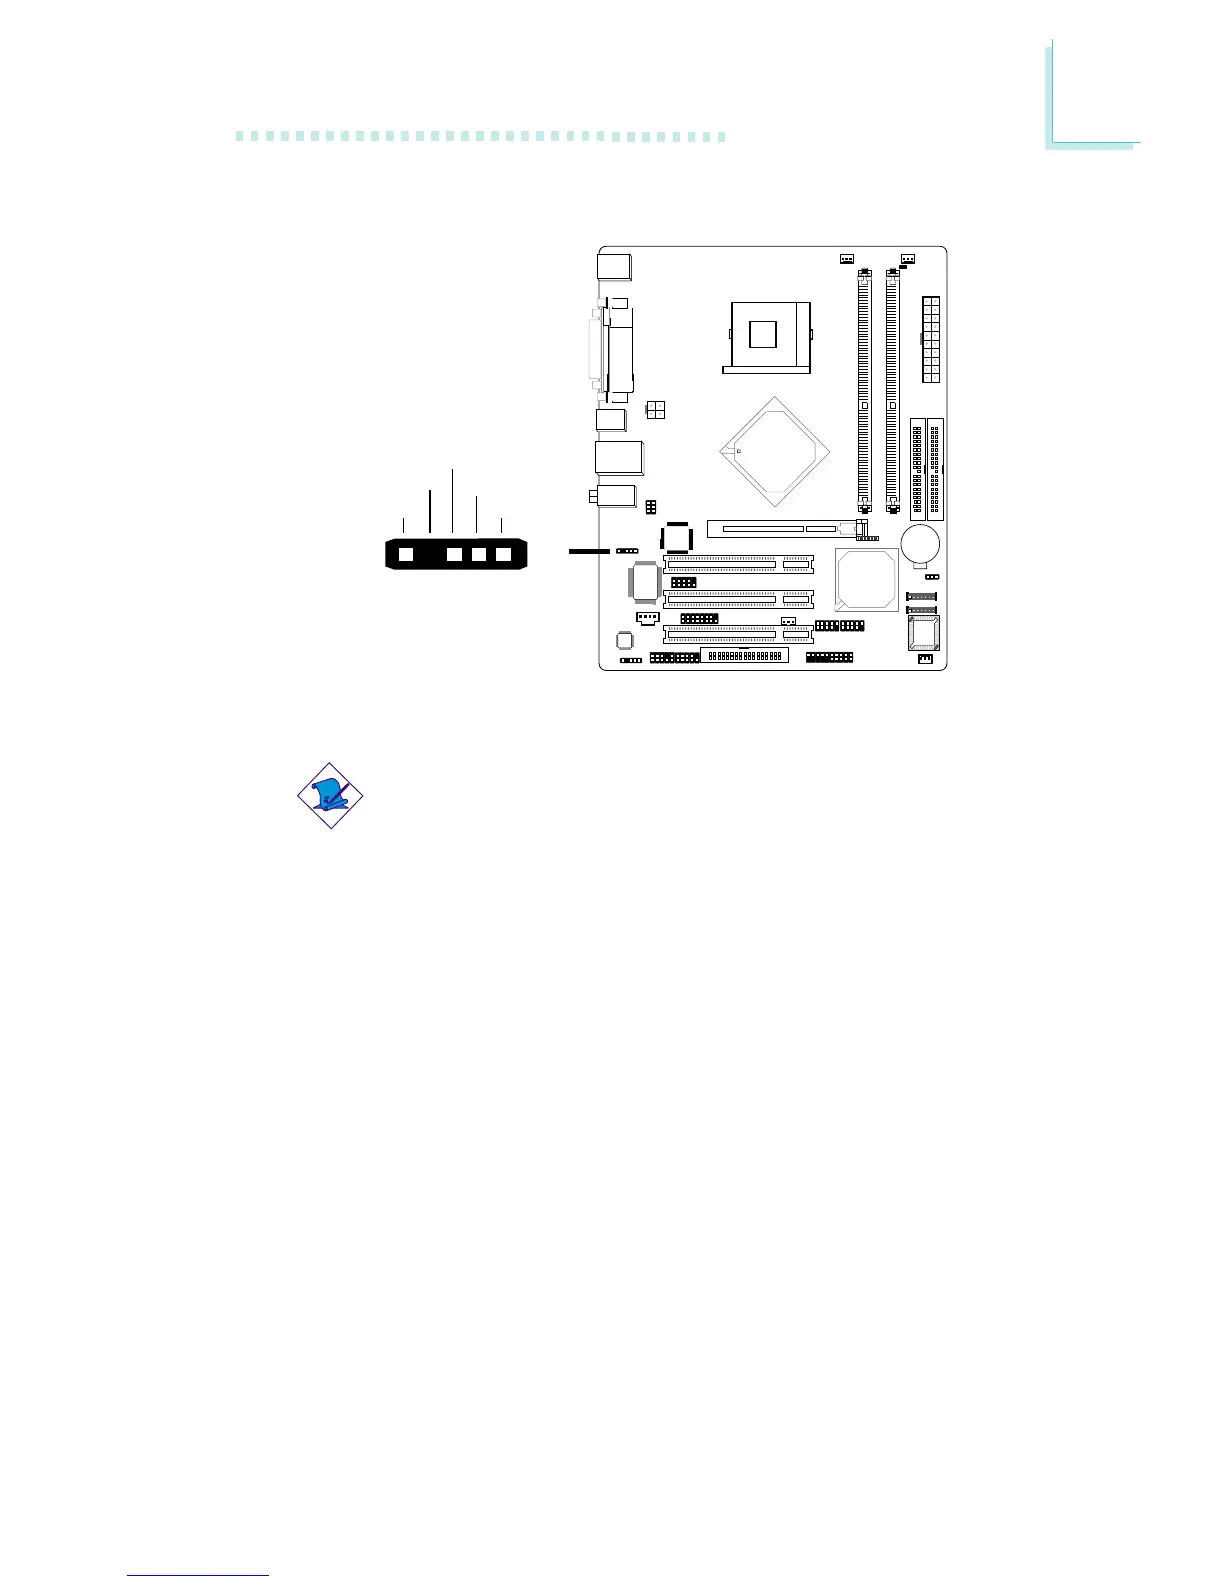
2.6.7 IrDA Connector
Connect your IrDA cable to connector J2 on the system board.
Note:
The sequence of the pin functions on some IrDA cable may be
reversed from the pin function defined on the system board.
Make sure to connect the cable to the IrDA connector
according to their pin functions.
BIOS Setting
Set “UART2 Mode Select” (“Super IO Device” field) in the Inte-
grated Peripherals submenu of the BIOS to the type of IrDA
standard supported by your device.
Driver Installation
You may need to install the proper drivers in your operating system
to use the IrDA function. Refer to your operating system’s manual or
documentation for more information.
15
VCC
N. C.
IRRX
Ground
IRTX
"

Table of Contents

Questions and Answers:

Question and Answer IconNeed help?

Do you have a question about the DFI PS35-BC and is the answer not in the manual?

DFI PS35-BC Specifications

General IconGeneral
Form FactorMicro ATX
Socket TypeLGA 775
FSB1333/1066/800 MHz
Max Memory Support8GB
Storage Interface4 x SATA 3Gb/s, 1 x IDE
USB Ports8 x USB 2.0 (4 rear, 4 via headers)
LAN Speed10/100/1000 Mbps
Power Connector24-Pin ATX, 4-Pin ATX 12V
Supported CPUIntel Core 2 Quad, Core 2 Duo, Pentium Dual-Core, Celeron
Expansion Slots1 x PCIe x16, 1 x PCIe x1, 2 x PCI
PS/22 (Keyboard/Mouse)

Related product manuals