22
BAS-SVX069F-EN
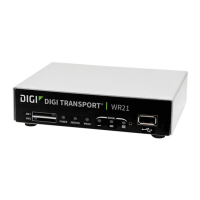
Installing the Firewall Router
Installation procedures will vary depending on whether adequate space is available to mount the
firewall router inside the Trane enclosure.
Internal Kit Installation
If adequate space is available within the Trane enclosure, use the Internal Mount Kit (Part# WR21-
NOCELL-TRANEKIT-INTERNAL).
1. Attach the provided DIN rail to the Digi firewall router.
2. Mount the Digi firewall router inside the Trane Enclosure.
3. Connect the Digi firewall router to Ethernet Port 2 on the Tracer BAS controller using an
Ethernet cable.
4. Connect power to the firewall router:
• Use the provided locking barrel connector to bare wire connector (Part #76000821)
– Connect the PM014 power supply to the bare wire. Connect the locking barrel
connector to the Digi firewall router.
The locking barrel connector has a black and red wire. There are two IMC terminal
connections on the PM014 power supply. Connect both wires into either the left or the
right IMC terminal connection. (See the following figure.)
Figure 17. PM014 power supply IMC terminal connections
Black wire
Red wire
Red wire
Black wire
External Kit Installation
When inadequate space is available within the Trane Enclosure , or you prefer to install the Digi
firewall router inside the Trane Enclosure, use the External Mount Kit (Part# WR21-NOCELL-
TRANEKIT-EXTERNAL).
1. Table-mount the firewall router next to an electrical receptacle and within Ethernet distance
of the Trane Enclosure.
Alternatively, you may wish to utilize the remote enclosure (available separately) on a wall
near the electrical receptacle.
2. Connect the Digi firewall router to Ethernet Port 2 on the Tracer BAS controller using an
Ethernet cable.
NNoottee:: Maximum cable length is 300 ft.
3. Connect power to Digi firewall router by utilizing the included 120V power supply.