35
8. To clear a loop from memory, press and hold the Up footswitch until the main display
shows LOOPCLRD.
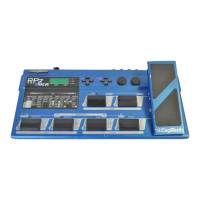
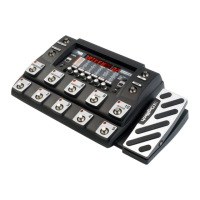
If using the optional FS3X to control the Looper, follow these steps for a quiet start:
1. To begin looping, press the Down footswitch. The Record LED on the matrix will flash
red indicating the Looper is armed and ready to record but not recording yet.
2. To begin recording, just start playing. The Record LED will now light solid red indicating
recording is in progress.
3. To set the loop point, press the Down footswitch again. The loop point will be set and
the recorded phrase will now begin playback. The Record LED will turn off and the green
Play LED will now be lit.
4. To add overdubs to the loop, press the Down footswitch again. The yellow Overdub LED
will now light (the green Play LED will still be lit) indicating that anything being played will
be merged with the loop being played.
5. Press the Down footswitch again to stop overdub recording which will turn off the Over-
dub LED and return the loop to normal playback.
6. To stop loop playback, press the Up (right) footswitch. This does not clear out the loop
but simply stops playback. Pressing the Down (left) footswitch again will resume playback.
7. To clear a loop from memory, press and hold the Mode (left) footswitch until the main
display shows LOOPCLRD.
If using the optional FS3X to control the Looper, follow these steps for on the fly use:
1. Start playing your guitar.
2. To begin looping, press the Down footswitch. The Looper will start recording as soon as
you press the Down footswitch, and the Record LED on the matrix will light red after
about half a second.
3. To set the loop point, press the Down footswitch again. The loop point will be set and
the recorded phrase will now begin playback. The Record LED will turn off and the green
Play LED will now be lit.
4. To add overdubs to the loop, press the Down footswitch again. The yellow Overdub LED
will now light (the green Play LED will still be lit) indicating that anything being played will
be merged with the loop being played.
5. Press the Down footswitch again to stop overdub recording which will turn off the Over-
dub LED and return the loop to normal playback.
6. To stop loop playback, press the Up (right) footswitch. This does not clear out the loop
but simply stops playback. Pressing the Down (left) footswitch again will resume playback.
7. To clear a loop from memory, press and hold the Mode (left) footswitch until the main
display shows LOOPCLRD.
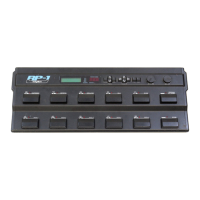
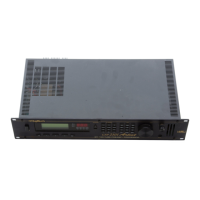
Tuner
The RP1000 features a built-in chromatic tuner with variable tuning references (427-453, A=Ab,
A=G, A=Gb). To use the tuner, follow these steps:
1. Press and hold the currently active preset’s footswitch to access the Tuner for 2 seconds.
The display briefly flashes TUNER.
2. To begin tuning, play a note on your guitar (a harmonic at the 12th fret usually works best).
3. The numeric display shows the note being played, and the alpha-numeric display indicates
whether the note is sharp or flat. Arrows to the left (<<<) indicate the note is sharp and
should be tuned down. Arrows to the right (>>>) indicate the note is flat and should be
tuned up. When your note is in tune, -><- is displayed.
4. To exit the Tuner, press any numbered footswitch.
While the tuner is selected, you can set your tuning reference with Knob 1. The default fac-
tory setting is A=440 Hz. The tuning references range from 427 Hz to 453 Hz (± 50 cents (1/2
semitone) from either direction of 440 Hz). Below 427 Hz, are alternate dropped tunings. The
alternate tunings are REF A(A=Ab), REF G(A=G), and REF G(A=Gb). The display window briefly
flashes the selected tuning preference.
 Loading...