18
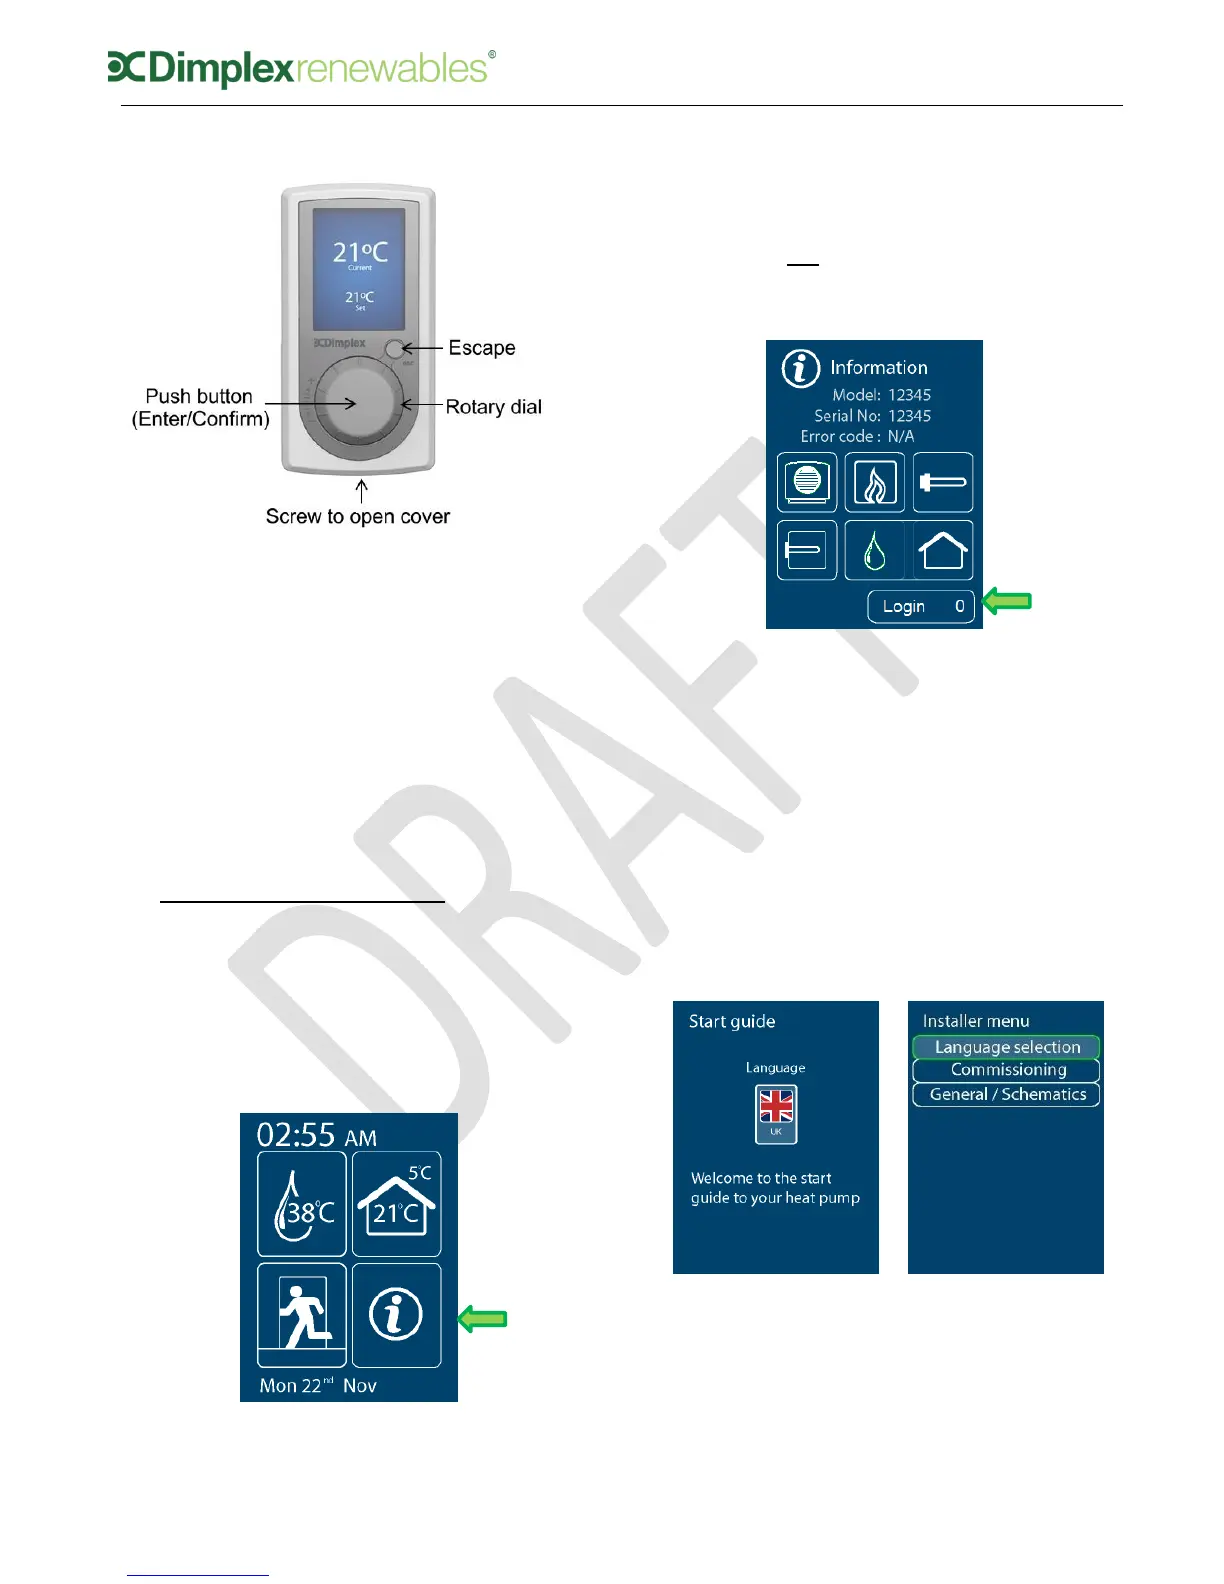
5.4 Using the User Interface
Figure 12: Main user interface (UI)
Select – click middle of the rotary
dial (Enter/Confirm)
Change selected value – turn the
rotary dial to desired value
Confirm change – click middle of
rotary dial (Enter/Confirm)
Back up one level – click small
button (Escape)
6 Pre-commissioning
When switching on the heat pump for
the first time, and after start up
sequence, you will be greeted with the
welcome screen, shown in figure 13.
Figure 13: Home screen
To access the Installer Menu, you must
click into the messages menu. Once in
the messages menu, you must select
‘Login’ as shown in figure 14, and turn
the dial to 55 in order to access the
Installer Menu.
Figure 14: Home screen
When you enter the installer menu, you
will see the ‘Start guide’ screen, as
shown in figure 15 (a). Selecting ‘UK’
will bring you to the Installer Menu.
Select ‘Commissioning’ to begin and
follow the step by step guide on the
user interface, which will take you
through all necessary steps of
commissioning. For commissioning
instructions, move to Section 7 now.
(a) (b)
Figure 15: (a) Welcome screen
(b) Installer menu