1144
© 2005 Directed Electronics—all rights reserved
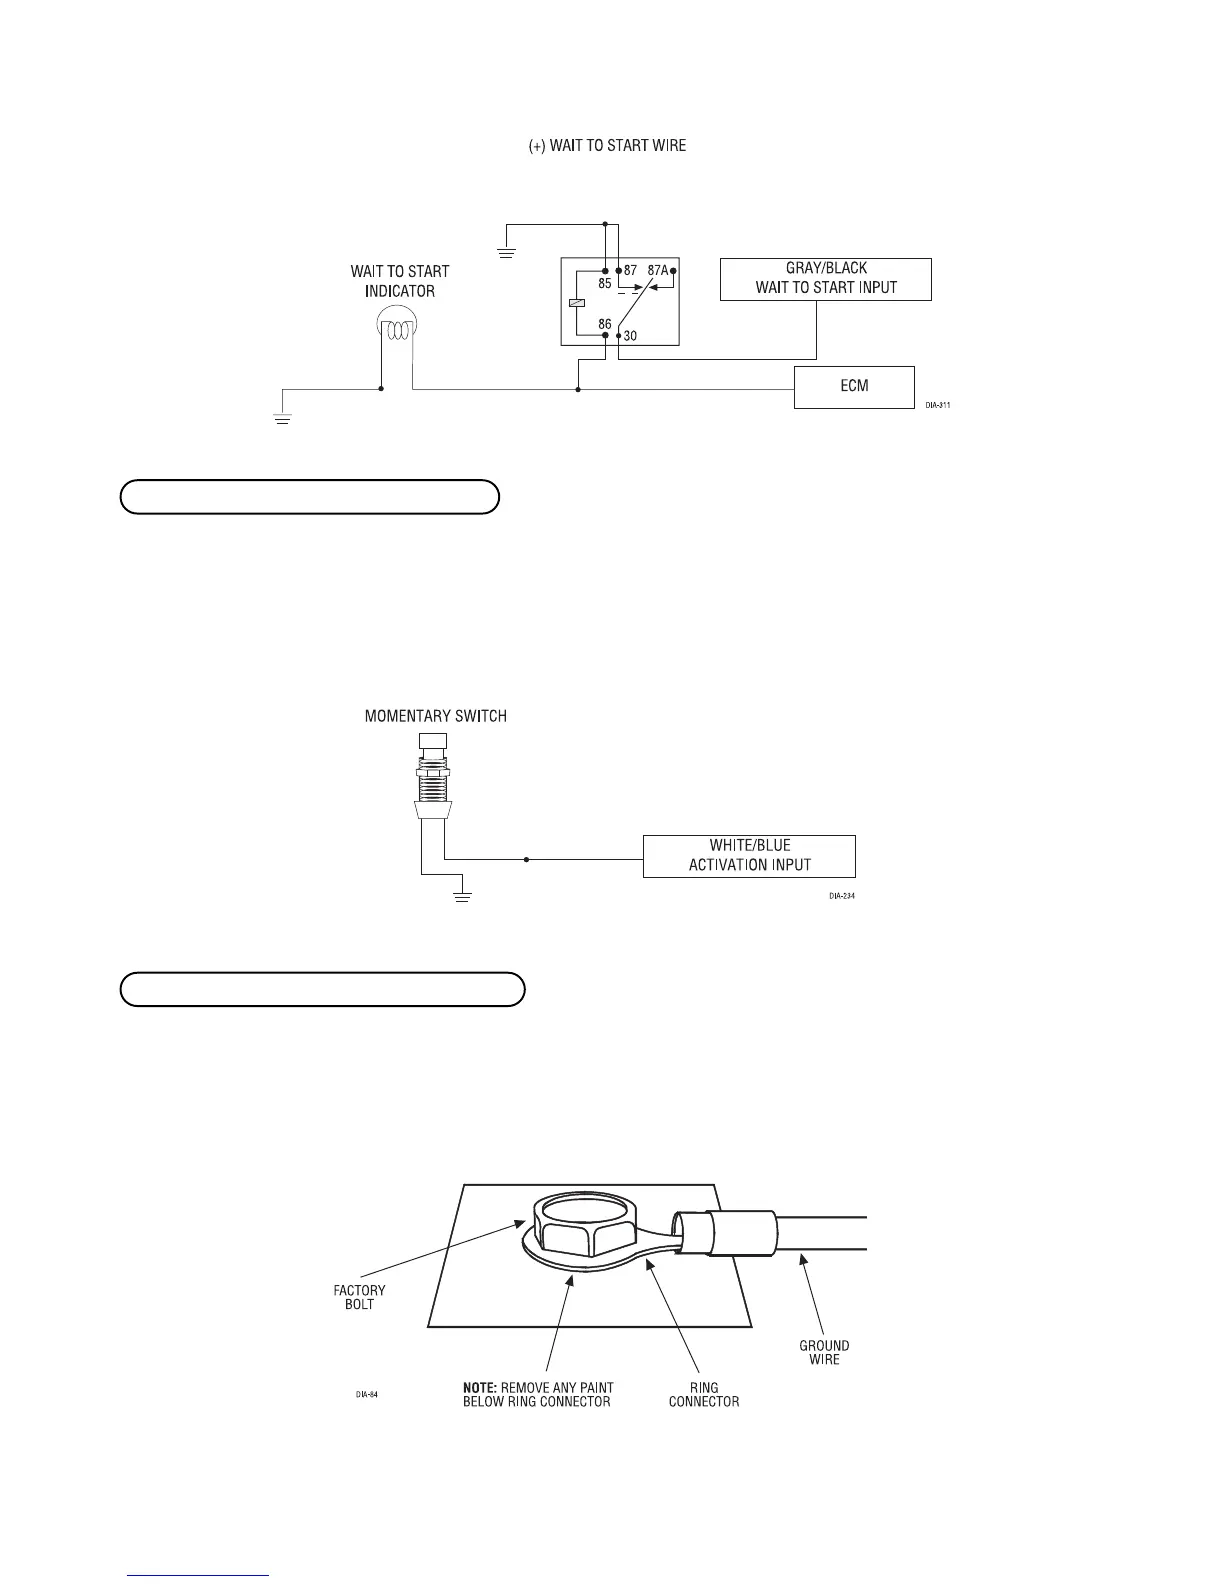
This input comes from the factory set 2 activation pulses. This means that it is necessary to have 2 consecutive
12V pulses on the white/blue wire for the remote start to activate or to deactivate.
NNOOTTEE::
When the activation pulse count can be programmed to 1, 2, or 3 pulses.
Remove any paint and connect this wire to bare metal, preferably with a factory bolt rather than your own screw.
(Screws tend to either strip or loosen with time.) We recommend grounding all your components to the same
point in the vehicle.
HH11//88 BBLLAACCKK ((--)) cchhaassssiiss ggrroouunndd ccoonnnneeccttiioonn
HH11//66 WWHHIITTEE//RREEDD ((++)) aaccttiivvaattiioonn iinnppuutt