lPage 77
Installing a Legacy DISH 500 System
Note: If you cannot find the signal, turn the dish back to the original
azimuth setting. Then, loosen both elevation bolts just enough to be able
to tilt the dish. Tilt the dish up by two degrees, and then tighten both bolts.
Now, try turning the dish back and forth again. Repeat these steps, raising
and lowering the elevation, until you find the satellite signal.
9. Once you have a signal, turn the dish assembly back and forth very
slightly until the signal strength bar displays the strongest possible signal
strength. Tighten the mast clamp bolts. Then, loosen the elevation bolts
and adjust the elevation of the dish up and down slightly until the signal
strength bar displays a strong signal. Do not adjust skew. Tighten all the
bolts in the dish assembly so that the dish cannot be moved.
10. Once you have the strongest possible signal, press the Cancel button on
the remote to exit the Point Dish/Signal menu. The receiver displays an
Attention message asking whether the installation is complete. If the
answer is yes, select the Yes option. The receiver will begin taking a
software upgrade. You will see a Warning that “Vital program
information will now be downloaded into your receiver.” You will also
see a status bar showing the progress of this upgrade.
11. Once the software upgrade is complete, you will see a message that your
receiver’s memory is being upgraded.
While this message is displaying, the green power light on the receiver’s
front panel will blink. Do not disturb the receiver while the green light is
blinking.
This message may disappear, your screen may go blank for a few minutes,
and the green light may continue to blink. This is normal and does not
indicate a problem with the receiver.
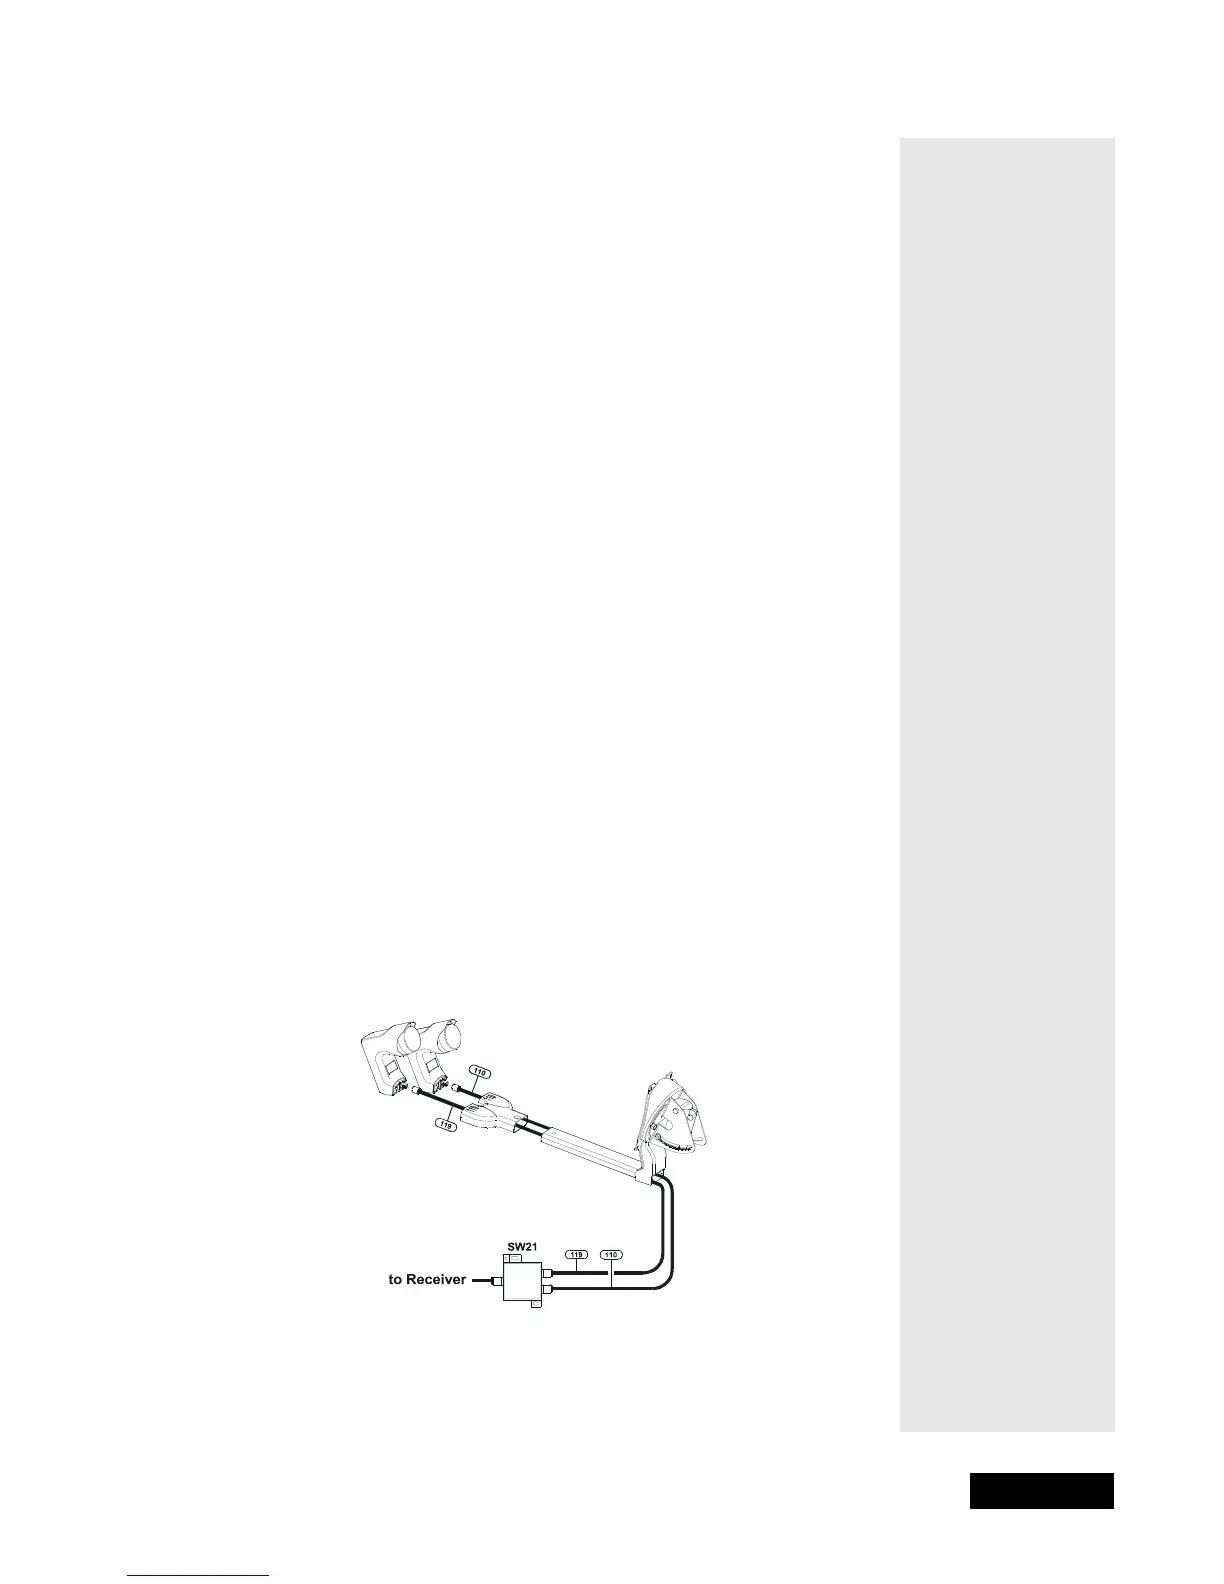
12. Next, connect the “119” cable from the LNBF to the Dish 1 connection
on the multi-dish switch. Connect the “110” cable from the LNBF to the
Dish 2 connection the multi-dish switch. Connect a cable from the multi-
dish switch to the Satellite In port on the receiver’s back panel.
You can use one of the wiring diagrams shown here, or one of the
alternate wiring diagrams that begin on page 84.
Two single LNBFS and one SW21
multi-dish switch.