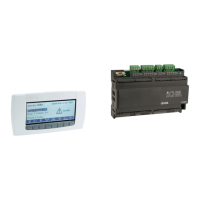
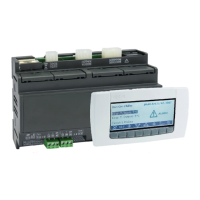
IC100C Series PRELIMINARY
1592015000 Manual IC100C Series 28/05/03 Page 6 di 38
1. Reach “Pr1” as described in 11.1.
2. Select the parameter “Pr2”, the “PAS” label appears
on the upper side.
3. Push SET: the lower display shows Pas while the
upper display 0 blinking.
4. Set the password using
o and n keys.
5. Push SET key to confirm the value.
11.3 How to Move a Parameter from “Pr2” Level
to “Pr1” Level.
Enter the “Pr2” level and select the parameter to move;
keeping pressed the SET key push and immediately
release the n key. One of the nearest led will light to
indicate the presence of the parameter in “Pr1”. Then
release also SET key.
To move the parameter in “Pr2” again: keep pressed SET
key and immediately release the n key. The led turns off so
as the parameter is not more visible in “Pr1” but just in
“Pr2”.
11.4 To Change a Parameter Value
1. Access to programming mode Pr1 or Pr2
2. Select the parameter to change.
3. Push SET key to enable its value.
4. Modify the value with
o and n keys.
5. Push SET key again to confirm the new value, after
some seconds next parameter will be displayed.
6. Exit the programming: push SET +
o, when a
parameter label is displayed, or wait 15s (time-out)
without pushing any keys.
NOTE: The new parameter value is also confirmed if, after
changing it, no SET key is pressed for the time-out to exit.
12. CHANGE THE PASSWORD
Before modifying the password you must know the previous
value. This operation is possible only under Pr2.
1) Enter Pr1 level.
2) Select the family containing the interested
parameters.
3) Push SET key.
4) Using arrows key select the parameter “Pr2”, then
push SET key. The lower display shows “PAS” while
the upper side is 0 blinking.
5) Use
n and o to set the active PASSWORD. push
SET key to reach the Pr2 level.
6) To modify the password: select the “Pr2” parameter.
7) Push SET key to enter the new value (blinking).
8) Insert the new password with
o and n keys.
9) Push SET key to confirm it.
10) The upper display will blink for few seconds then,
next parameter will be showed.
11) Exit the programming by pushing SET + o together
or wait the time-out.
13. VALUE OF DISPLAY READ–OUT PAR. CF36
The parameter data can change depending on CF03
parameter value.
13.1 Parameter CF36 = 0
Upper display shows as default Pb1 probe.
Lower display: if CF06 =1,2,4, it shows Pb3 probe, if
CF07=1,4 it shows Pb4 probe.
13.2 Parameter CF36 = 1
Upper display shows as default Pb2 probe.
Lower display: if CF06 =1,2,4, it shows Pb3 probe,
if CF07=1,4, it shows Pb4 probe.
13.3 Parameter CF36 = 2
Upper display shows as default Pb1 probe.
Lower display shows the clock time.
13.4 Parameter CF36 = 3
Upper display shows Pb2 probe.
Lower display shows the clock time.
If the default probe is Pb1 value, each time the o key is
pressed the upper display shows Pb2 value for 30 seconds
with OUT label. When the time is expired, it comes back to
default Pb1 read-out.
If the default probe is Pb2 value, each time the o key is
pressed the upper display shows Pb1 value for 30 seconds
with IN label. Then it comes back to default Pb1 read-out.
13.5 Display Read-Out when Remote ON/OFF
The digital input configured as remote OFF: if activated it
turns off the controller (also for motocondesing), upper
display shows “OFF ” the decimal point led is blinking.
1. This remote on/off command overrides the
instrument keyboard commands.
2. The keyboard commands are active only when the
digital input is not active.
3. When the remote off is not activated the controller
automatically restarts.
13.6 Upper Display Read-Out with Par. CF02=1
(Motocondensing Unit)
Upper display shows:
“ON” with digital input active
“OFF” with digital input not active.
If the chiller function is selected it turns to OnC.
If the Heat Pump is selected it turns to OnH.
Even for the Motocondensing function the user is allowed
to check the probe values using key arrows and to verify
and manage the alarm events.
 Loading...
