©
2021
DJI All Rights Reserved.
19
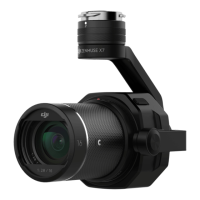
ZENMUSE P1
User Manual
1. Enter the mission ight screen in DJI Pilot, select Create Mission, and to choose a Mapping mission.
Tap and drag on the map to adjust the area that will be scanned and tap “+” to add a waypoint.
2. Edit parameters:
A. Select Zenmuse P1 (35mm) as the camera type according to the lens type. A 35mm lens is used
as an example.
B. Enable Smart Oblique.
C. Set the gimbal angle, display altitude/height, takeo point to target surface, takeo speed, and
the action upon completion.
D. In Advanced Settings, set the side overlap ratio, forward overlap ratio, and course angle.
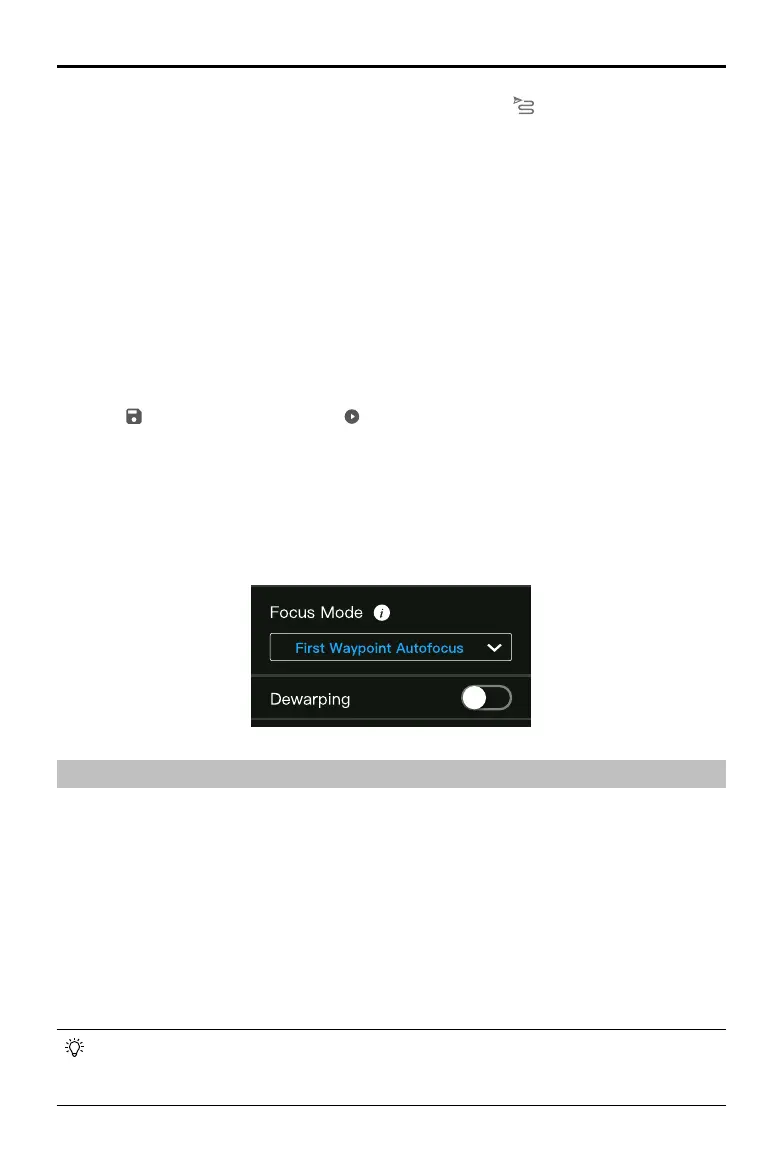
E. In Payload Settings, set the focus mode and dewarping.
During a Smart Oblique flight, the aircraft will fly as efficiently as possible by adjusting the flight
speed according to the number of photos taken in each ight route segment.
It is recommended to set the gimbal angle to -45°, set the mapping area focus mode to First
Waypoint Autofocus, disable dewarping, and select the photo format as JPEG.
3. Select
to save the mission and select to upload and execute the ight mission.
4. Power o the aircraft after the mission is complete and remove the SD card from the P1. Connect it
to a computer and check photos and les.
Mapping Area Focus Mode
In Payload Settings, set the mapping area focus mode to First Waypoint Autofocus or Calibrated Innity Focus.
It is recommended to set the mapping area focus mode to First Waypoint Autofocus.
Terrain Follow
To perform a precise Terrain Follow ight, enable Terrain Follow in Mapping mission and import the DSM
le including the altitude information.
Preparing Files
The DSM les of the measurement area can be obtained through the following two methods:
A. Collect the 2D data of the mapping area and perform a 2D reconstruction through DJI Terra by
selecting Fruit Tree mode. A .tif le will be generated and can be imported to the microSD card of
the remote controller.
B. Download the terrain mapping data from a geobrowser and import to the microSD card of the
remote controller.
Make sure that the DSM file is a geographic coordinate system file, and not a projected
coordinate system le. Otherwise, the imported le may not be recognized. It is recommended
that the resolution of the imported le should be no more than 10 meters.

 Loading...