8
©
2021
DJI All Rights Reserved.
ZENMUSE P1
User Manual
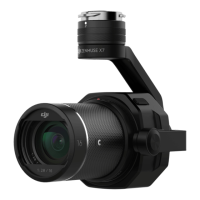
Installing on the Aircraft
1. Remove the gimbal cap.
2. Press the button on the aircraft to detach the gimbal and camera. Rotate the gimbal cap on the
aircraft to remove.
3. Align the white dot on the gimbal with the red dot on the aircraft and insert the gimbal.
4. Rotate the gimbal lock to the locked position by aligning the red dots.
2 3
4
11
1
3
1
3
1
4
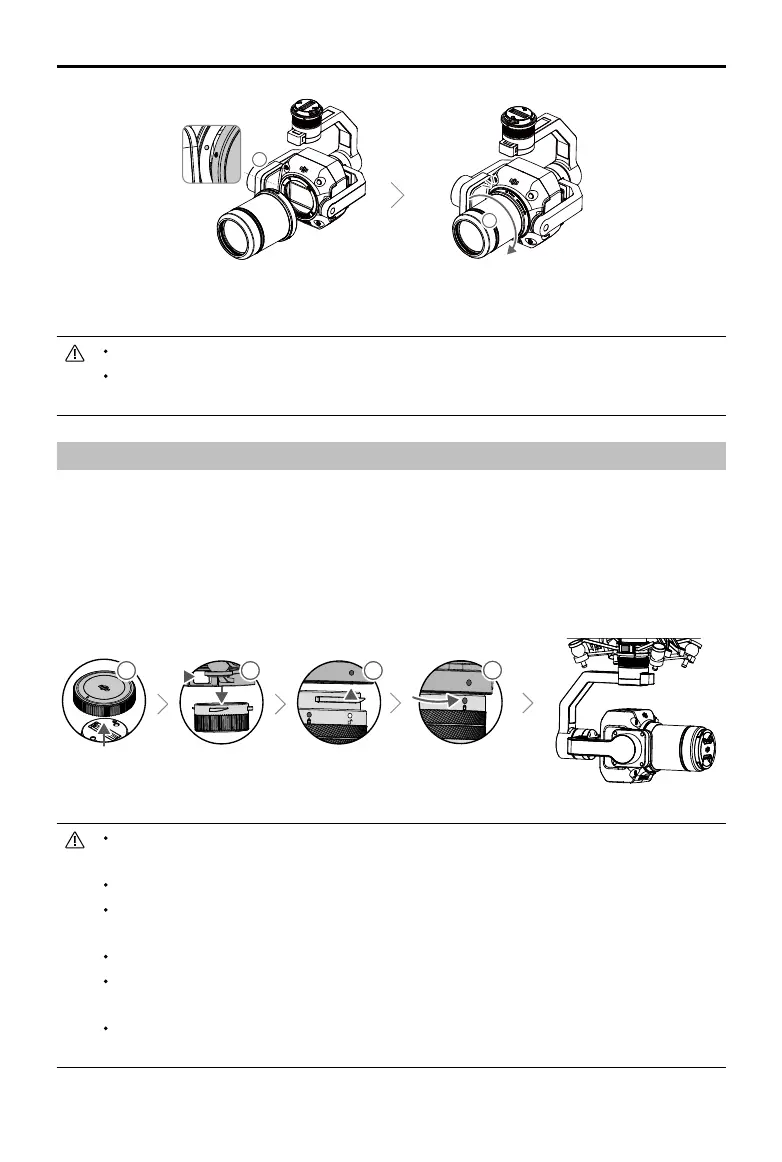
5. Rotate the camera lens counter-clockwise after mounting the lens to make sure the lens is rmly
attached.
DO NOT press the lens release button while attaching the lens.
Mount the camera lens with the lens mount facing downward to prevent dust from entering
the sensor. Otherwise, the performance may be negatively aected.
Make sure the gimbal connector on the aircraft is positioned correctly when mounting.
Otherwise, the camera cannot be mounted.
Remove the P1 by pressing the button on the aircraft to detach the gimbal and camera.
Put the P1 with the lens attached in the storage case. It is not recommended to repeatedly
disassemble and assemble the lens.
Only remove the P1 after powering o the aircraft.
Detach the gimbal from the aircraft during transportation or storage. Otherwise, the service
life of the damper balls may be shortened or they may even be damaged.
Before takeoff, make sure that the SD card cover is closed properly. Otherwise, it may
obstruct the gimbal arm from moving and cause the motor to overload.

 Loading...