26
MAINTENANCE
SAW GUIDE AND BACK-UP INSERTS
These instructions can be used to replace
the saw guide and back-up inserts on both left
and right saw guide arms.
The band drive motor must not be running when
replacing saw guide and back-up inserts.
1. Loosen the insert adjustment screw on each saw
guide arm. Then: (a) Remove the both saw band
guards, relax the band tension and remove the
saw band from the saw guide arms; (b) Remove
the adjustment screw -- be very careful not to
drop or lose the front insert when it falls from
the assembly; (c) Loosen the at head screw and
remove the rear insert.
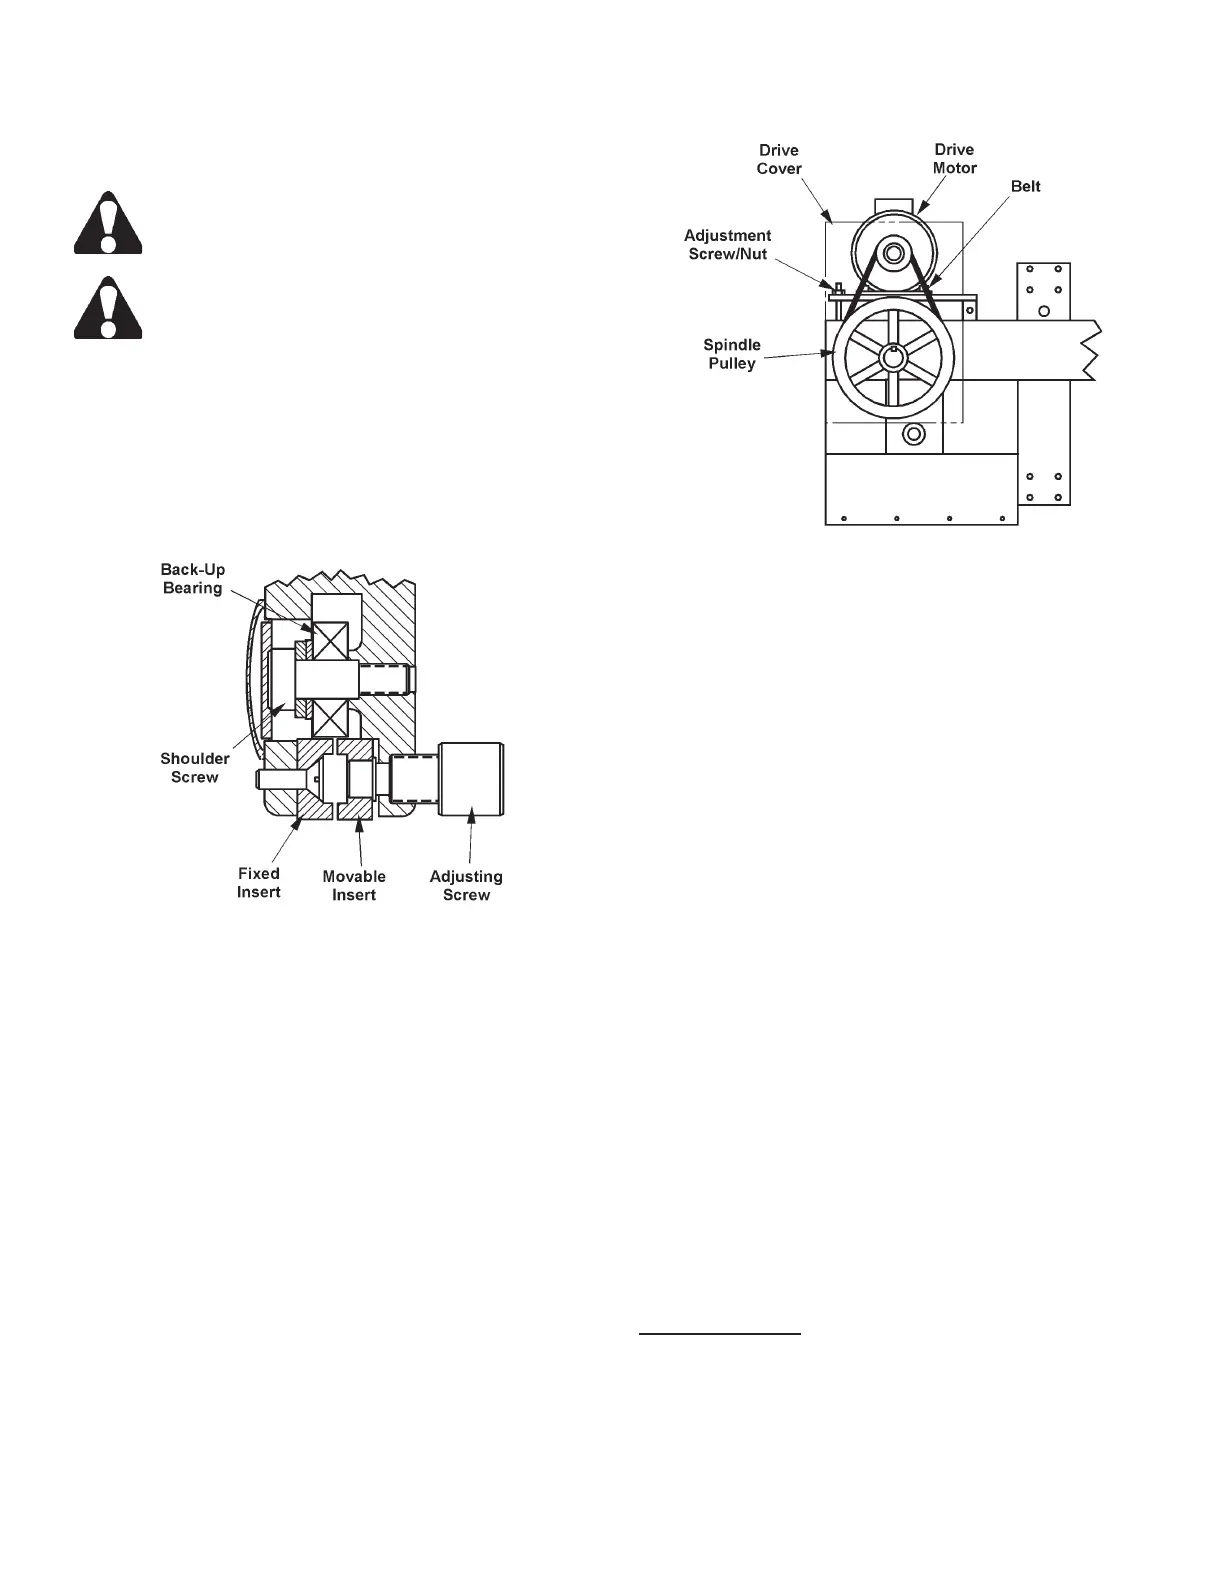
Typical Saw Guide Assembly (Both Arms).
2. Thoroughly clean the saw guide arm and inserts
area. Then reverse the carbide back-up insert or
replace it if both sides are worn.
3. Install the new inserts; xed insert rst. Then: (a)
Thread the adjusting screw inward part way; (b)
Place the saw band between the inserts; (c) Tighten
the adjustment screw; (d) Replace the saw band
guards.
BAND DRIVE BELT REPLACEMENT
1. Turn the machine and disconnect switch off. Then:
(a) Remove the band drive cover; (b) Loosen the
adjustment nut and then turn the screw counter-
clockwise to lower the motor mounting bracket
until the belt tension is released; (c) Remove the
old broken or worn drive belt.
Replacing the Drive Belt.
2. Position the new drive belt around the motor and
spindle pulley until it is seated; (a) Turn the adjust-
ment screw clockwise (this moves the motor mount-
ing bracket up) until there is very little deection on
the drive belt; (b) Tighten the adjustment screw nut;
(c) Turn the disconnect switch and machine on; (d)
Turn the hydraulic and band drive motors on; (e)
Check the operation of the new drive belt; (f) If the
operation is satisfactory, turn the band drive motor
off and replace the band drive cover.
HYDRAULIC SYSTEM
1. Keep the reservoir lled at all times. Capacity is 10
gallons (37.8 liters). Check the reservoir oil level
daily by referring to the sight gauge.
2. Drain, clean, rell the reservoir and change the oil
lter after the rst month of operation; every six
(6) months thereafter. Clean the suction strainer
and ller opening screen when necessary. Auto-
matic transmission uid (ATF) is the recommended
uid.
3. Before changing the hydraulic uid: (a) Lower the
saw head completely; (b) Stop the hydraulics; (c)
It may be necessary to slide out the power unit to
access the drain plug;(d) Remove the reservoir drain
plug; (e) Allow the reservoir to drain completely.
System Pressure
1. Hydraulic system pressure is correctly set at the
factory and should not require adjustment for a
considerable period of time. Correct system pres-
sure is 400 psi (28.1 kg/cm²).