Do you have a question about the DOF EDGE and is the answer not in the manual?
Key considerations for scanner setup and environment.
Warnings regarding direct light exposure and safe handling.
Lists the scanner, plates, cables, and accessories in the package.
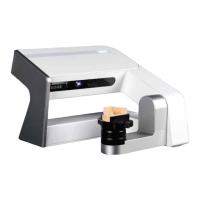
Identifies cameras, projector, and connectors on the scanner.
Standard plates for various scanning needs.
Additional plates for specific applications.
Steps to physically connect the scanner to power and PC.
Hardware and OS specifications for the scanner.
Step-by-step guide for installing the ScanApp software.
Connecting ScanApp with exocad for workflow.
Explains common software interface icons.
Steps to locate and add the exocad DentalDB executable.
How to select the software display language.
Detailed steps for performing scanner calibration.
Explains functions of mouse buttons for navigation.
Icons for initial setup, calibration, and save functions.
Icons representing different scanning modes like Articulator and Multi-Die.
Icons for Upper/Lower Base, Gingiva, Scan Abutment, Face Bow, Impressions.
Icons for Quadrant Arch, Bite Registration.
Adjusting brightness, auto exposure for the camera.
Icons for Rescan, Home, Preview, Scan Additional, Edit.
Icons for Previous Model, Auto Align, Match, Next Model.
Icons for Build, Trim, V.A Alignment, Hole Filling, Save, CADapp.
Icons for Front, Rear, Left, Right, Top, Bottom, Wireframe, Texture views.
Define customer, job, and technician details.
Select dental indications from the tooth diagram.
Choose the type of model for scanning.
Running the scanning application.
Choosing scan model types (e.g., Solid, Pinned, Impression).
Correctly placing the model on the platform.
Adjusting brightness and exposure for clear scanning.
Obtaining the overall shape of the adjacent model.
Methods to add more data or fill missing areas.
Deleting unnecessary data after scanning.
Scanning prepped dies with optimal brightness.
Capturing the overall shape of the antagonist model.
Capturing the occlusion relationship between jaws.
Aligning pre-scan and detail scan data.
Aligning upper/lower jaws to occlusion data.
Automatic alignment based on data shape.
Step-by-step guide for manual alignment using 3-point technique.
Selecting and trimming parts of the scanned data.
Modifying file size and resolution for final data.
Filling holes, saving data, and proceeding to CAD.
Headquarters and branch office details.
| Category | Dental equipment |
|---|---|
| Manufacturer | DOF |
| Light Source | LED |
| Texture Scanning | Yes |
| Color Scanning | Yes |