CONTACT US AT www.DRpower.com 19
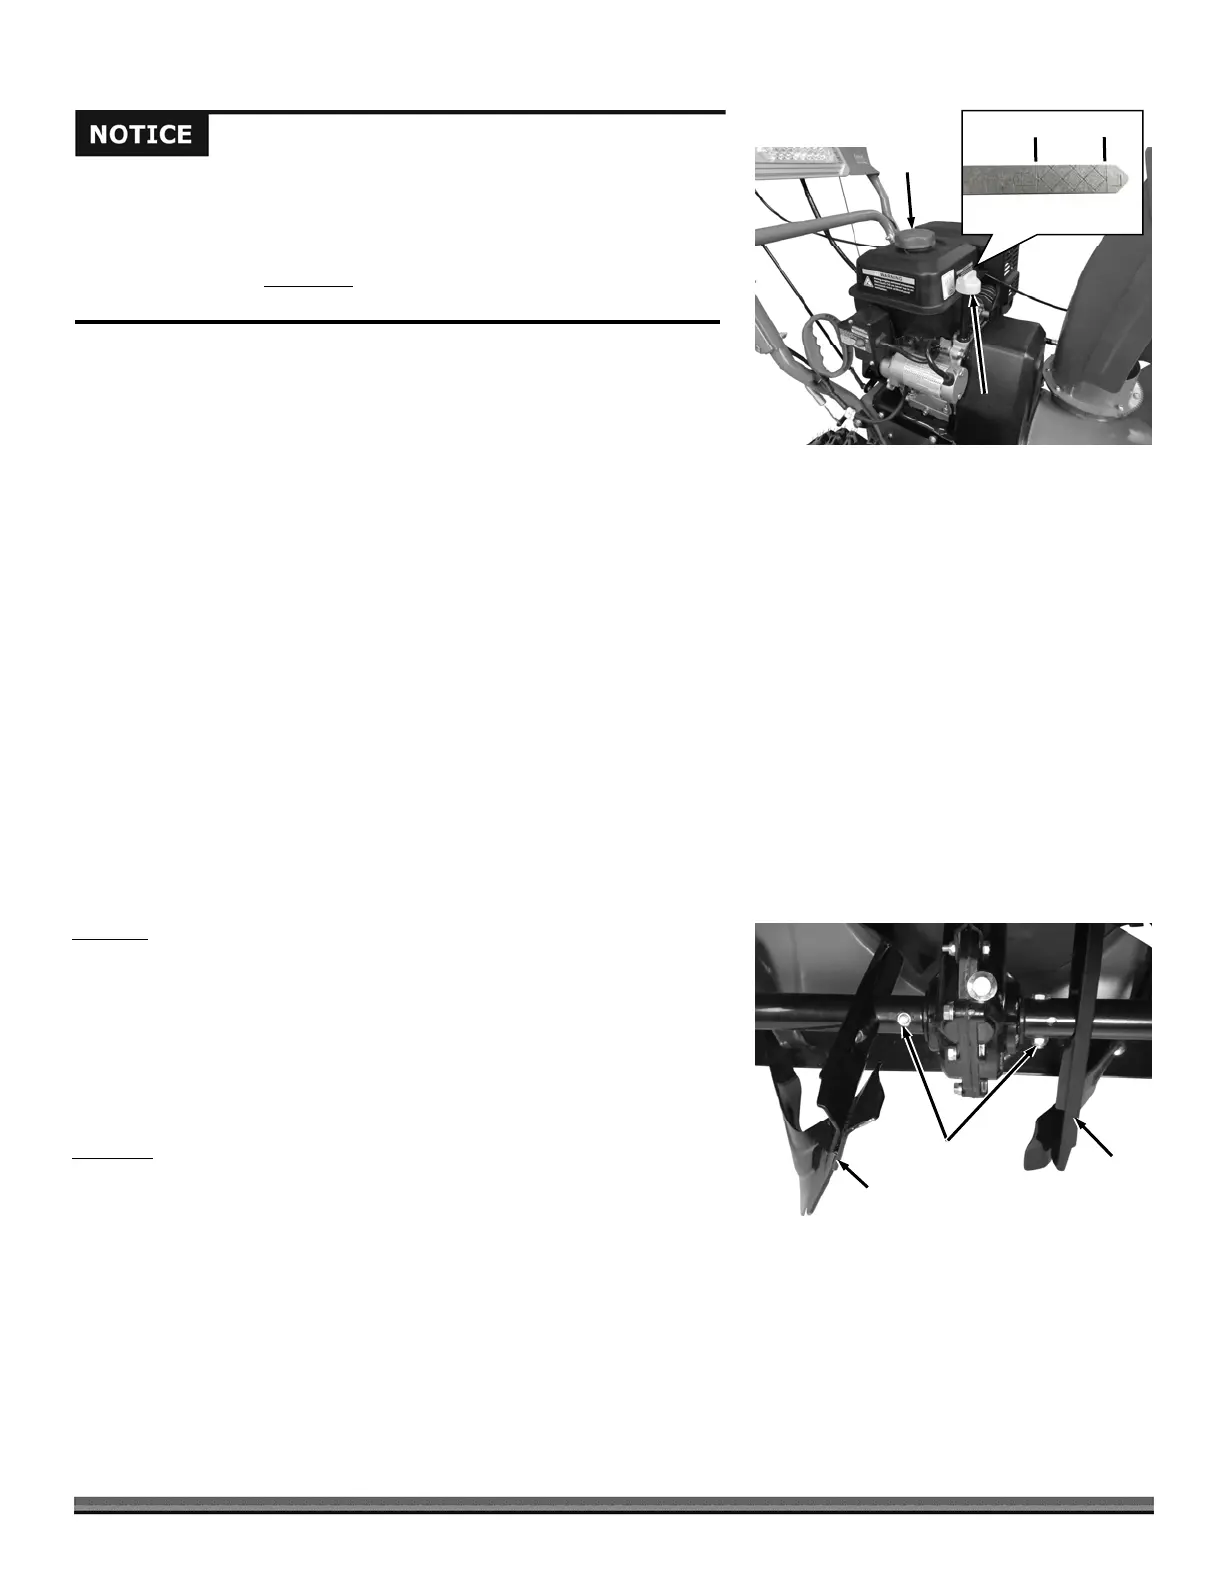
4. Remove the Oil Fill/Dipstick and initially add 3/4 of oil (type of oil
recommended by the Engine Manufacturer) into the Oil Fill and wait one
minute for the oil to settle (Figure 40).
5. Insert the Dipstick without screwing all the way in and then remove to
check the level.
6. Continue adding a few ounces of oil at a time, rechecking the Dipstick until
the oil reaches the fill mark. Be careful not to overfill.
Checking and Replacing the Auger Shear Pins
Check the condition of the Shear Pins by removing them from the Auger Shafts.
If the Shear Pins are worn excessively or if they are broken or missing from the
Auger Shaft. They must be replaced.
Tools and Supplies needed:
Two 13mm Wrenches (PRO-28, PRO-XL 30, and PRO-MAX 34)
Safety Glasses
Small punch
Hammer
Shear Pin (PRO-24)
Cotter Pin (PRO-24)
Shear Bolt (PRO-28, PRO-XL 30, and PRO-MAX 34)
Jam Nut (PRO-28, PRO-XL 30, and PRO-MAX 34)
Checking
1. Remove the Shear Bolt and Locknut using two 13mm Wrenches (Figure
41).
2. If the Shear Pins are not worn excessively or damaged, they can be
reinstalled.
3. If the Shear Pins are worn excessively or damaged, replace as described in
the following steps.
Replacing
1. If you cannot see the Shear Bolt hole, you will need to turn the Auger until
the holes in the Auger and Auger Shaft line up.
2. If the Shear Bolt ends are sheared off, you will need to use the Punch to
push the remainder of the Bolt out.
3. Once the holes are aligned and the holes are clear, the new Shear Bolts and
Cotter Pins can be installed.
Figure 40
Oil
Fill/Dipstick
Gas Fill
d
Full
Fill the Oil reservoir slowly, checking the level frequently to avoid
overfilling.
To get an accurate reading when checking the oil level:
- The Engine must be level.
- The dipstick should not be screwed down to ensure an accurate oil
level reading.
Shear Bolts
and Locknuts
Figure 41
uge
uge