CONTACT US AT www.DRpower.com 25
Replacing the Friction Drive Wheel
Tools Needed:
Flat Head Screwdriver
10mm Wrench
Two 13mm Wrenches
Dead Blow Hammer
Disassembly
1. Drain the Gas and Oil from the machine before starting these instructions.
2. Shift to 6th gear (Figure 67).
3. With the help of another person, tip the Snow Blower onto the Auger
Housing (Figure 68).
4. Insert a Flat Head Screwdriver into the slot of the Wheel Retaining Clips,
rotate the Screwdriver away from the Axle Shaft to lift the inside of the Clip
above the end of the Axle (Step 1), and push the Clips off the Axle Shafts
(Step 2) (Figure 69).
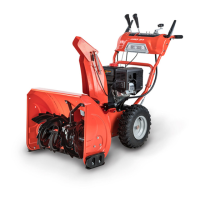
5. Remove both Wheels and Shaft Keys from the Axle Shafts (Figure 70).
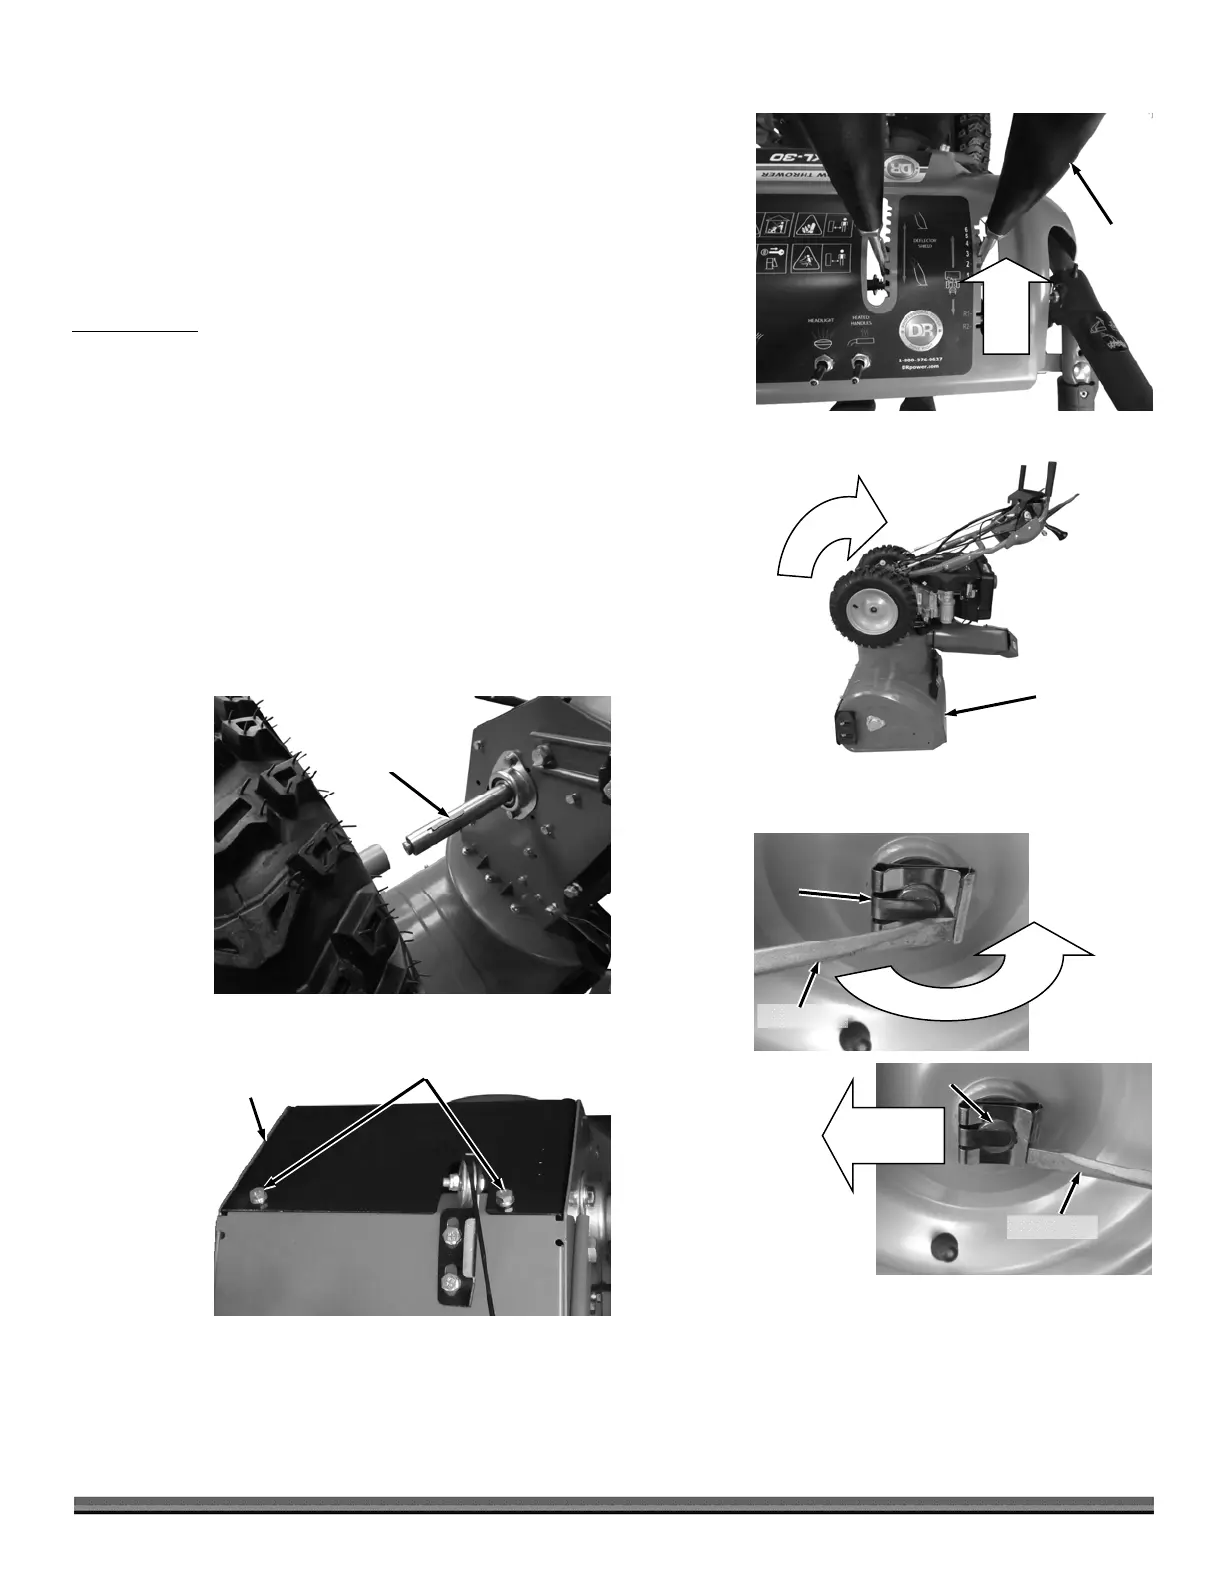
6. Use a 10mm Wrench to remove the two Bolts securing the Transmission
Cover and remove the Transmission Cover (Figure 71).
Shaft
Key
Figure 70
Wheel
ssembly
uger
Housing
Figure 68
Gear
Shift
Lever
Figure 67
Transmission
Cove
Figure 71
Bolts
Wheel
Retaining
Clip
xle
Figure 69
Step 1
Step 2
Screwdriver
Screwdriver