22 DR
®
SNOW BLOWER
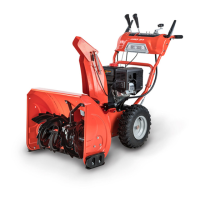
6. Loosen (do not remove) the three Locknuts on the left side of the
Transmission Box using a 13mm Wrench (Figure 52).
7. Hold the Handles and pull them to the left to create some separation
between the Auger Housing and Frame on the right side.
8. Roll the front Auger Belt off the front of the Engine Drive Pulley and the rear
Auger Belt off the back of the Engine Drive Pulley (Figure 53).
Note: It may help to put a 13mm Wrench on the Engine Shaft Bolt and turn
clockwise to aid in rolling the Belts off the Pulley.
9. Remove the Belts from the Auger Pulley underneath and remove the Belts
from the machine.
10. Install the new Belts onto the Pulleys.
11. Hold the Handlebars and pull to the right to close the gap between the
Auger Housing and Frame.
12. Install the Locknuts that secure the right side of the Frame to the Auger
Housing (Figure 51).
13. Tighten the Locknuts to secure the left side of the Frame to the Auger
Housing (Figure 52).
14. Install the Brake Spring to the Frame (Figure 50).
15. Install the Transmission Cover (Figure 49).
16. Install the Belt Guide and Belt Cover (Figures 48 and 47).
Replacing the Traction Drive Belt (PRO 24 Model)
Tools and Supplies needed:
10mm Wrench
13mm Wrench
Pliers
New DR Belt
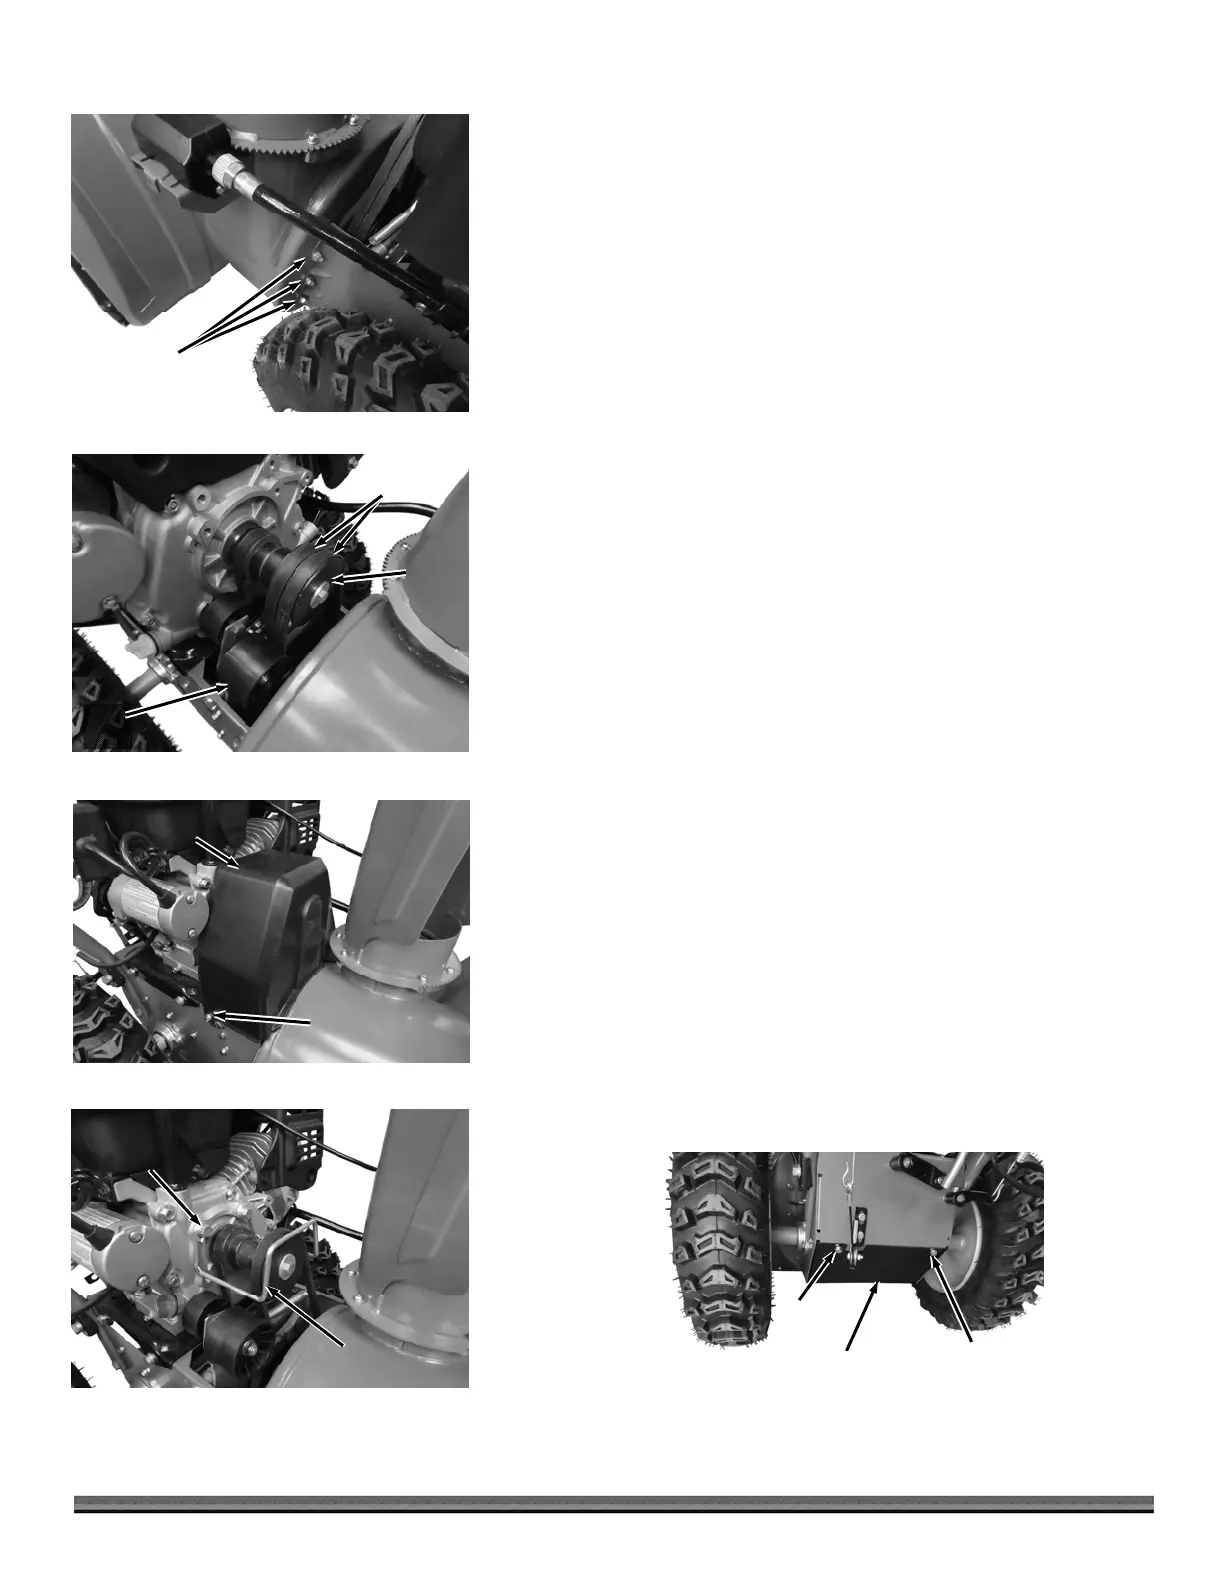
1. Remove the two Bolts and rectangular Washers from the Belt Cover using a
10mm Wrench and remove the Belt Cover (Figure 54).
2. Remove the two Bolts, Lock Washers and Flat Washers that secure the Belt
Guide to the Engine using a 13mm Wrench and remove the Belt Guide
(Figure 55).
3. Remove the two Bolts that secure the Transmission Cover using a 13mm
Wrench and Remove the Transmission Cover (Figure 56).
Belt
Guide
Figure 55
Bolt, Lock
Washer, and
Flat Washe
Belt
Cover
Figure 54
Bolt and
Rectangular
Washer
Loosen
Locknuts
Figure 52
uger
Housing
Frame
Transmission
Cove
Figure 56
Bolt
Bolt
Drive
Pulley
Figure 53
uger
Belts
Idler
Pulley