CONTACT US AT www.DRpower.com 21
Only remove the three Locknuts on the right side of the Transmission Box as
described in the next step. If you remove the Locknuts from both sides, the
machine can become unstable and cause possible injury.
Replacing the Auger Belts (PRO 28, 30 and 34 Models)
The Pro 28, 30 and 34 Models use two Belts to drive the Auger.
Tools and Supplies needed:
10mm Wrench
13mm Wrench
Two new DR Belts (Part number 40237, PRO-28) (Part number 40265, PRO-
XL-30 and PRO-MAX 34)
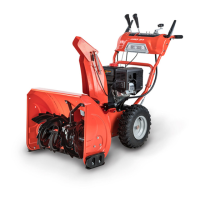
1. Remove the two Bolts and rectangular Washers from the Belt Cover using a
10mm Wrench (Figure 47). Remove the Belt Cover.
2. Remove the two Bolts, Lock Washers and Flat Washers that secure the Belt
Guide to the Engine using a 13mm Wrench and remove the Belt Guide
(Figure 48).
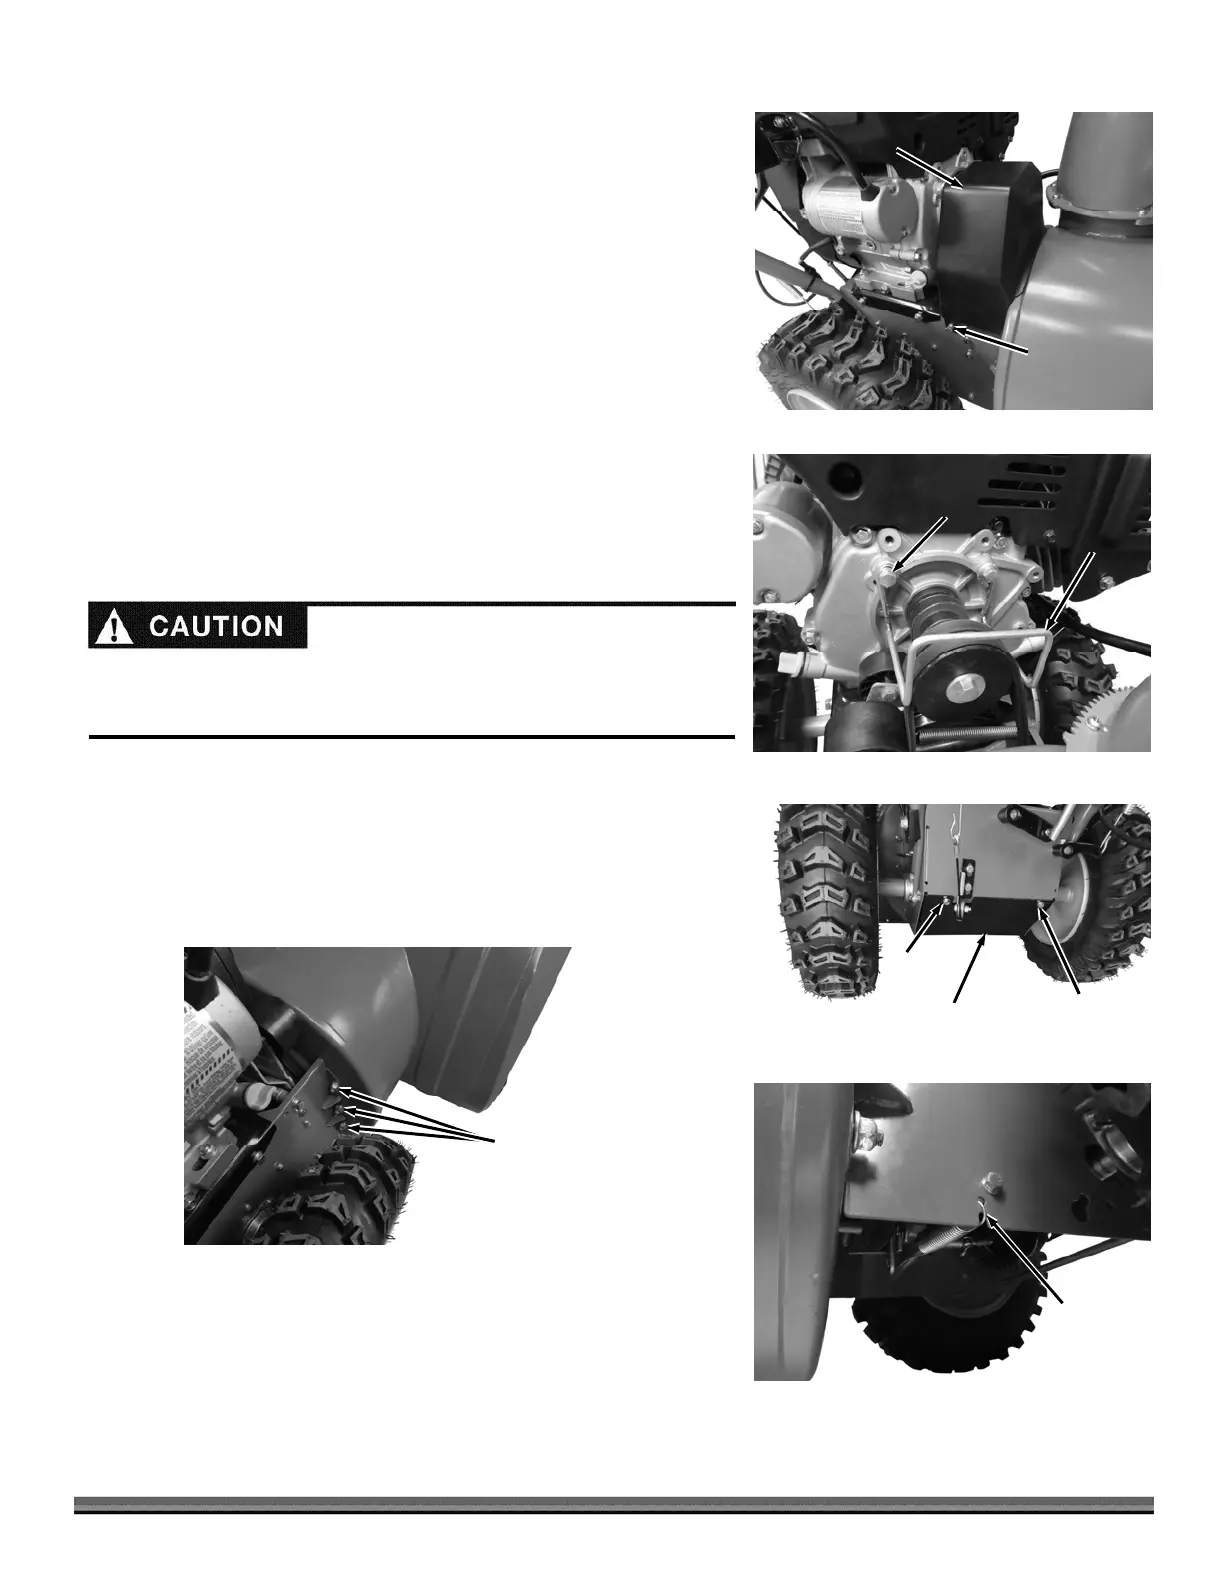
3. Remove the two Bolts that secure the Transmission Cover using a 10mm
Wrench and remove the Transmission Cover (Figure 49).
4. Remove the Brake Spring from Frame so the Brake Pad will come away
from the Auger pulley, making room for Belt removal (Figure 50).
5. Remove the three Locknuts from the right side of the Transmission Box
using a 13mm Wrench (Figure 51).
Belt
Guide
Figure 48
Bolt, Lock
Washer, and
Flat Washe
Belt
Cover
Figure 47
Bolt and
Rectangular
Washer
Transmission
Cove
Figure 49
Bolt
Bolt
Brake
Spring
Figure 50
Locknuts
Figure 51
uger
Housing
Frame