20 DR
®
ROTO-HOG™ POWER TILLER - OPTIONAL ACCESSORIES
5.
t the vehicle in motion and then toggle the ROTO-
ontrol Box switch to "ON" and m e Flow
lock with the Adjustable Stop.
NOTE: Move
or stopping.
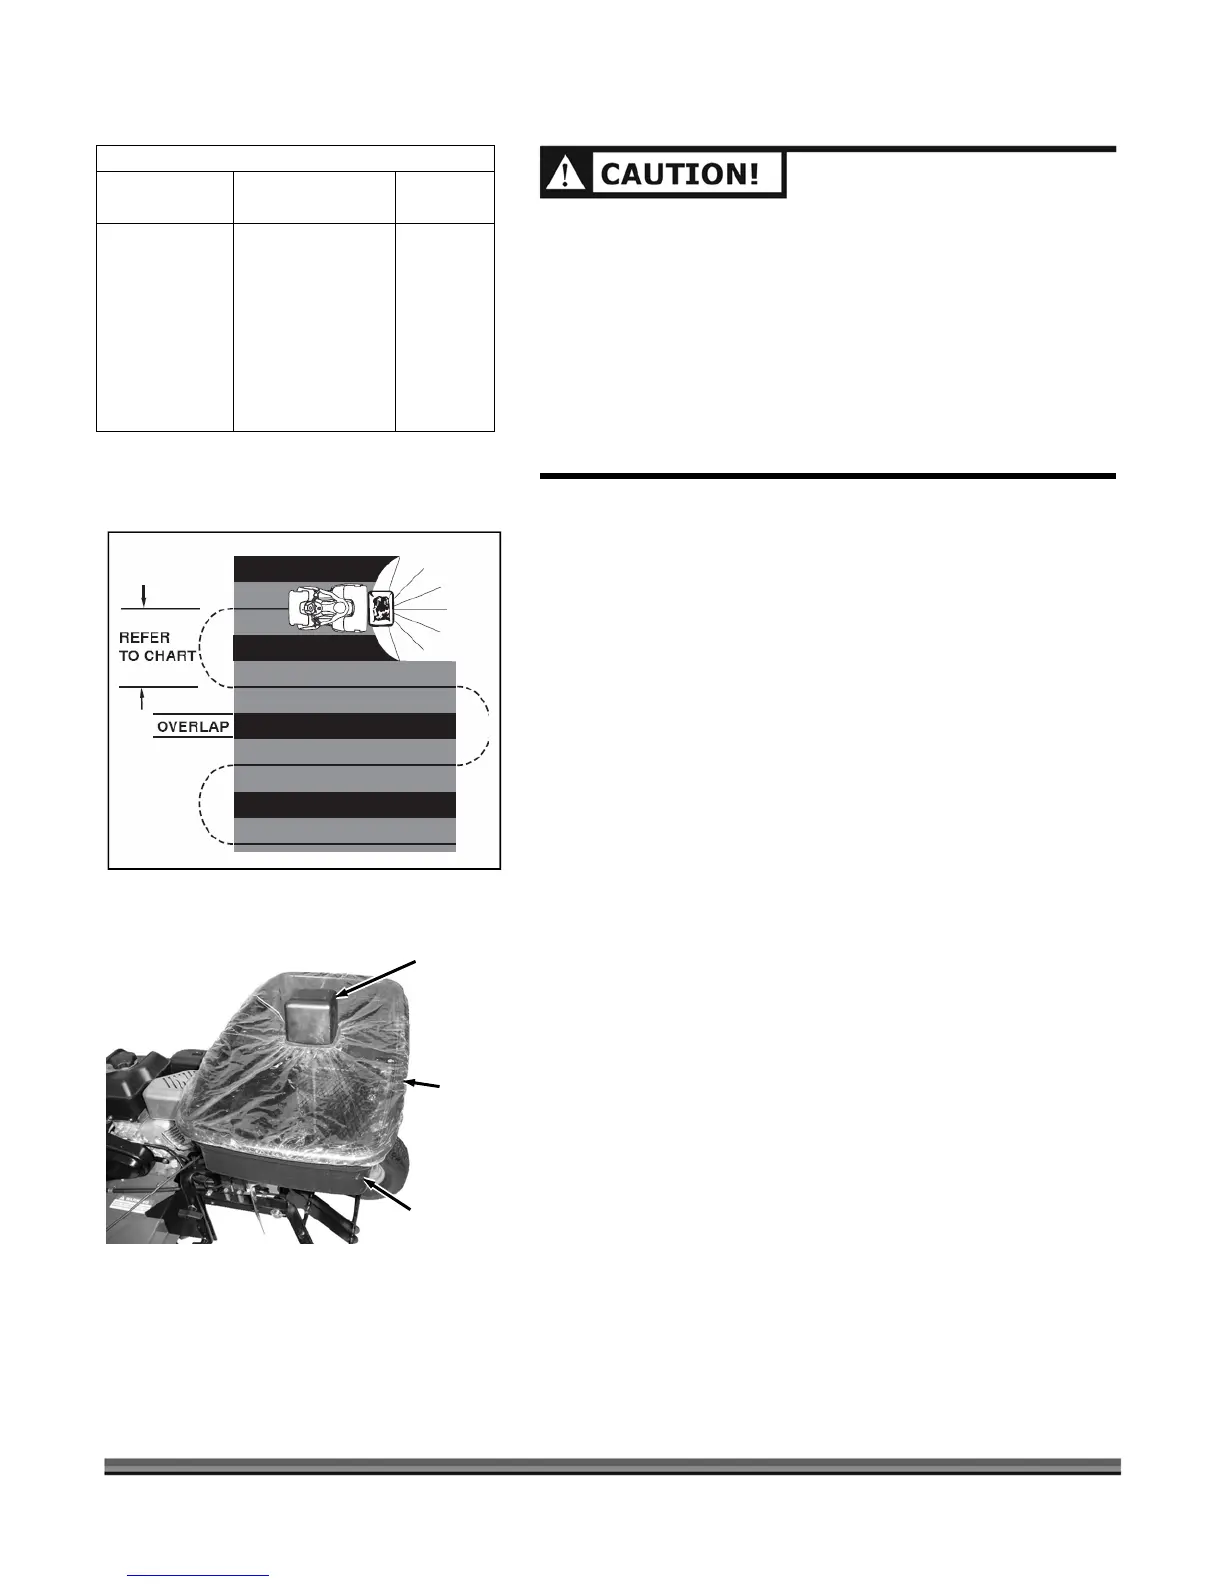
re uniform coverage, make each pass so that
oadcast pattern slightly overlaps the pattern
m the pr ass (Figure 31). The approximate
broadcast widths for different materials are shown in
used
2).
n
e or
of the lawn.
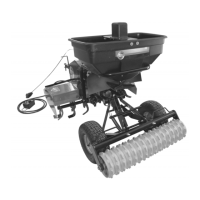
Removing the DR Power Spreader
Motor Mount Assembly Connector. Remove the Flow
Control Valve Assembly from the rear of the vehicle if it
reader and remove the Wing knobs,
racket
ATION CHART APPLIC
TYPE
MATERIAL
FLOW SETTING
3 MPH
SPREAD
WIDTH
FERTILIZER
Powder
3-5
WHEN SPREADING WEED CONTROL F IZERS, MAKE
SURE THE BROADCAST PATTERN DOES NOT HIT
EVERGREEN TREES, FLOW UBS VEGETAB E
ENS.
FOLLOW THE INSTRUCTIONS, WARNINGS, ETC. FROM THE
MANUFACTURER OF THE MATERIAL YOU ARE SPREADING
TO ENSURE SAFE OPERATION.
T BS. WEIGHT LIMIT OF MATERIAL
IN THE HOPPER.
ERTIL
OR
Granular
Coarse
3-5
3'-4'
8'-10'
'-7'
Break up any lumps as you fill the Hopper with the
material to be spread.
6. Star
HOG C
Control Le
ove th
ver up to
the Flow Control Lever to off (“OFF”) before turning
7. To insu
the br
fro evious p
the application chart on this page.
8. Heavy moisture conditions may require a cover over
the hopper to keep contents dry. The Vinyl Cover acts
as a wind and moisture shield, but should not be
as a rain cover (Figure 3
9. If fertilizer is accidentally deposited too heavily in a
area, soak the area thoroughly with a garden hos
sprinkler to prevent burning
1. Disconnect the Wire Harness Connector from the
is attached there.
2. Support the Sp
Washers and Carriage Bolts from the Spreader B
Tubes.
3. Remove the Spreader from the tiller.
Pelleted
Organic
3-5
6-8
10'-12'
6'-8'
GRASS SEED
Fine
3-4
6
4-5
8'-9'
Figure
ERS, SHR L
GARD
DO NOT EXCEED HE 125L
Table 3
Fi
ure 31
Motor
Mount
ssembl
Vinyl
Cover
Hopper/Frame
Assembly
32