Configuration and calibration
Issue 5 - June 2005 Page 37 of 64 Pages
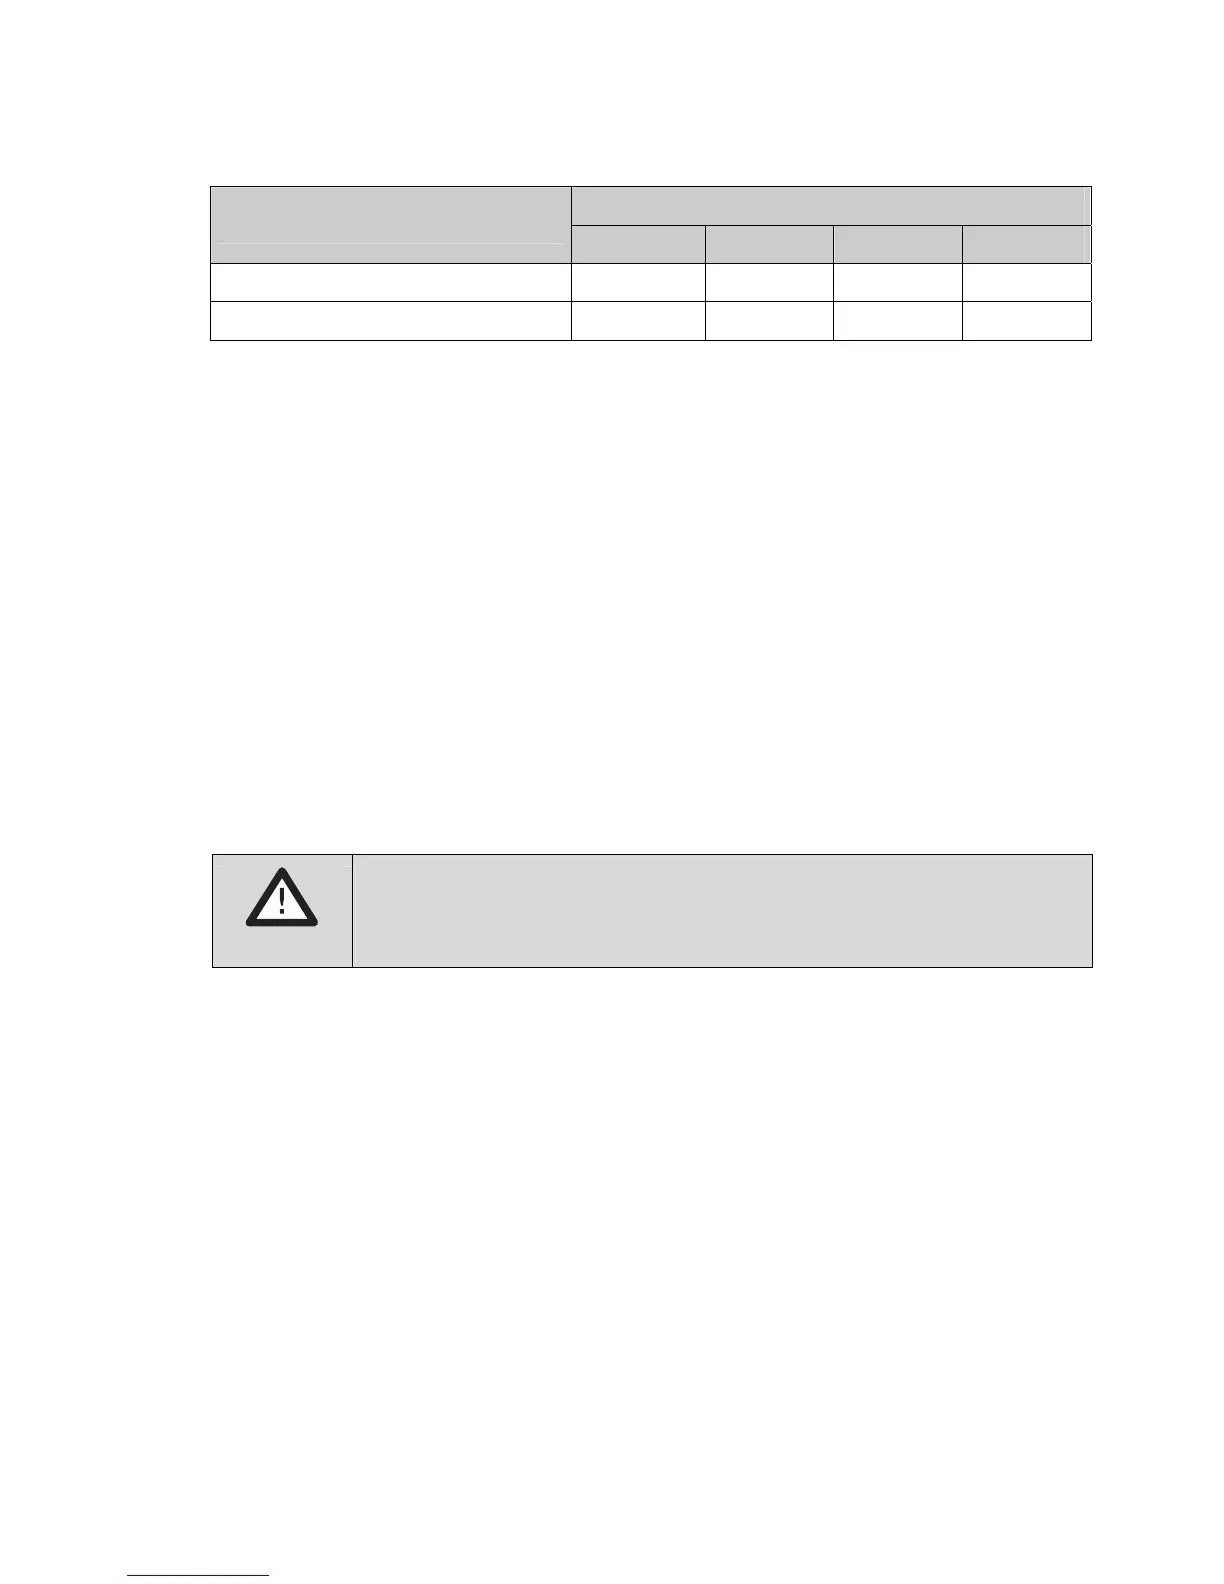
SW1
Drive current range
A B C D
95 – 195 mA ON – – –
190 – 350 mA OFF – – –
The position of switches B, C and D does not matter yet.
2. Adjust the sensor current to the required value.
• Turn off the device by disconnecting the device's AC or DC supply or remove
batteries, if fitted.
• Connect an ammeter between terminal 9 and the sensor
• Reconnect the AC or DC supply
• Adjust VR2 on the pellistor board to set the current (270.0 mA for Dräger Ex
sensors). Allow two minutes for the current to settle after adjusting VR2.
Readjust VR2 if necessary
• Disconnect power, remove the ammeter and reconnect the sensor
• Turn on power and allow sensor to settle or at least five minutes before
continuing with zero and calibration
CAUTION!
Do not connect the sensor/measuring head when the controller is
powered: this will damage the sensor.