Assembling the remaining thread monitor
Additional Instructions 867/867-M PREMIUM - 00.0 - 07/2018 9
9. Roll up the remaining thread monitor cables that are too long and fix
them to the base plate of the remaining thread monitor control with
cable ties.
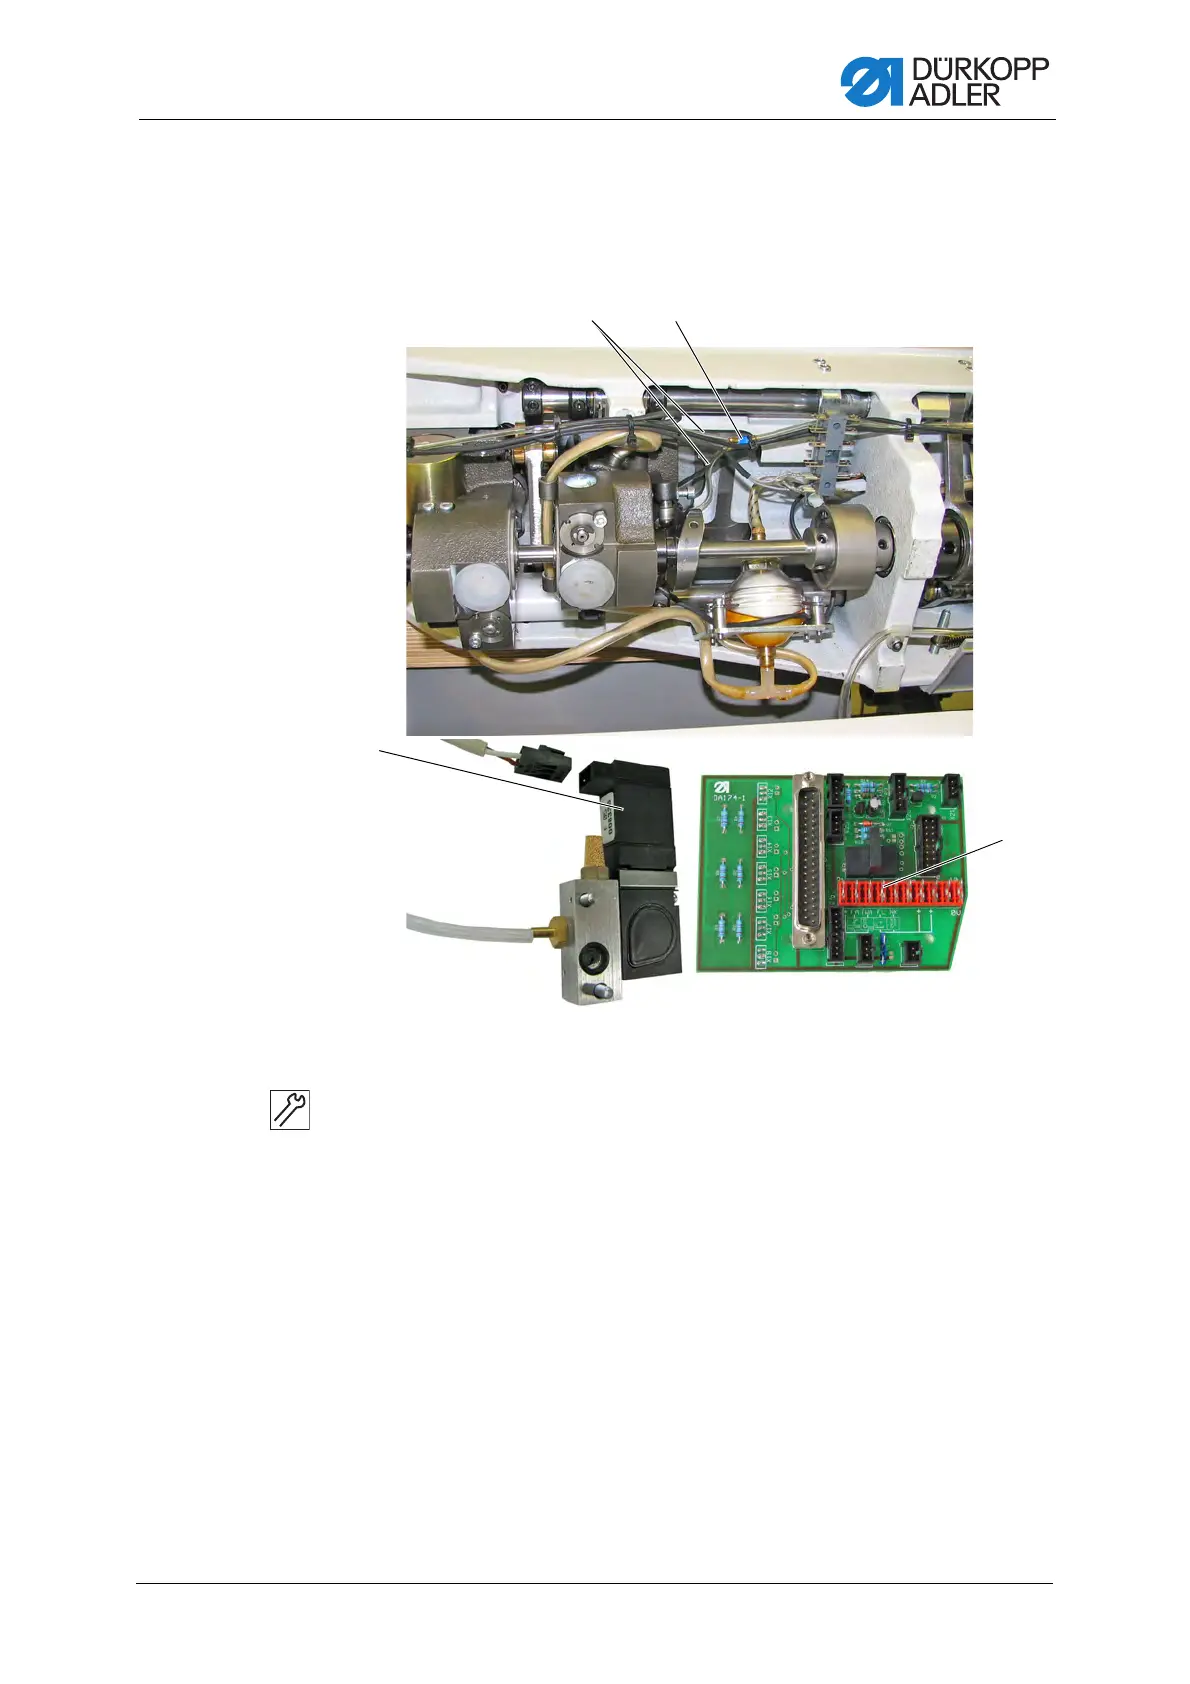
Fig. 5: Connecting the remaining thread monitor on Classic machines (4)
10. Assemble the valve (10).
Ensure that the sealing washer is in the correct position when doing this.
11. Disassemble the valve unit.
12. Screw the valve (10) to the valve rail.
13. Assemble the valve unit.
14. Connect the hoses (9) of the remaining thread monitor to the valve.
With right AND left remaining thread monitor: Connect hoses (9)
to Y-connection (8).
15. Assemble hoses and cables with clips to the oil return line and to the
knee lever shaft.
16. Connect the magnet valve electrically to the valve circuit board.
• X22, PIN 1/7/8 (+) and PIN4 (FL)
OR
• X22, PIN 1/7/8 (+) and PIN2 (FA)
(8) - Y-connection
(9) - Hoses
(10) - Valve

 Loading...


